7
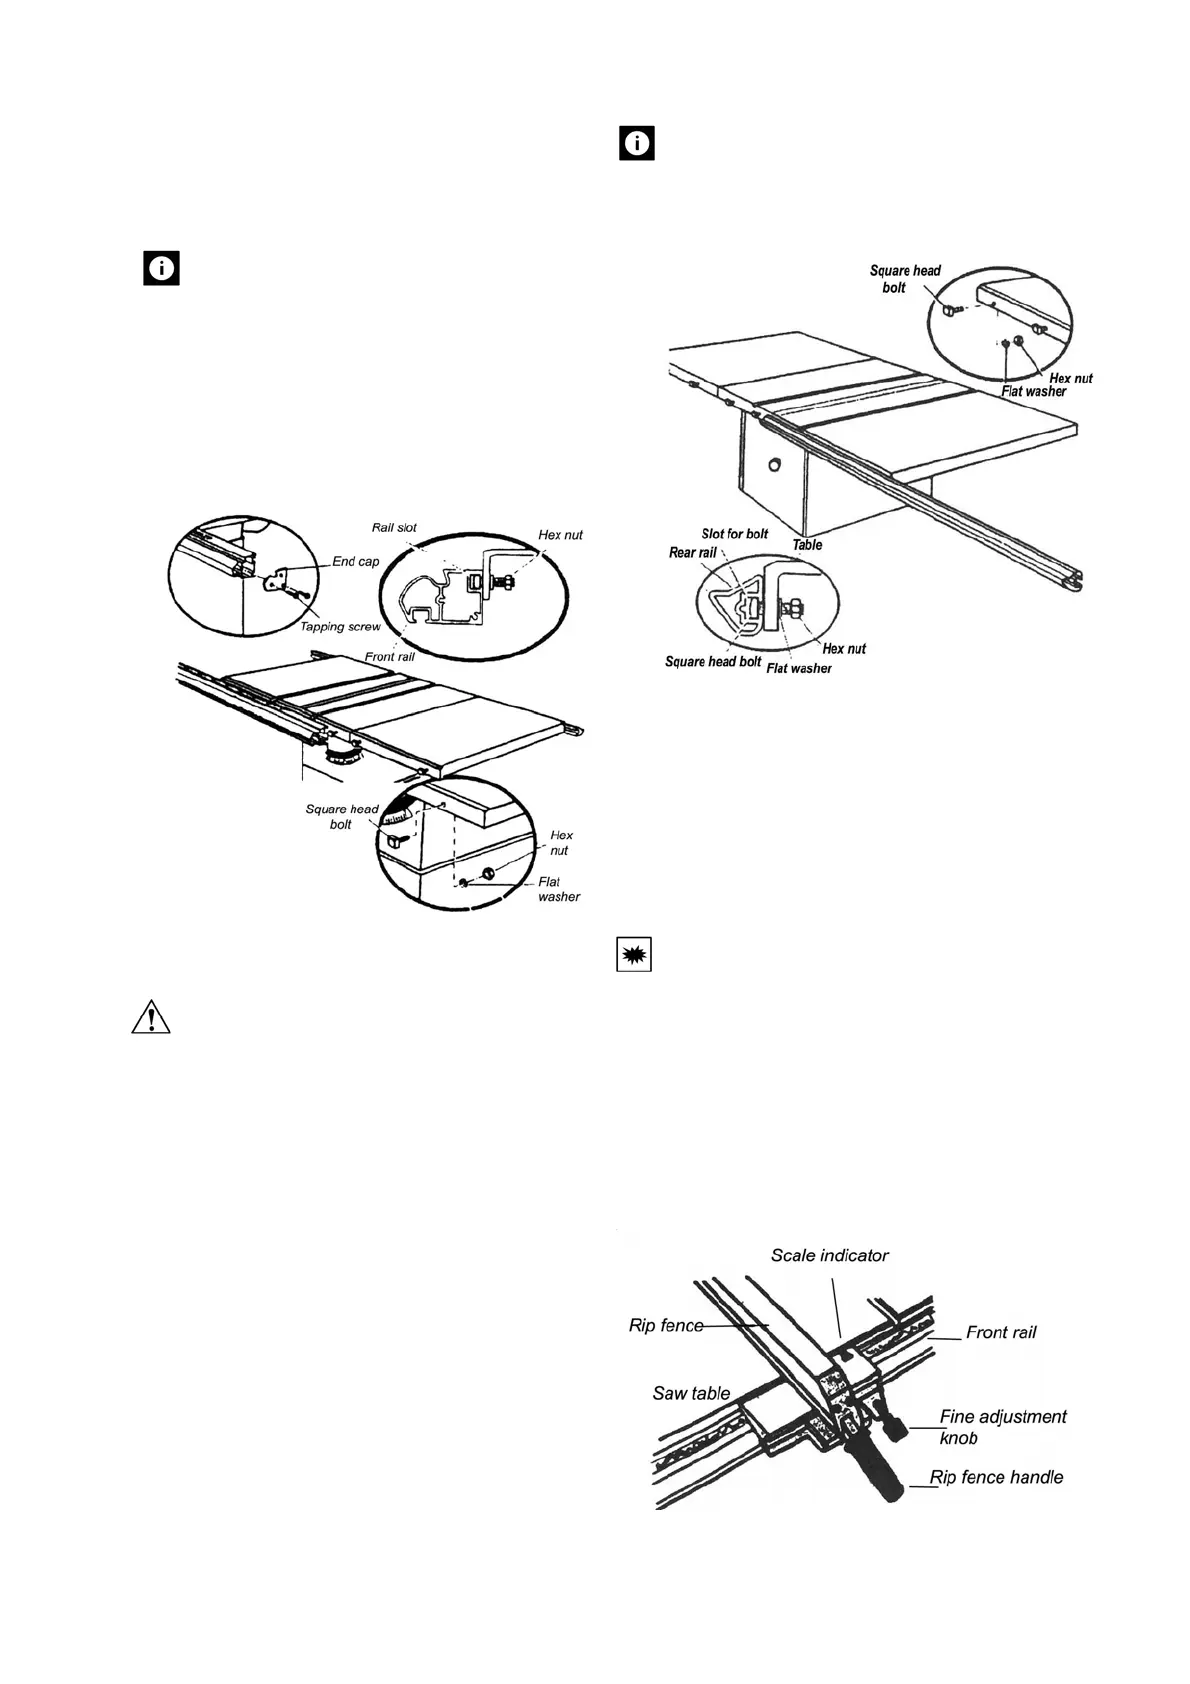
3. Slide the slot on the front rail over bolts. Adjust
each bolt to fit the rail closely to the table.
4. Push the front rail against table and hand tighten
each hex nut.
Note:
Make sure there are no gaps between the rail
and edge of table or extensions.
5. Put the left end caps on the rail ends. Insert the
tapping screw and tighten with Phillips screwdriver.
8.4 Installing the rear rail
Take out the rear rail from rip fence carton.
Warning;
The front and rear rails must be carefully
aligned to reduce the risk of kickback, which
can cause serious injury.
Install the rear rail needs following hardware:
5 square head bolt
5 8mm flat washer
5 M8 hex nuts
1. At the back of the table put the square head bolts
in the holes in the edge of the table and extension
so the bolt heads extend outward 6mm.
2. Loosely attach the flat washer and hex nut onto
bolts, slide the slot on the rear nail over bolts
adjust each bolt to fit the rail closely to the table.
3. Push the rear rail against table and tighten all
screws.
Note:
Make sure there are no gaps between the rail and
edge of table or extensions.
8.5 Installing the rip fence
1. Unpacking the rip fence part from fence carton.
2. Place the rip fence assembly on the scale mount.
3. If need, attach the “L” shape extension to the rip
fence.
4. Slide the rip fence onto the rear and front rails.
Caution
This fence has a set micro adjusting device,
which be positioned on the right side of the
scale indicator housing when you sure the
exact position by adjusting the rip fence and
micro device, you should push down the rip
fence handle to lock the rip fence.