6
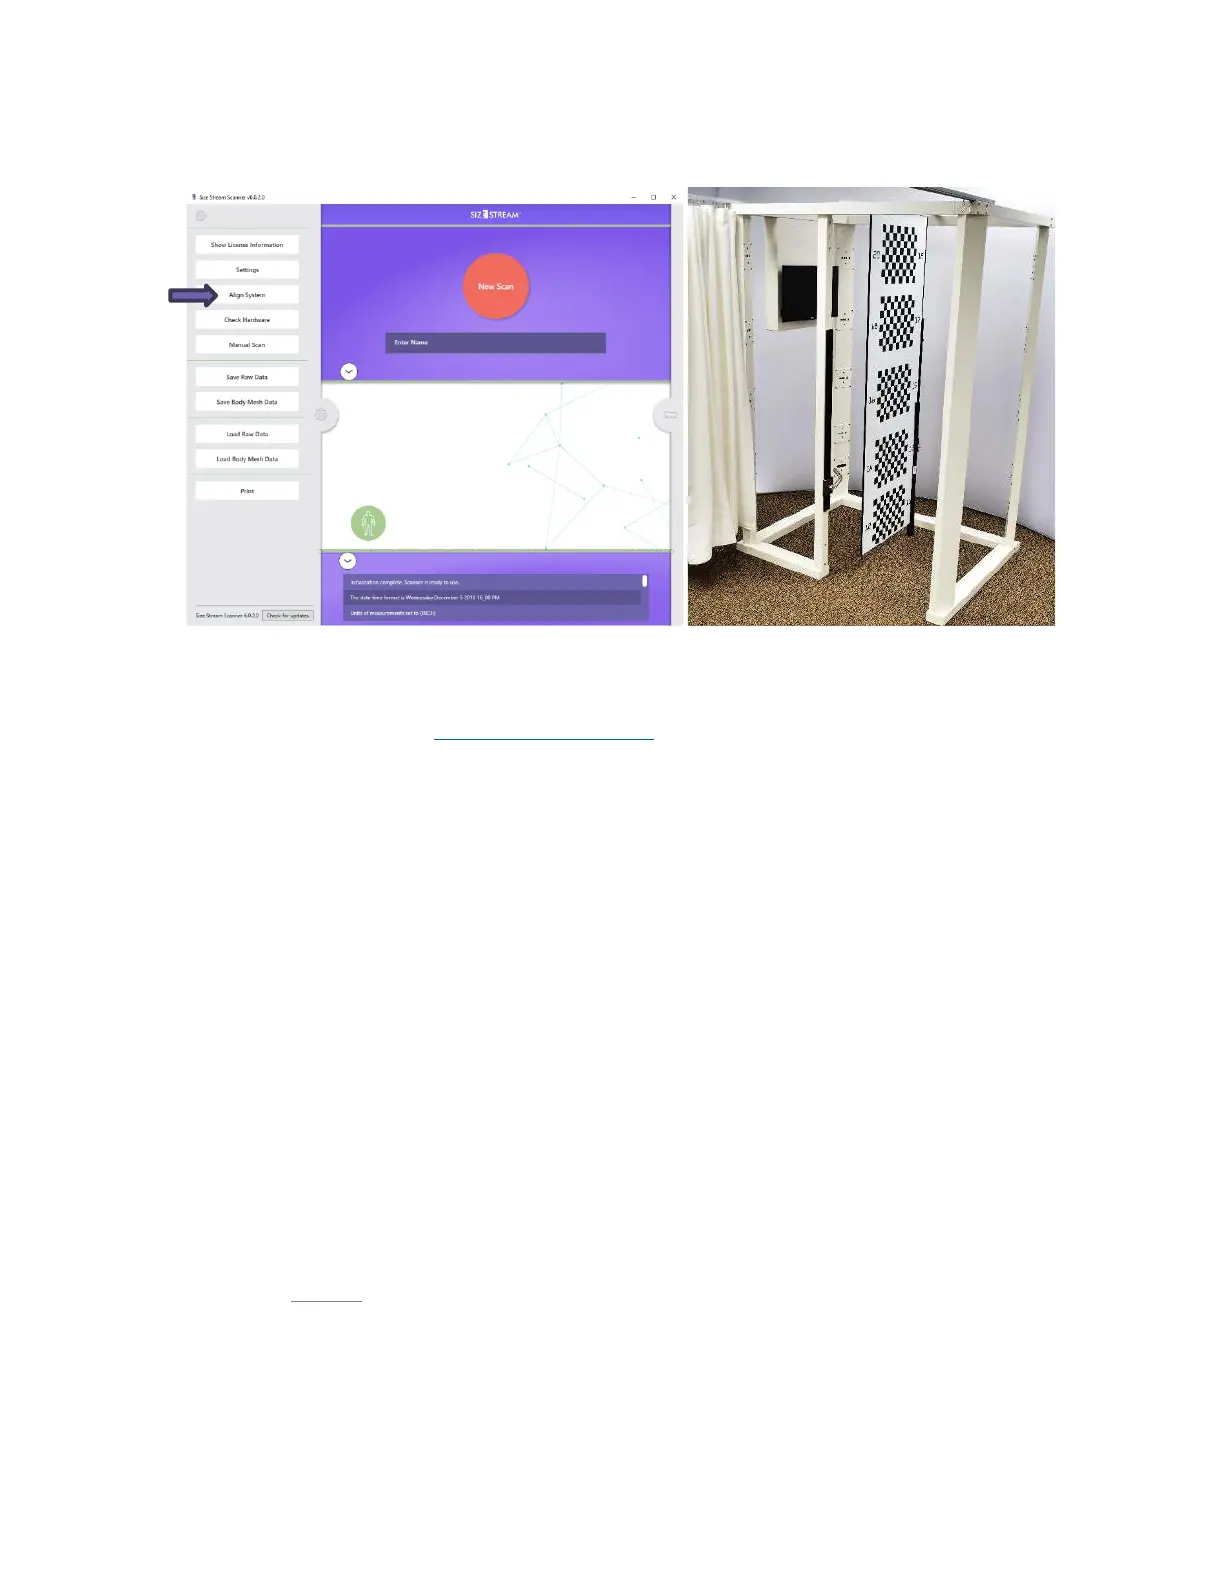
Aligning the Scanner
The data coming from each of the sensors in the scanner must be aligned to maintain the accuracy of the 3D
body image. The system administrator does this with the Alignment Board provided with the scanner. If the
board is lost or damaged, contact
support@sizestream.com
.
Size Stream recommends that the scanner be aligned every day or whenever it is moved or modified. When
the Scanner Software initializes it will prompt the user to do a system alignment. The user can choose to skip
this step if the system is already aligned. If not, please follow the instructions below before clicking Yes to the
alignment prompt.
1. If not previously done, carefully unpack the scanner Alignment Board. Make sure to find and keep
the “stabilizer” foam tube. It is easy to mistake the stabilizer tube as packing material.
2. Hang the Alignment Board on the Alignment Bar, in the center of the scanner. Numbers 1-10 should
be facing the monitor and 11-20 should be facing the back of the scanner.
3. Attach the stabilizer tube to one side of the alignment board. Dampen any swaying motion and lower
the foam slider to the floor once the Alignment Board is centered and vertical with the scanner
frame.
Important: The alignment board must be as still as possible. The alignment directly affects the accuracy
of the scan.
4. If the Align pop-up window was skipped, alignment can be started from the Utility Menu. Click the
gear icon on the left side of the screen to open the Utility Menu and touch or click the Align System
button. (
CTRL+m)
Note: The system will play music while the system alignment is active.
5. When system alignment is completed a message in the status box will appear and an audio
notification saying, “Alignment Complete!”.