SECTION 5, Page 19SJ-800 Series E Battery Powered
119153
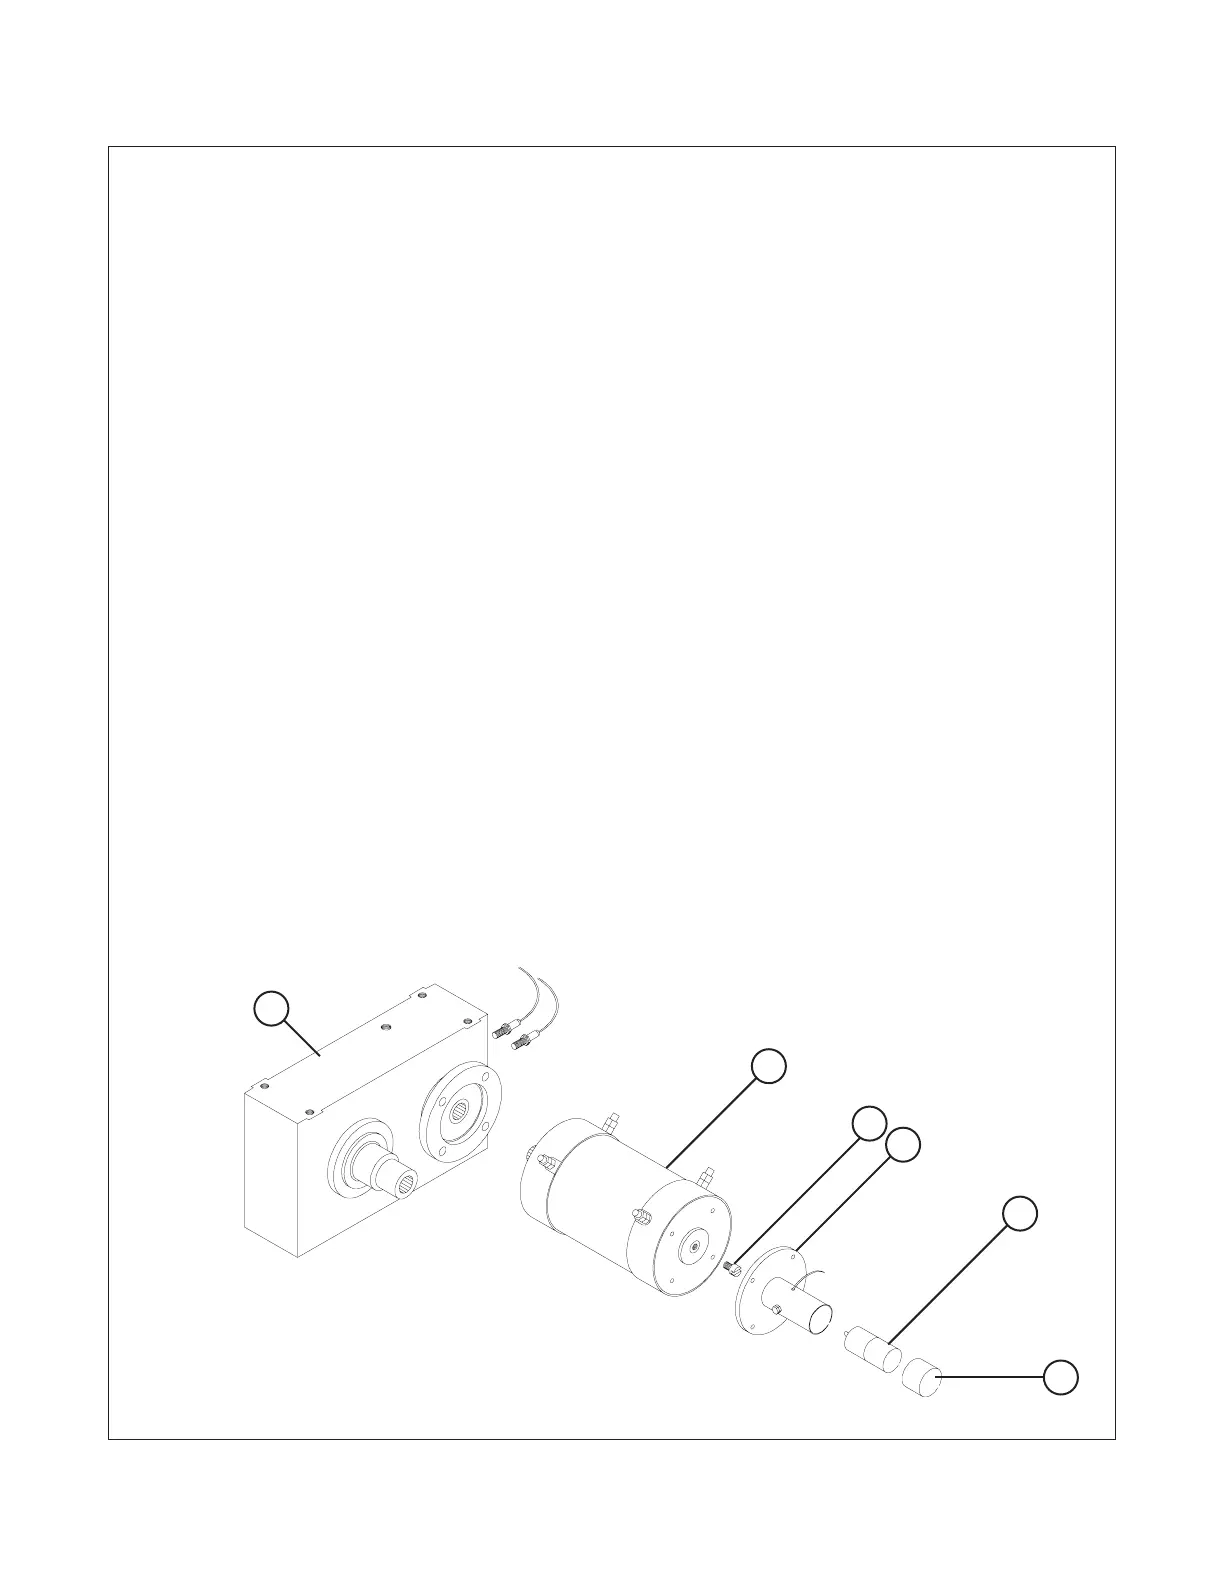
1. Locate tachometer generator on back of drive motor. Remove rubber boot from the rear of the tachometer
generator.
2. Mark the location of the wires attached to the generator and remove wires. NOTE: Wires must be
reattached to the same terminals as they were removed from or the Sevcon controller will not function
when reassembled.
3. Remove the four 5/16-18 x 1-1/2” bolts securing the tachometer generator mounting plate to the rear of
the motor.
NOTE: Do not attempt to remove the tachometer generator from mounting plate until it has been determined
to be defective.
4. Remove the coupler half from the tachometer generator and attach generator to a drill with a 1000-RPM
rating.
5. Attach a voltmeter to the terminals on the rear of the tachometer generator and set the meter for D.C.
voltage.
6. Energize drill and read voltage on meter. At 1000-RPM voltmeter should indicate (20.8) volts. If reading
is lower the tachometer generator is defective.
7. Put the drill in reverse and energize drill, read voltage on meter. At 1000-RPM voltmeter should read (-20.8)
volts. If reading is lower the tachometer generator is defective.
Note
Steps #6 and #7, the voltage should be a smooth incline to proper voltage.
If voltage is erratic it may affect the performance of the machine.
1. GEAR BOX
2. DRIVE MOTOR
3. COUPLER HALF
4. TACHOMETER GENERATOR MOUNTING PLATE
5. COUPLER HALF
Figure 5-9. Traction Motor/Tach Generator
1
2
3
4
5
6
Tachometer Generator Testing Procedure