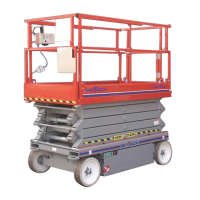
SECTION 5, Page 6 SJ-800 Series E Battery Powered
119153
System, Gearbox and Brake Pressure Adjustments
All adjustments must be made with a Calibrated Gauge.
Refer to the Serial Number Plate located on the rear of the machine for System and Lift Pressure values.
System Relief Pressure Adjustment
1. Locate the System Pressure Quick Disconnect Port on the Main Manifold. Refer to Section 3 “Hydraulic
Manifold And Port Identification” for location.
2. Install a Calibrated 3000 PSI Gauge to the System Pressure Quick Disconnect Port.
3. Remove the Platform Control Box from the Guardrail and disconnect from the Main Control Cable.
4. Locate the Main Control Cable Plug in the Hydraulic/ Electric side of cabinet.
5. Disconnect the Main Cable and connect the Platform Control Box into the Plug.
6. At the Main Manifold, loosen the Locknut on the System Relief Valve R1. Refer to Section 3 “Hydraulic
Manifold And Port Identification” for location.
7. Select Drive with the Lift/Off/Drive Select Switch on the Platform Control Box.
8. Engaged Steer Right and hold.
9. Observe reading on Gauge. Adjust the R1 System Relief Value listed on the Serial Number Plate. Turning
the stem on the Relief Valve clockwise increases pressure. Turning the stem counterclockwise decreases
pressure.
10. Release Steer Switch and tighten the Locknut.
11. Remove the gauge from the System Pressure Test Port.
Gearbox Relief Pressure Adjustment
1. Locate the Gearbox Quick Disconnect Port on the Main Manifold. Refer to Section 3 “Hydraulic Manifold
And Port Identification” for location.
2. Install a Calibrated 1000 PSI Gauge to the Gearbox Quick Disconnect Port.
3. At the Main Manifold, loosen the Locknut on the Gearbox Relief Valve R2. Refer to Section 3 “Hydraulic
Manifold And Port Identification” for location.
4. Disconnect the shift sensors plug (CN6) located near the top left corner of the main control board. Refer
to Section 3.
5. Select Platform Controls. The Small Pump (P2) will start operating.
6. Observe reading on gauge. Adjust Gearbox Relief Valve (R2) to obtain 500 PSI. Turning the stem on the
Relief Valve clockwise increases pressure. Turning the stem counterclockwise decreases the pressure.
7. Reconnect wiring to the Proximity Switches and tighten the Locknut on the Relief Valve.
8. Remove the gauge form the Gearbox Pressure Test Port.
Brake Pressure Adjustment
1. Locate Pressure Switch (PS2) on Main Manifold. Refer to Section 3 “Hydraulic Manifold And Port Identifi-
cation” for location.
2. Disconnect spade connectors for pressure switch wires.
3. Turn the black knurled portion of the pressure switch body counter-clockwise until movement stops.
4. Turn the black knurled portion of the pressure switch clockwise for only four full revolutions and recon-
nect spade connectors.
5. Install 3000 PSI Gauge to quick coupler on main manifold. Refer to Section 3 “Hydraulic Manifold And
Port Identification” for location.
6. Operate Drive slowly while observing gauge. It should read a minimum of 800 PSI.
7. If pressure needs to be increased, turn black knurled portion clockwise. If pressure need to be de-
creased turn counter-clockwise.
8. Once 800 PSI is obtained, brake pressure adjustment is complete.