SMART LightRaise Installation and User's Guide 23
4
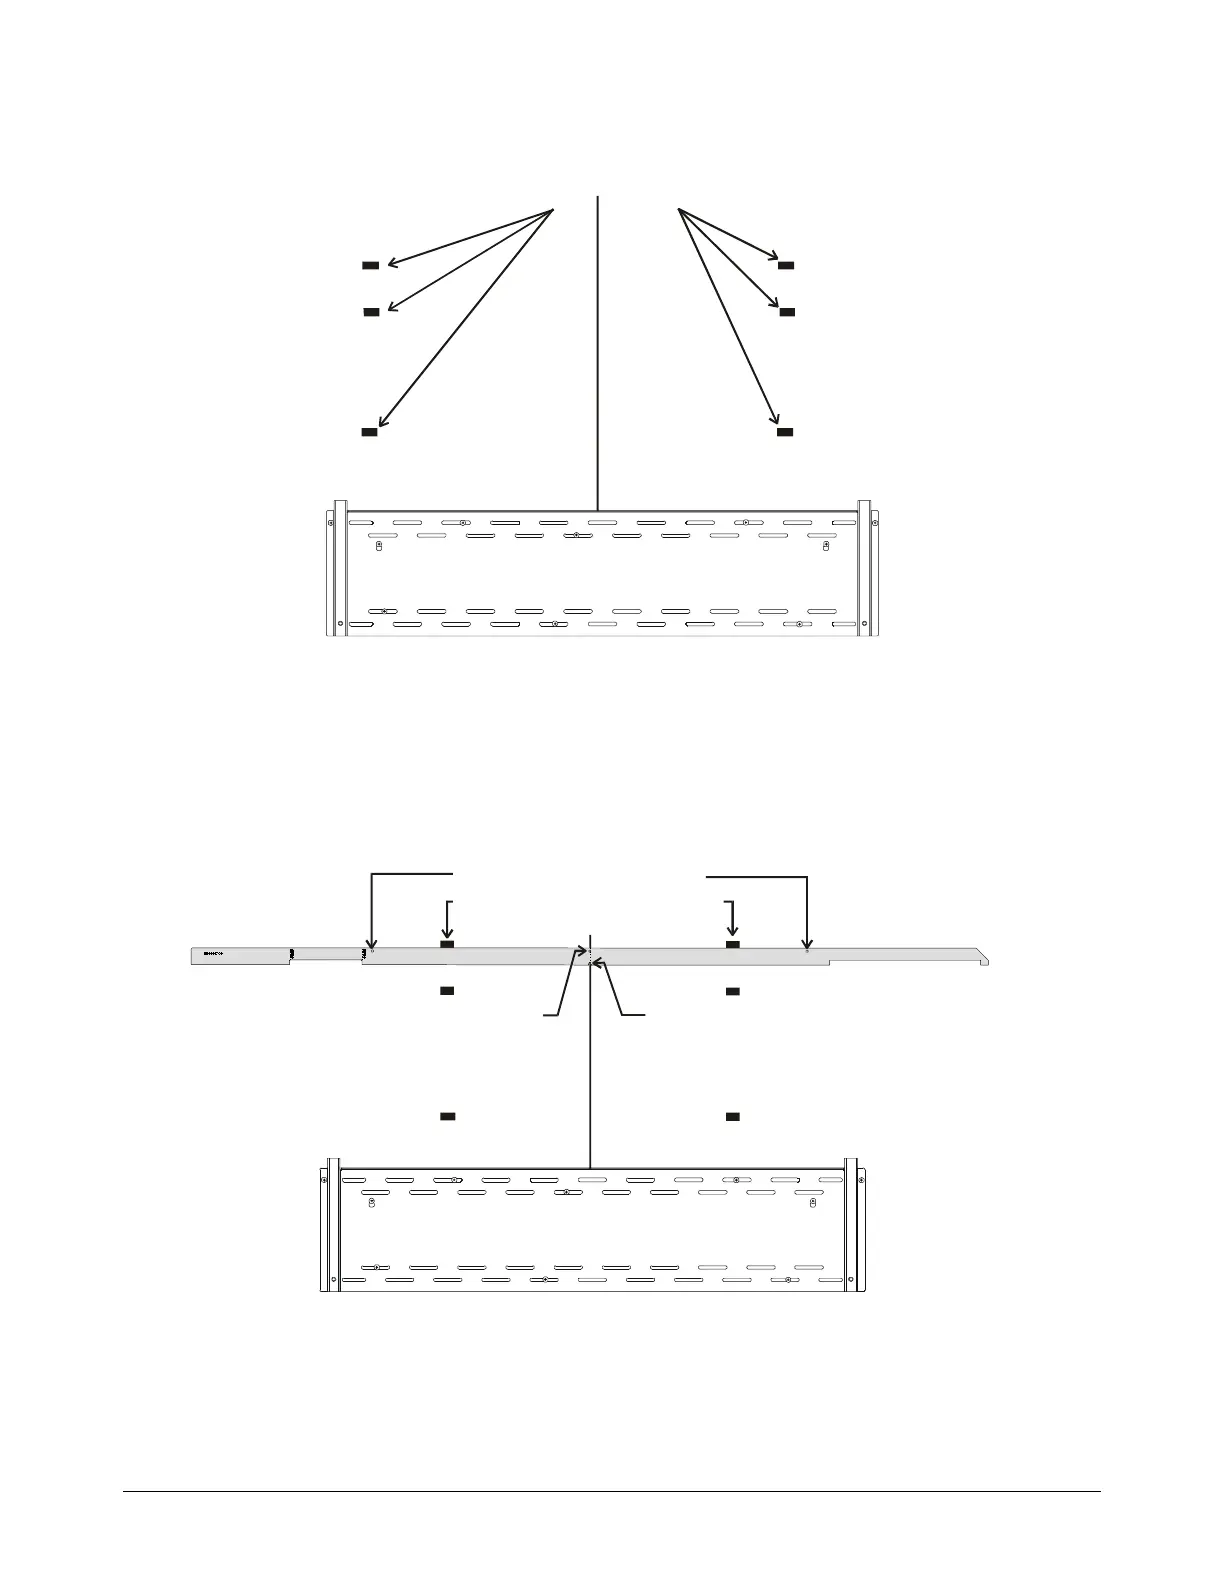
Move the template tool to the other side of the console bracket, make sure it's vertical and
the flat (bottom) end is against the top edge of the console bracket. Repeat steps 2 and 3
to create three corresponding marks on the wall. You'll have six marks on the wall.
Wall Markings
Centerline
Console Bracket
5
Turn the template tool so it's horizontal, with the notched edge down.
6
Ensure the template tool is level by aligning it with the two marks on the wall and aligning
the centerline hole and the centerline notch with the centerline drawn previously.
7
Use the pencil to mark two keyhole locations on the wall using the template tool as a
stencil.
Centerline
Centerline
Hole
Keyhole Locations for Bracket
Align the template tool's top edge
with one set of marks on the wall
Centerline
Notch
Console Bracket
Illustration not to scale
8
Repeat steps 5 through 7 for the second and third set of marks on the wall.