24 SMART LightRaise Installation and User's Guide
To mount the brackets to a concrete or cinder block wall:
1
At each marked keyhole location, use the supplied masonry drill bit to drill a hole.
2
Partially thread a concrete screw into each hole, leaving ¼"
(6 mm)
of each screw
exposed.
3
Hang the upper boom bracket on the highest set of screws, pushing the keyholes firmly
down over the protruding screws.
4
Hang the lower boom bracket on the middle set of screws, pushing the keyholes firmly
down over the protruding screws.
5
Hang the hanger bracket on the tabs of the lower boom bracket.
6
Hang the spacer bracket on the lowest set of screws, pushing the keyholes firmly down
over the protruding screws.
7
Tighten the screws, but don't overtighten them.
8
Use the same drill bit to drill three holes along the top and bottom rows of slots in the
upper boom bracket. These six holes should be evenly spaced along the width of the
bracket. Insert a screw into each hole, being careful not to overtighten each.
NOTE:
If your installation is into a cinder block wall, try to drill your holes into the center of
as many blocks as possible. If a mortar joint intersects with one row of slots, use the
middle row of slots instead.
9
Drill three holes along the top and bottom rows of slots in the lower boom bracket. These
six holes should be evenly spaced along the width of the bracket. Insert a screw into each
hole, being careful not to overtighten each.
10
Drill two holes along the top and bottom rows of slots in the hanger bracket. These four
holes should be evenly spaced along the width of the bracket. Insert a screw into each
hole, being careful not to overtighten each.
11
For the spacer bracket, mark the two screw holes. Use the same drill bit to drill holes at
these two locations. Insert a screw into each hole, being careful not to overtighten each.
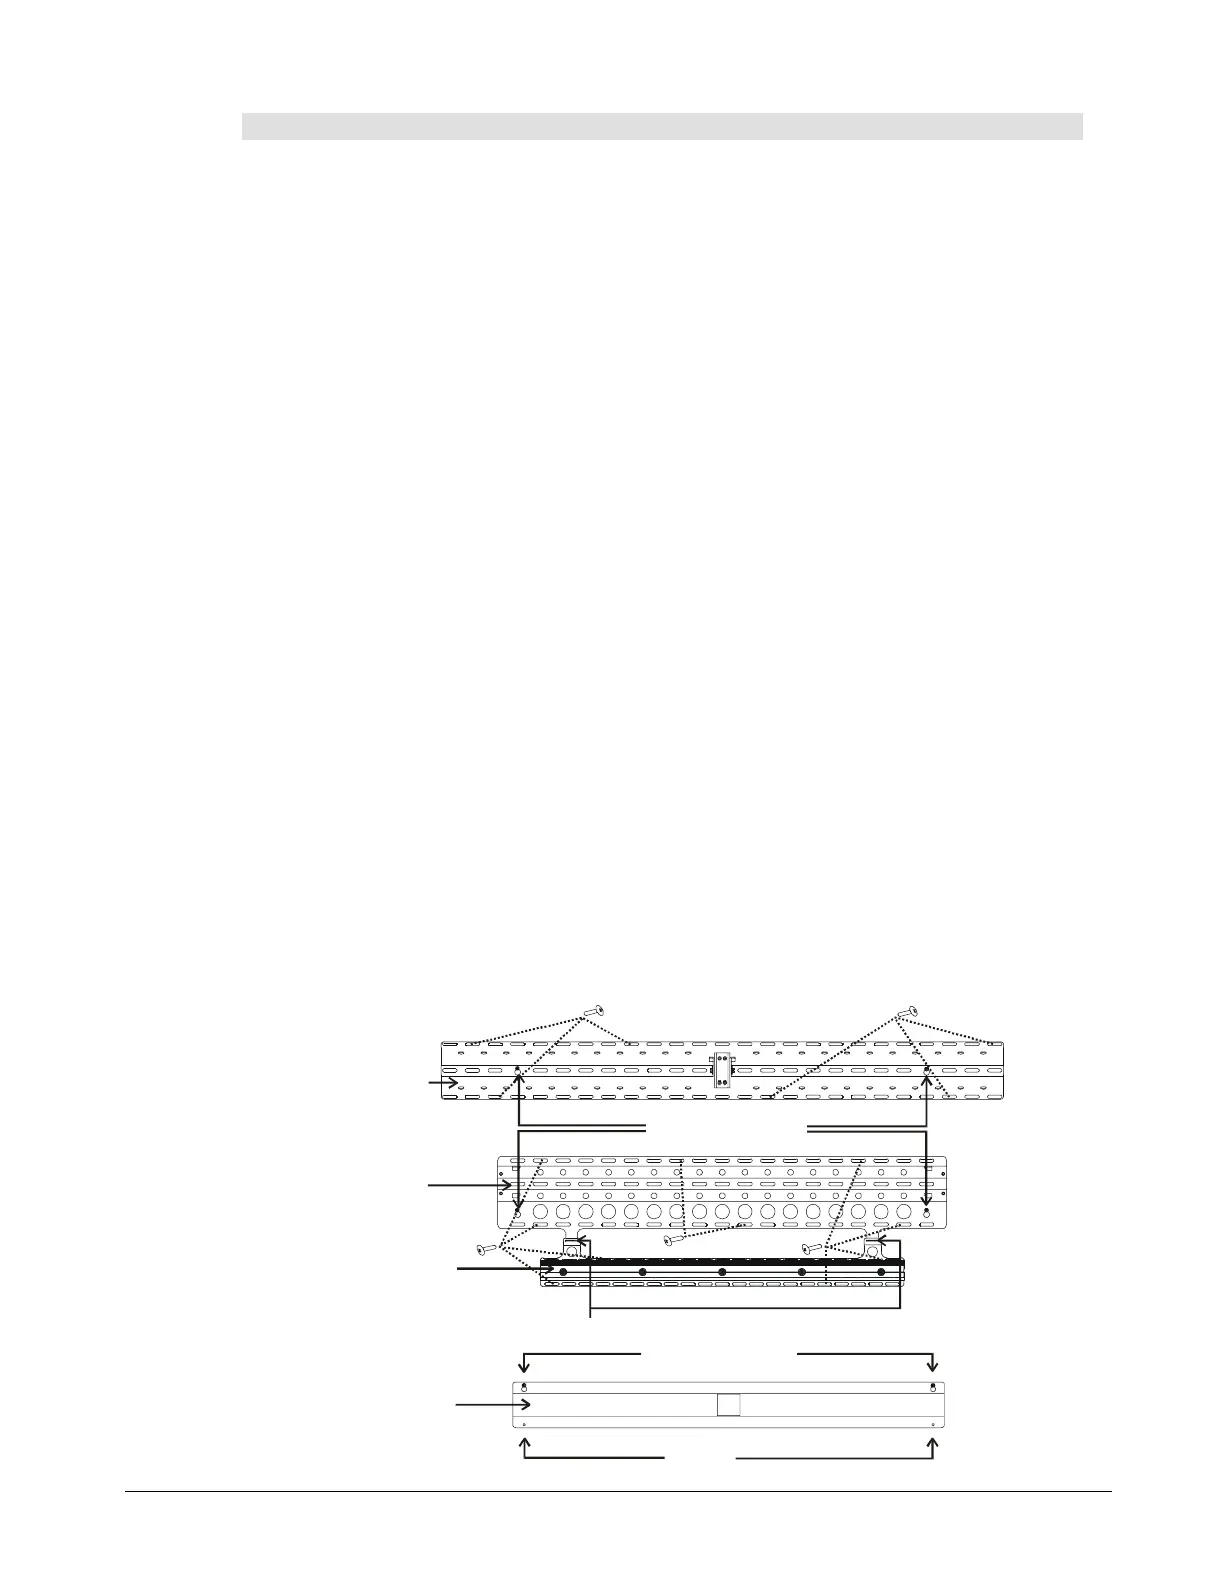
Upper Boom
Bracket
Keyhole Locations
Keyhole Locations
Screws
Illustration not to scale
Spacer Bracket
Lower Boom
Bracket
Hanger Bracket
Tabs for Hanger Bracket
NOTE:
If your setup
doesn't include a
SMART Board
interactive white-
board, you don't
need to follow the
instructions for the
hanger and spacer
brackets.