HRX-OM-K003
Chapter 3 Transporting and Installation
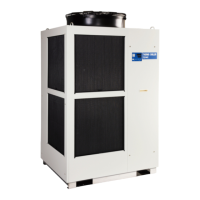
3.3 Procedure for Installation HRW Series
Anti-seismic bracket is an optional part, which is required for the installation of this
system (HRZ-TK002).
Preparation of anchor bolts suitable for floor material is your responsibility. Prepare
M12-anchor bolts (4 pcs.) for installation. See “8.6 Anchor Bolt Mounting Position” on
page 8-13 for mounting of the anchor bolt.
3.3 Procedure for Installation
3.3.1 Installation
System installation should be on a vibration-free stable level plane.
See “Appendix 8.2 Outer Dimensions” in Chapter 8 on page 8-7 for the
dimensions of this system.
3.3.2 Procedure for system securing
1. Transfer this system to the installation site.
2. Lock the brakes on casters.
3. Using a13-mm open end wrench, attach the anti-seismic brackets to the front and back.
Figure 3-4 Anti-seismic Bracket Attachment
Drain pan port is assigned to the bottom on the back of this system. Exercise
caution not to damage the dain pan port when attaching the anti-seismic bracket.
Anti-seismic bracket (optional)
HRZ-TK002
M8 nut (2 pcs.)
(Accessory for anti-seismic bracket)
 Loading...