4.
Drill the holes and mount the bracket. Verify that the bracket is firmly attached to
the mounting surface.
5.
Hang the inverter on the bracket:
a. Lift the inverter from the sides, or hold it at the top and bottom of the inverter
to lift the unit into place.
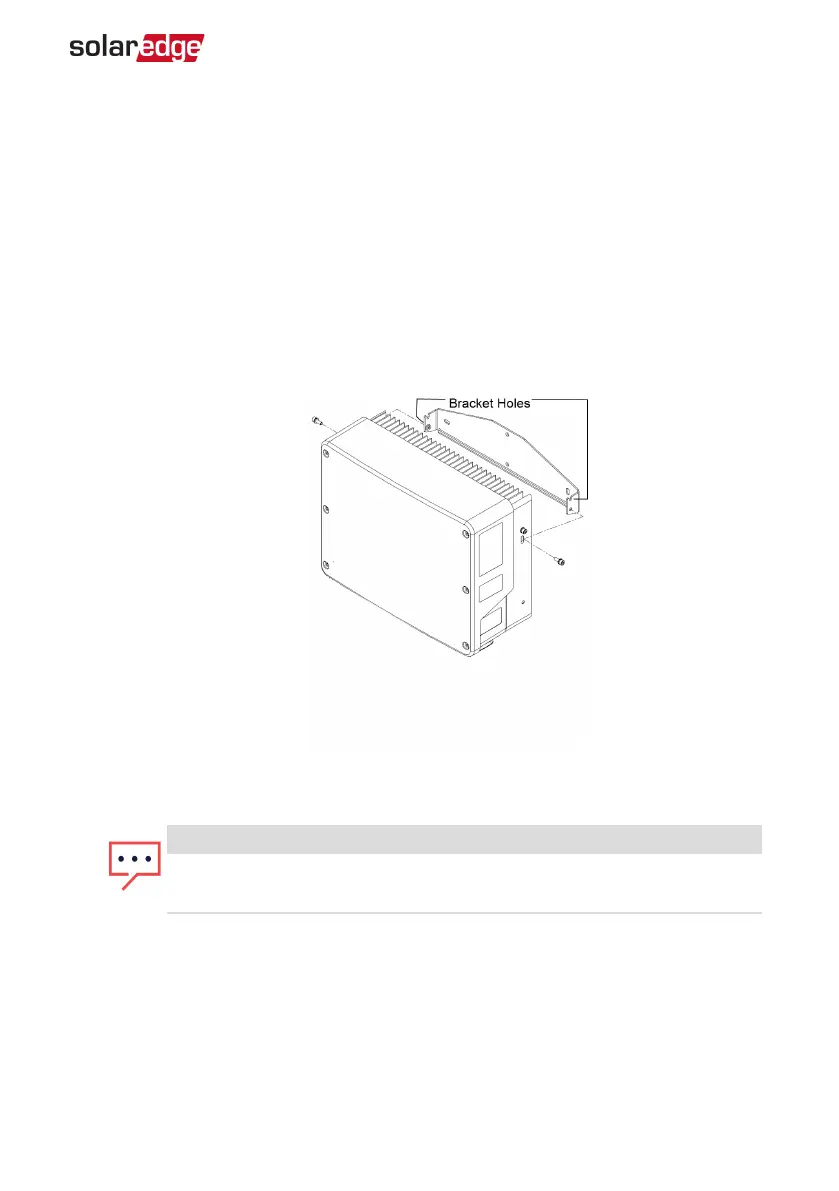
b. Lower the inverter onto the U-shaped indentations, as shown below. Let the
inverter lay flat against the wall or pole.
c.
Insert the two supplied screws through the outer heat sink fin on both sides of
the inverter and into the bracket. Tighten the screws with a torque of 4.0 N*m /
2.9 lb.*ft.
Figure 10: Hanging the inverter on the brackets
6.
Optionally, secure the DC Safety Unit bracket to the wall/pole, using 3 screws:
NOTE
In case of inverter replacement with the DC Safety Unit still mounted, it is
recommended to use all 3 holes.
Chapter 3: Installing the Inverter 25
Single Phase Inverter with HD-Wave Technology Installation MAN-01-00540-1.0