Chapter 4: Connecting the AC and the Strings
to the Inverter
This chapter describes how to connect the inverter to the AC grid, and to the strings of
modules with power optimizers.
Refer to the technical specifications provided with the inverter.
Connecting the ACGrid to the Inverter
The AC output gland can fit an AC cable external gauge of PG21 (9-16 mm diameter) .
The maximum wire size for the input terminal blocks is 16 mm².
For more wiring information refer to the
SolarEdge Recommended AC
Wiring Application Note
, available on the SolarEdge website at
http://www.solaredge.com/files/pdfs/application-note-recommended-
wiring.pdf.
1. Turn OFF the AC circuit breaker.
2. Release the Allen screws of the inverter cover and carefully move the cover
horizontally before lowering it.
CAUTION!
When removing the cover, make sure not to damage internal components.
SolarEdge will not be held responsible for any components damaged as a
result of incautious cover removal.
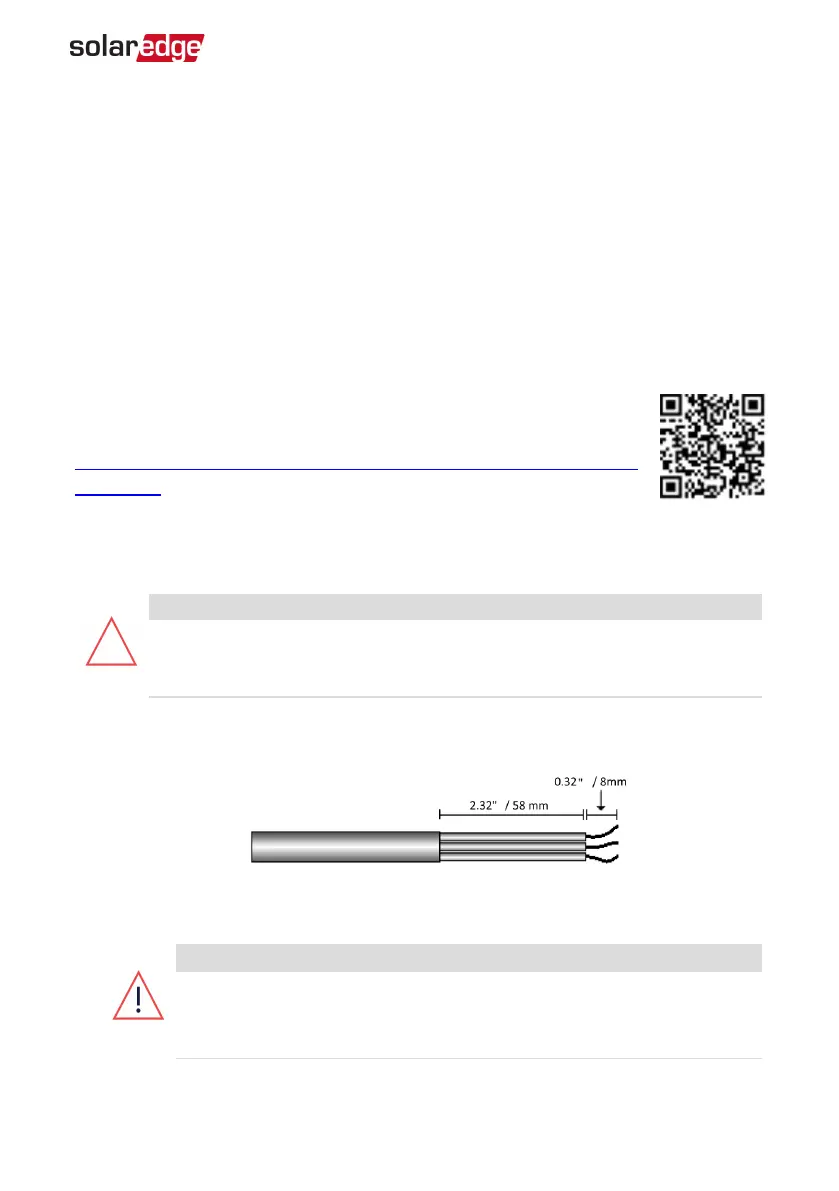
3.
Strip 58 mm / 2.32'' of the external cable insulation and strip 8 mm / 0.32'' of the
internal wire insulation.
Figure 12: Insulation stripping – AC (3-wire cable)
4.
Open the AC cable gland and insert the cable through the gland (see ).
WARNING!
Turn OFF the AC before connecting wires to the AC terminals. If
connecting equipment grounding wire, connect it before connecting the
AC Line and Neutral wires.
Chapter 4: Connecting the AC and the Strings to the Inverter 27
Single Phase Inverter with HD-Wave Technology Installation MAN-01-00540-1.0