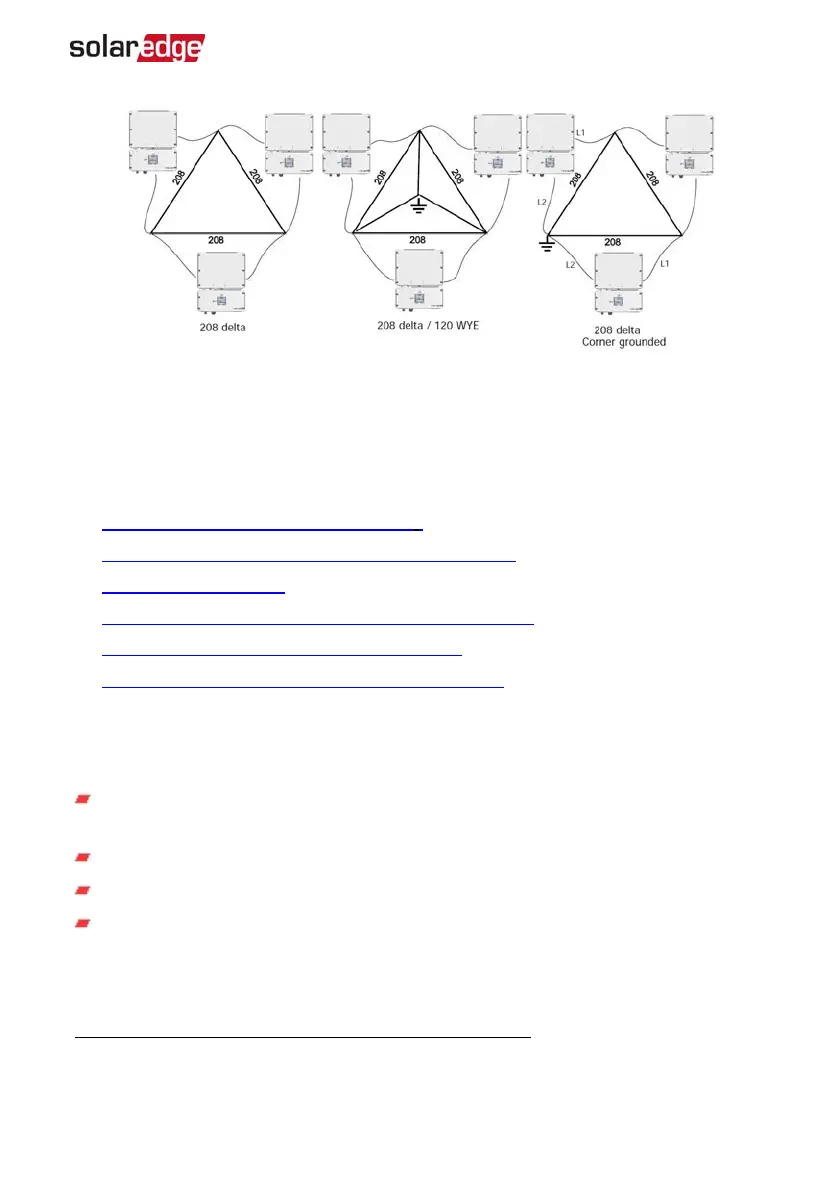
Figure 3: 208V AC grids supported by SolarEdge single phase inverter
(1)
Installation Procedure
The following is the procedure for installing and setting up a new SolarEdge site. Many
of these also apply to modification of an existing site.
1. Connecting Power Optimizers in Strings, page 23
2. Recording power optimizer serial numbers (optional), page 44
3. Mounting the inverter, Page 32
4. Connecting the AC and the String to the DCSafety Unit, page 36
5.
Commissioning and activating the installation, page 40
6. Connecting the inverter to the monitoring platform, page 45
Installation Equipment List
Standard tools can be used during the installation of the SolarEdge system. The
following is a recommendation of the equipment needed for installation:
Allen screwdriver for 4 mm screw type for the inverter cover, side screws, and Safety
Switch cover
Standard flat-head screwdrivers set
Non-contact voltage detector
Cordless drill (with a torque clutch)or screwdriver and bits suitable for the surface
on which the inverter and optimizers will be installed and for opening the Safety
Switch drill guides. Use of an impact driver is
not
allowed.
(1)
208V AC grids are only supported by some inverter models. Refer to the specification supplied with the
inverter.
Chapter 1: Introducing the SolarEdge Power Harvesting System 13
Single Phase Inverter with HD-Wave Technology Installation MAN-01-00541-1.3