3.
Connect the DC wires to the DC+ and DC- terminal blocks, according to the
labels on the terminals. or; connect two wires (DC+ and DC-) per string:
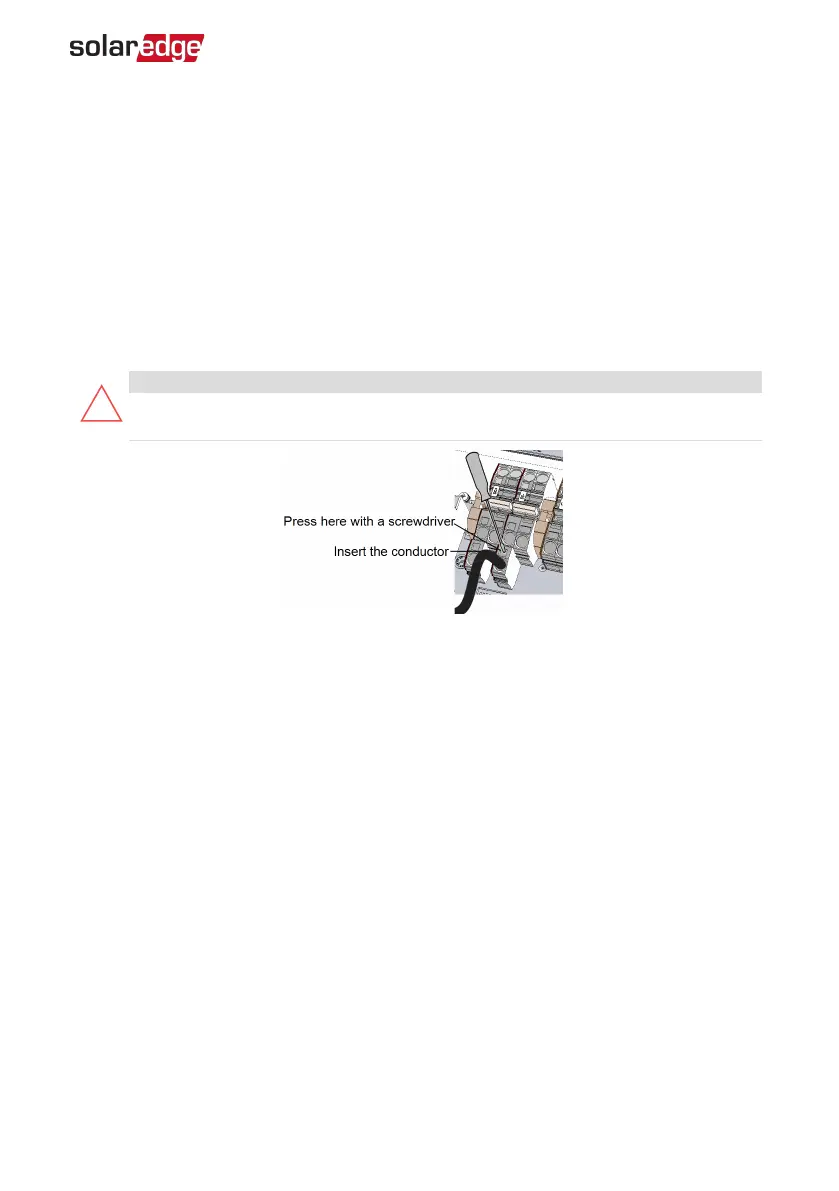
a. Use a standard flat-blade screwdriver to connect the wires to the spring-clamp
terminals. The screwdriver blade should fit freely in the terminal opening. Too
large a blade can crack the plastic housing.
b. Insert the screwdriver and firmly tilt it to press the release mechanism and
open the clamp.
c. Insert the wire into the top opening (see
Figure 26
).
d. Remove the screwdriver – the wire is automatically clamped.
CAUTION!
Ensure that the Plus (+) wire is connected to the + terminal and that the Minus
(-) wire is connected to the Minus (-) terminal connector.
Figure 26: DC Spring-clamp terminals
5. Close the Connection Unit cover: Attach the switch cover and secure it by
tightening the six screws with a torque of 1.2 N*m / 0.9 ft.*lb.
Chapter 4: Connecting the AC and Strings to the Connection Unit 41
Three Phase Inverter with Synergy Technology Installation MAN-01-00402-1.2