Plug-in Mixer Tutorial
78
SSL UF8 User Guide
Plug-in Mixer - Tutorial
The following tutorial guides you through configuring and using the Plug-in Mixer profile on UF8.
SSL 360° Setup
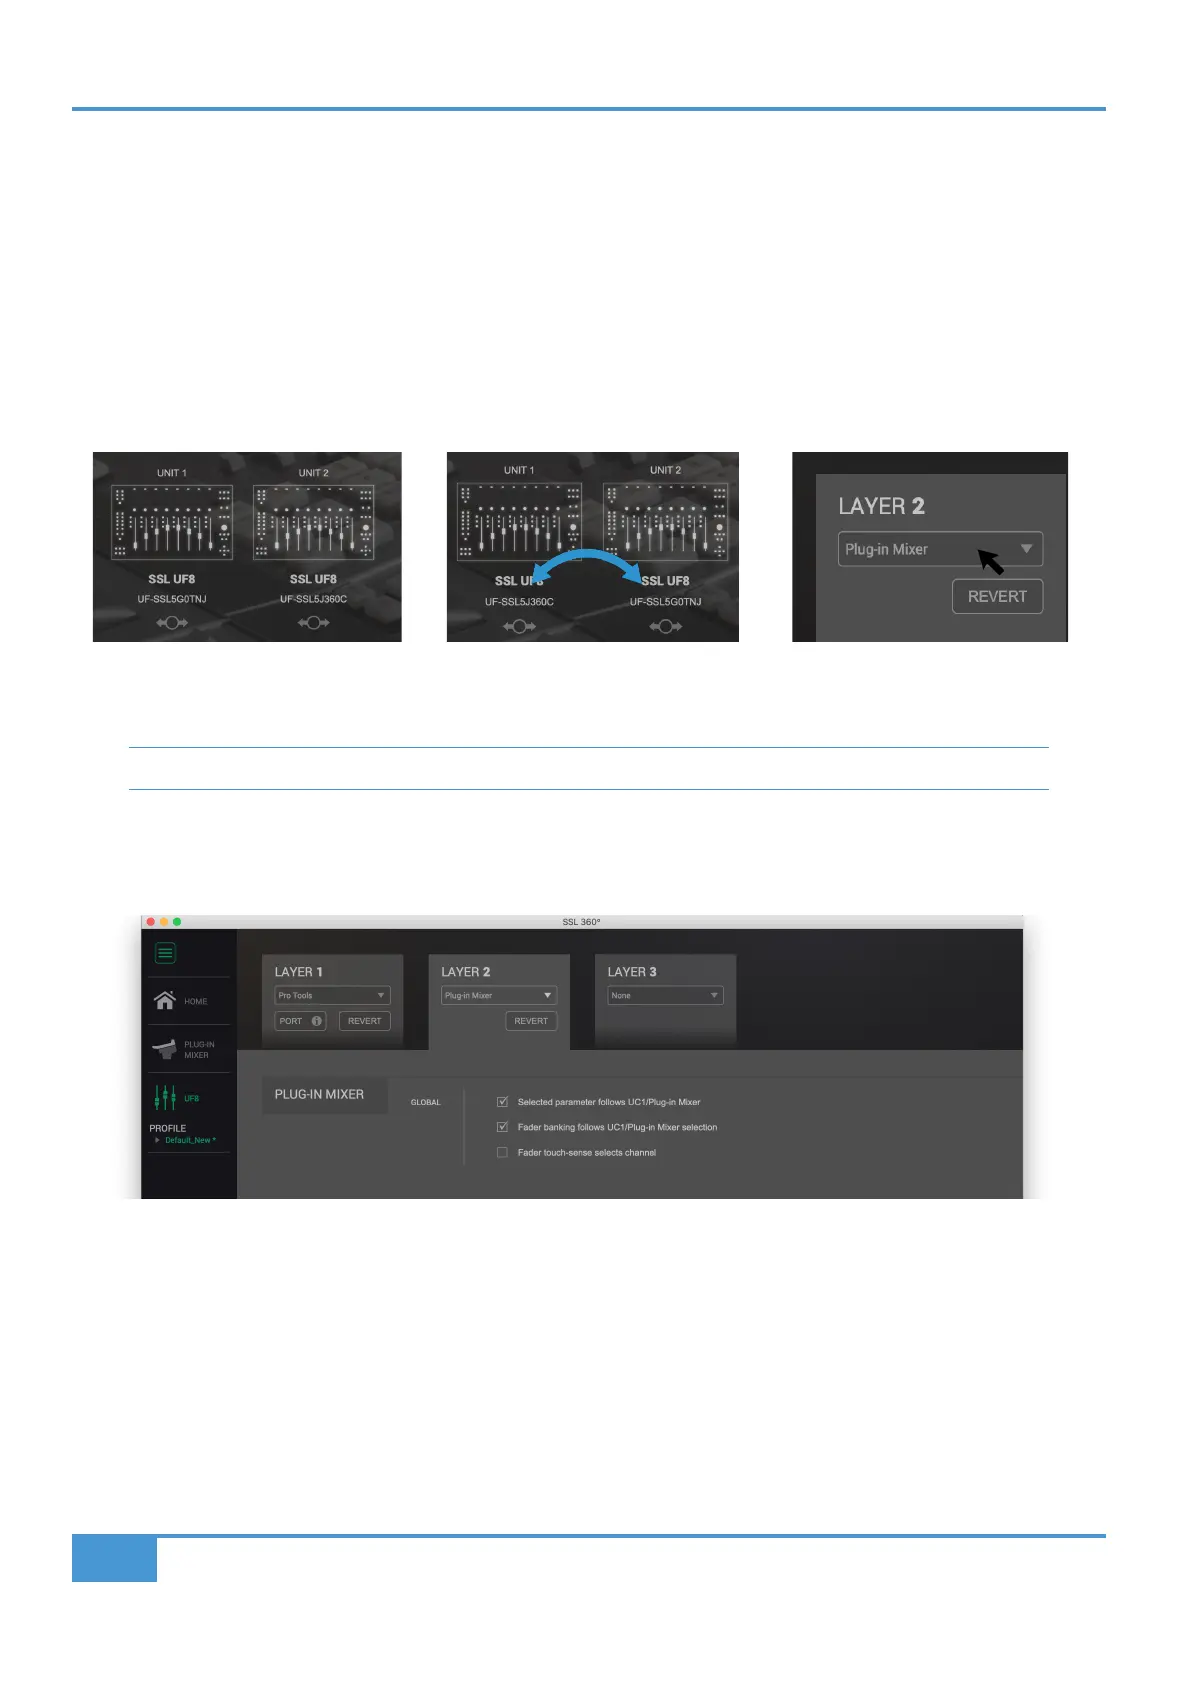
1. Open the SSL 360° application on your Mac or Windows computer and on the HOME page check that any UF8s you have
connected are present - outline images of each UF8 appear on screen.
2. If you have multiple UF8s connected, click down on the outline image of each unit to check that the UF8s are arranged in the
correct order. If units need to be re-ordered then click and drag to re-arrange.
3. Go to the UF8 page and set a Layer to Plug-in Mixer using the drop-down list.
You need to be on SSL 360° v1.2 or above to set a Layer to Plug-in Mixer.
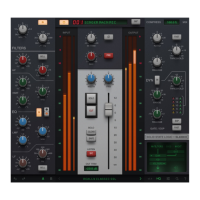
Plug-in Mixer Setup
Selected parameter follows UC1/Plug-in Mixer - With this mode enabled, the Channel Strip or Bus Compressor parameter
assigned across the V-Pots will automatically change in response to the parameter being moved/actioned in the Plug-in Mixer,
on UC1 or in the Plug-in itself. e.g. if you move the LMF Frequency control in any of these places, UF8's V-Pots will automatically
switch to control that parameter.
Fader banking follows UC1/Plug-in Mixer selection - With this mode enabled, the bank of faders UF8(s) is focused on will
automatically move to include the Channel Strip plug-in that is being selected in the Plug-in Mixer or that is being opened in the
DAW, if it is not already visible on the UF8 surface.
Fader touch-sense selects channel - With this mode enabled, touching a fader will select it in the Plug-in Mixer.
STEP 1 : Open SSL 360° application.
Connected UF8s appear on-screen.
STEP 2 : Click and drag to re-order
units if necessary.
STEP 3 : Select the Plug-in Mixer
profile from the UF8 page.