26
Copyright © 2016 Somfy SAS. All rights reserved.
Pictures are for illustration purposes only
CONTENTS
WELCOME 2
1. SAFETY 3
2. NINA IO TIMER REMOTE CONTROL 5
3. USING NINA TIMER IO 16
Control a device 17
My function 18
Natural Control function 22
Launch a scenario 26
Alarm function 27
Timer function 29
Create typical days 34
Programme the week 50
View programmed actions 53
4. CUSTOMIZING NINA TIMER IO 60
Customize devices 60
Customize groups 64
Customize scenarios 70
Define timer settings 75
Customize the remote control 80
5. ADVANCED SETTINGS 86
6. TROUBLESHOOTING 98
7. ABOUT NINA TIMER IO 99
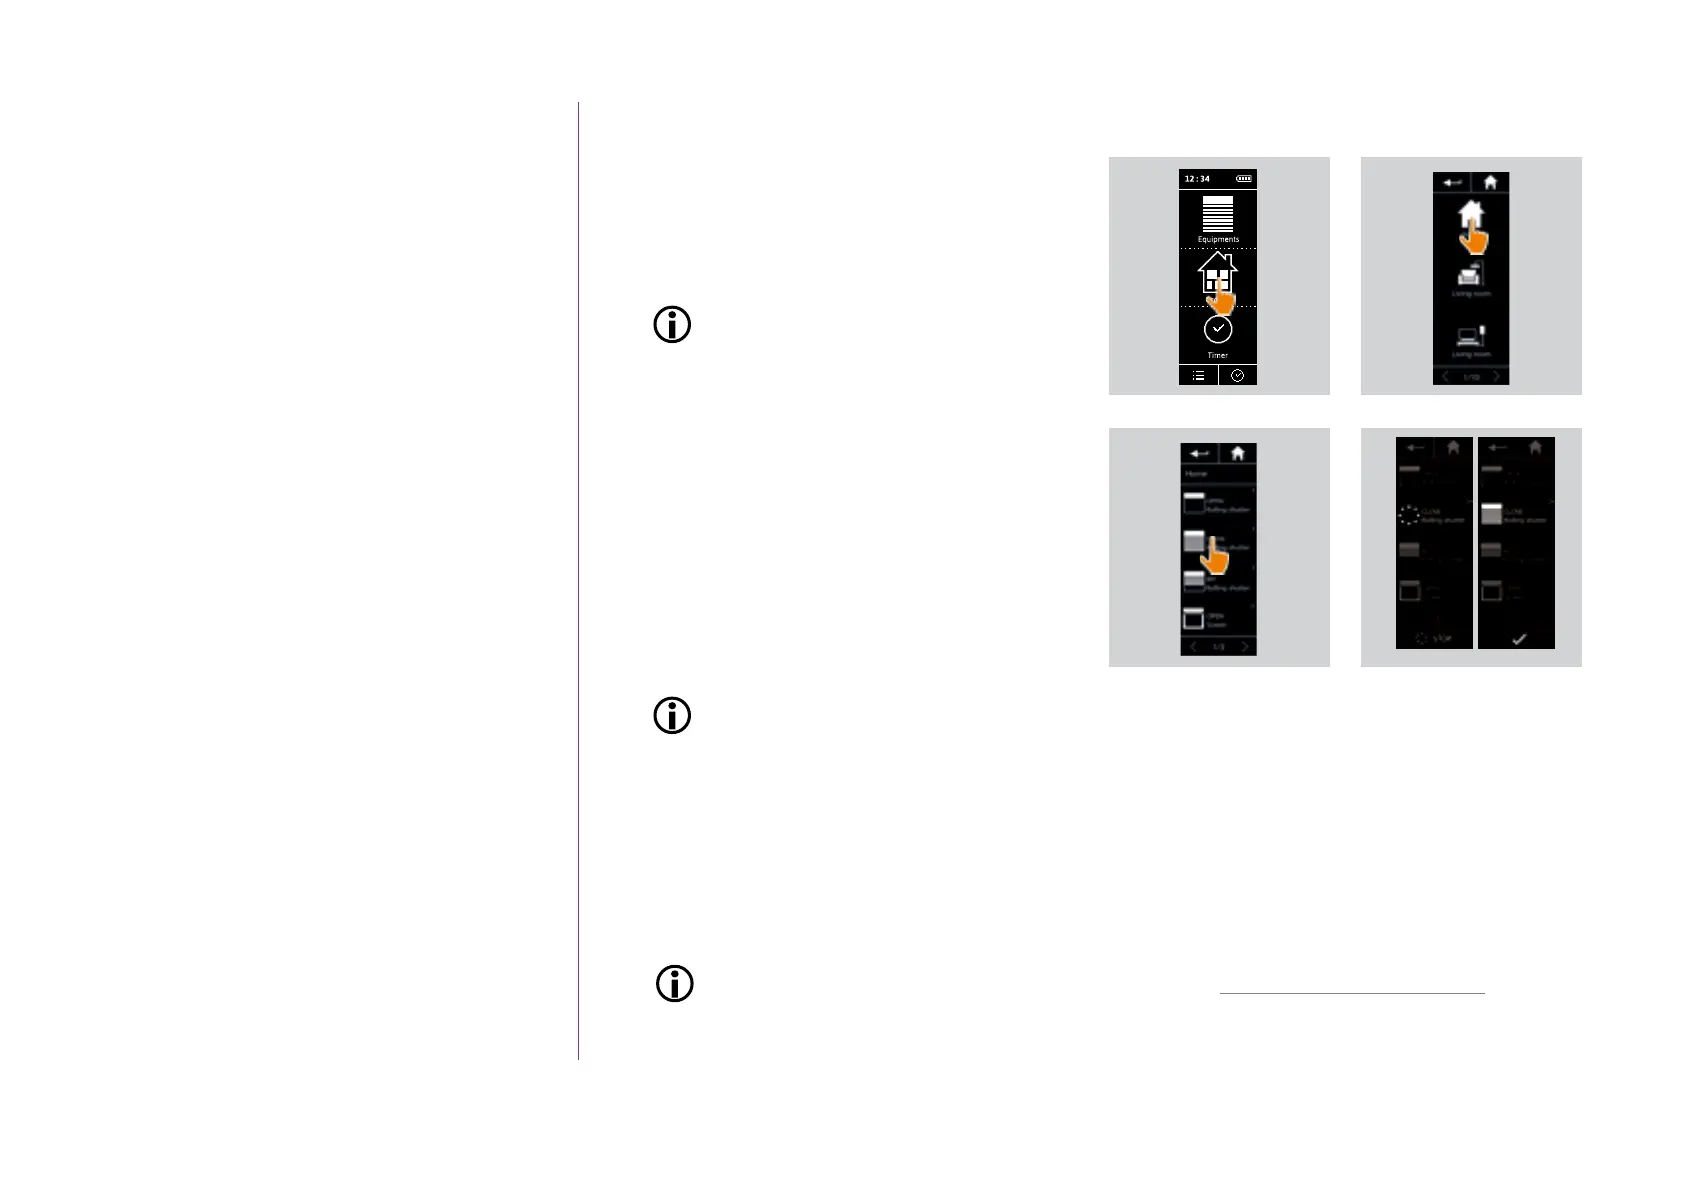
Launch a scenario
1. Select the Groups menu by clicking on the
corresponding icon.
2. Select the room or the group containing
the device to control by clicking on the
corresponding icon.
You can access all the rooms and groups
using the navigation buttons or the swipe.
> The scenarios available for controlling the
selected room/group are displayed.
3. Select the scenario by clicking on the
corresponding icon or name.
4. The action starts once the button is released:
> A wheel and a STOP button are displayed
when the action is ongoing (A). Click on this
button to stop the action at any time.
> A tick mark is displayed for few seconds
when the action is completed (B).
If a problem occurs, the detected fault is
displayed and you can start the launching
the scenario again.
Scenarios defined by default at installation:
Open/Close
Open/Close all
Switch ON/OFF
My position
Up/Down
To access all the functions to customize a scenario, see Customize scenarios, page 70.
1
2
3
4
A B
 Loading...