13
Getting Started
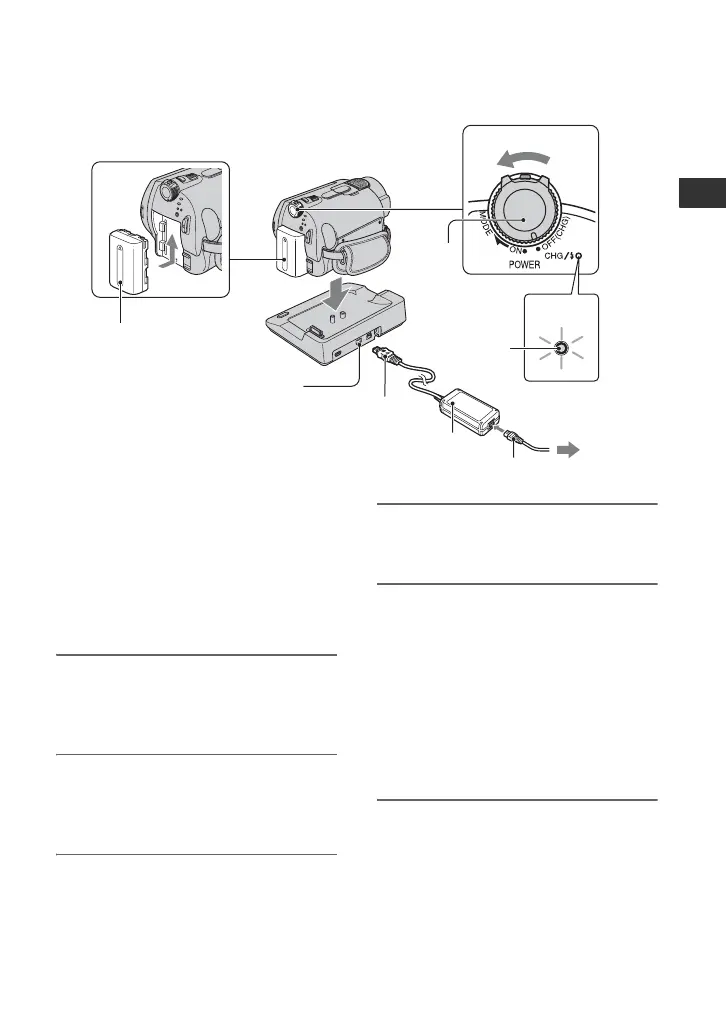
Step 2: Charging the battery pack
You can charge the “InfoLITHIUM”
battery pack (H series) (p. 112) after
attaching it to your camcorder.
b Notes
• Your camcorder operates only with an
“InfoLITHIUM” battery pack (H series).
1 Attach the battery pack by sliding
it in the direction of the arrow
until it clicks.
2 Turn the POWER switch in the
direction of the arrow to OFF
(CHG) (The default setting).
3 Connect the AC Adaptor to the
DC IN jack on the Handycam
Station.
Be sure that the v mark on the DC plug
is facing up.
4 Connect the mains lead to the AC
Adaptor and the wall socket.
5 Set the camcorder onto the
Handycam Station securely.
The CHG (charge) lamp lights up and
charging starts.
The CHG (charge) lamp turns off when
the battery pack is fully charged.
• When setting the camcorder onto the
Handycam Station, close the DC IN jack
cover.
1
2
3
4
5
5
POWER
switch
DC IN jack
DC plug
AC Adaptor
Mains lead
To the wall socket
CHG
(charge)
lamp
Battery