78
2 Turn on the computer.
3 Place the recordable DVD to be
saved in the DVD drive of your
computer.
z Tips
• It is recommended that you use a new
recordable DVD.
• If any software starts on the computer
automatically, close it.
4 Connect the Handycam Station to
the wall socket using the supplied
AC Adaptor.
5 Set the camcorder onto the
Handycam Station, then turn the
POWER switch to turn on.
z Tips
• You can perform this operation, whichever
position of the (Movie)/ (Still) lamp is
lit.
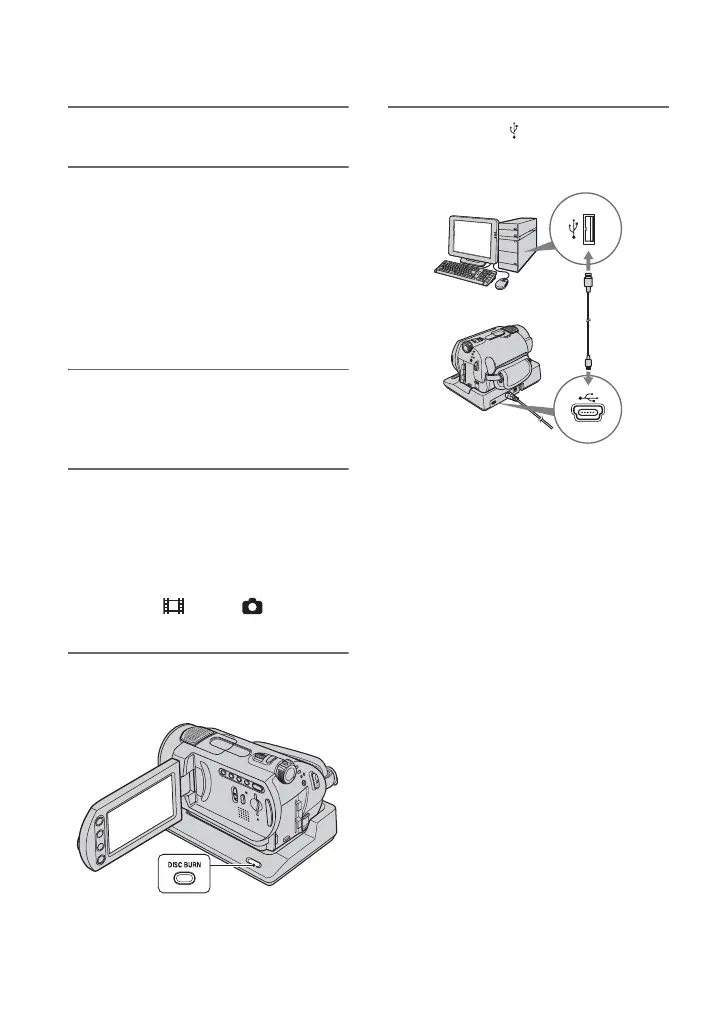
6 Press DISC BURN button on the
Handycam Station.
7 Connect the (USB) jack of the
Handycam Station to a computer
using the supplied USB cable.
The DVD recognition window is
displayed on the computer screen.
When the DVD type is recognized,
DVD creation begins.
b Notes
• When connecting your camcorder to a
computer, make sure you insert the connector in
the correct direction. Do not insert the connector
forcibly as it may damage the cable, the
Handycam Station or your computer.
z Tips
• Your camcorder is compatible with Hi-Speed
USB (USB 2.0). You can transfer data at a faster
rate using a computer compatible with Hi-Speed
USB (USB 2.0). When you connect a USB
interface not compatible with Hi-Speed USB
(USB 2.0), the data transfer ratio will be that of
USB 1.1 (USB Full-Speed).