EasyManuals Logo

Sony DSLR-A200 Instruction Manual (DSLR-A200) User Manual

Sony DSLR-A200 Instruction Manual (DSLR-A200)
158 pages
To Next Page IconTo Next Page
To Previous Page IconTo Previous Page
Page #120 background imageLoading...
Page #120 background image
120
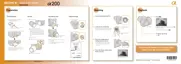
Stage 1: Connecting the camera and your computer
1 Insert a memory card with recorded images into the camera.
2 Insert the sufficiently charged battery pack in the camera, or
connect the camera to a wall outlet (wall socket) with the AC
Adaptor/charger (not supplied).
When you copy images to your computer using insufficient battery pack,
copying may fail or image data may become corrupted if the battery pack
shuts down too soon.
3 Turn on the camera and the computer.
4 Check that [USB connection] in 2 is set to [Mass Storage].
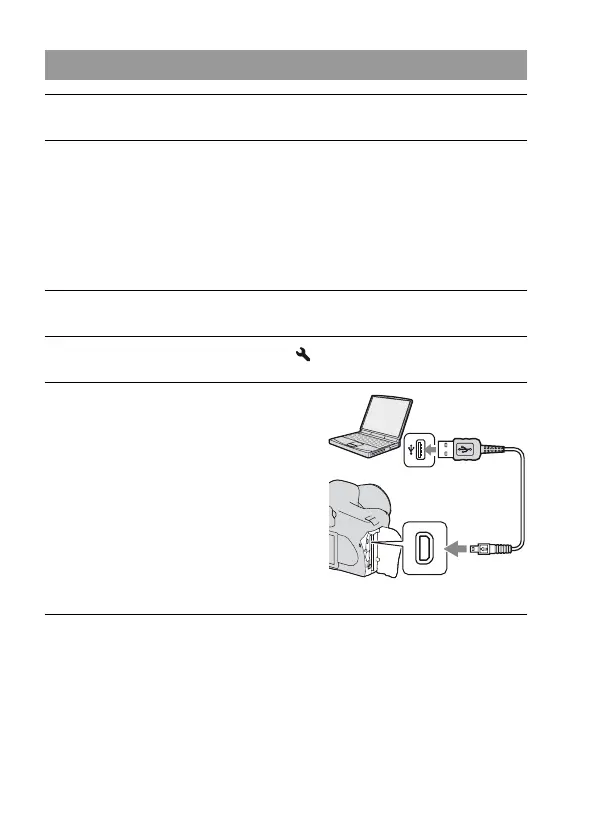
5 Connect the camera and your
computer.
The AutoPlay wizard appears on the
desktop.
1 To the USB
terminal
USB cable
2 To the
USB terminal

Table of Contents

Other manuals for Sony DSLR-A200 Instruction Manual (DSLR-A200)

Questions and Answers:

Question and Answer IconNeed help?

Do you have a question about the Sony DSLR-A200 Instruction Manual (DSLR-A200) and is the answer not in the manual?

Sony DSLR-A200 Instruction Manual (DSLR-A200) Specifications

General IconGeneral
ModelDSLR-A200
Effective Pixels10.2 megapixels
Sensor TypeCCD
Sensor Size23.6 x 15.8 mm
Autofocus Points9 points
Continuous Shooting Speed3 fps
LCD Screen Size2.7 inches
LCD Screen Resolution230, 400 dots
Viewfinder Coverage95%
Storage MediaCompactFlash Type I/II, Microdrive
TypeDigital SLR camera
ISO SensitivityISO 100-3200
Shutter Speed1/4000 to 30 sec
Viewfinder TypeOptical
Lens MountSony A-mount
BatteryNP-FM500H
Weight532 g (body only)
Dimensions130.8 x 98.5 x 71.3 mm

Related product manuals