EasyManuals Logo

Sony DSLR-A200 Instruction Manual (DSLR-A200) User Manual

Sony DSLR-A200 Instruction Manual (DSLR-A200)
158 pages
To Next Page IconTo Next Page
To Previous Page IconTo Previous Page
Page #135 background imageLoading...
Page #135 background image
135
Printing images
Printing images by connecting the
camera to a PictBridge compliant printer
Note
You cannot print RAW data files.
Note
It is recommended to use the AC Adaptor/charger (not supplied) to prevent the
power from turning off partway through printing.
Even if you do not have a computer, you
can print images shot using your camera
by connecting the camera directly to a
PictBridge compliant printer.
“PictBridge” is based on the CIPA
standard. (CIPA: Camera & Imaging
Products Association)
Stage 1: Setting the camera
1 MENU button t 2 t [USB connection] t [PTP]
2 Turn the camera off and insert the memory card that the images
have been recorded on.
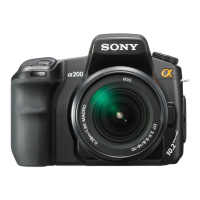
Table of Contents

Other manuals for Sony DSLR-A200 Instruction Manual (DSLR-A200)

Questions and Answers:

Question and Answer IconNeed help?

Do you have a question about the Sony DSLR-A200 Instruction Manual (DSLR-A200) and is the answer not in the manual?

Sony DSLR-A200 Instruction Manual (DSLR-A200) Specifications

General IconGeneral
ModelDSLR-A200
Effective Pixels10.2 megapixels
Sensor TypeCCD
Sensor Size23.6 x 15.8 mm
Autofocus Points9 points
Continuous Shooting Speed3 fps
LCD Screen Size2.7 inches
LCD Screen Resolution230, 400 dots
Viewfinder Coverage95%
Storage MediaCompactFlash Type I/II, Microdrive
TypeDigital SLR camera
ISO SensitivityISO 100-3200
Shutter Speed1/4000 to 30 sec
Viewfinder TypeOptical
Lens MountSony A-mount
BatteryNP-FM500H
Weight532 g (body only)
Dimensions130.8 x 98.5 x 71.3 mm

Related product manuals