EasyManuals Logo

Sony DSLR-A200 Instruction Manual (DSLR-A200) User Manual

Sony DSLR-A200 Instruction Manual (DSLR-A200)
158 pages
To Next Page IconTo Next Page
To Previous Page IconTo Previous Page
Page #136 background imageLoading...
Page #136 background image
136
Stage 2: Connecting the camera to the printer
1 Connect the camera to the printer.
2 Turn on your camera and the printer.
The screen used for selecting images you want to print appears.
Stage 3: Printing
1 Select the image to print with b/B on the controller, then press
the center of the controller.
To cancel, press the center again.
2 Repeat step 1 if you want to print other images.
3 Press the MENU button and set up each item.
For details on setting items, see “PictBridge menu.”
4 Select [Print] t [OK] in the menu, then press the center of the
controller.
The image is printed.
After the screen indicating that the print is completed appears, press the
center of the controller.
2 To the
USB terminal
USB cable
1 To the
USB terminal
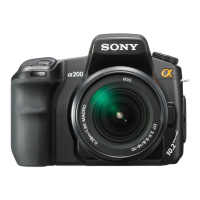
Table of Contents

Other manuals for Sony DSLR-A200 Instruction Manual (DSLR-A200)

Questions and Answers:

Question and Answer IconNeed help?

Do you have a question about the Sony DSLR-A200 Instruction Manual (DSLR-A200) and is the answer not in the manual?

Sony DSLR-A200 Instruction Manual (DSLR-A200) Specifications

General IconGeneral
ModelDSLR-A200
Effective Pixels10.2 megapixels
Sensor TypeCCD
Sensor Size23.6 x 15.8 mm
Autofocus Points9 points
Continuous Shooting Speed3 fps
LCD Screen Size2.7 inches
LCD Screen Resolution230, 400 dots
Viewfinder Coverage95%
Storage MediaCompactFlash Type I/II, Microdrive
TypeDigital SLR camera
ISO SensitivityISO 100-3200
Shutter Speed1/4000 to 30 sec
Viewfinder TypeOptical
Lens MountSony A-mount
BatteryNP-FM500H
Weight532 g (body only)
Dimensions130.8 x 98.5 x 71.3 mm

Related product manuals