11
Note: Confirm each contents of this section first of all. If the results are
not satisfied, do the adjustment.
1. Demagnetize the record/playback head with a head demagne-
tizer.
2. Do not use a magnetized screwdriver for the adjustments.
3. After the adjustments, apply suitable locking compound to the
parts adjust.
4. The adjustments should be performed with the rated power
supply voltage unless otherwise noted.
5. The adjustments should be performed in the order given in
this service manual. (As a general rule, playback circuit ad-
justment should be completed before performing recording
circuit adjustment)
6. The adjustments should be performed for both L-CH and R-
CH.
7. Switches and controls should be set as follows unless other-
wise specified.
• Test Tape
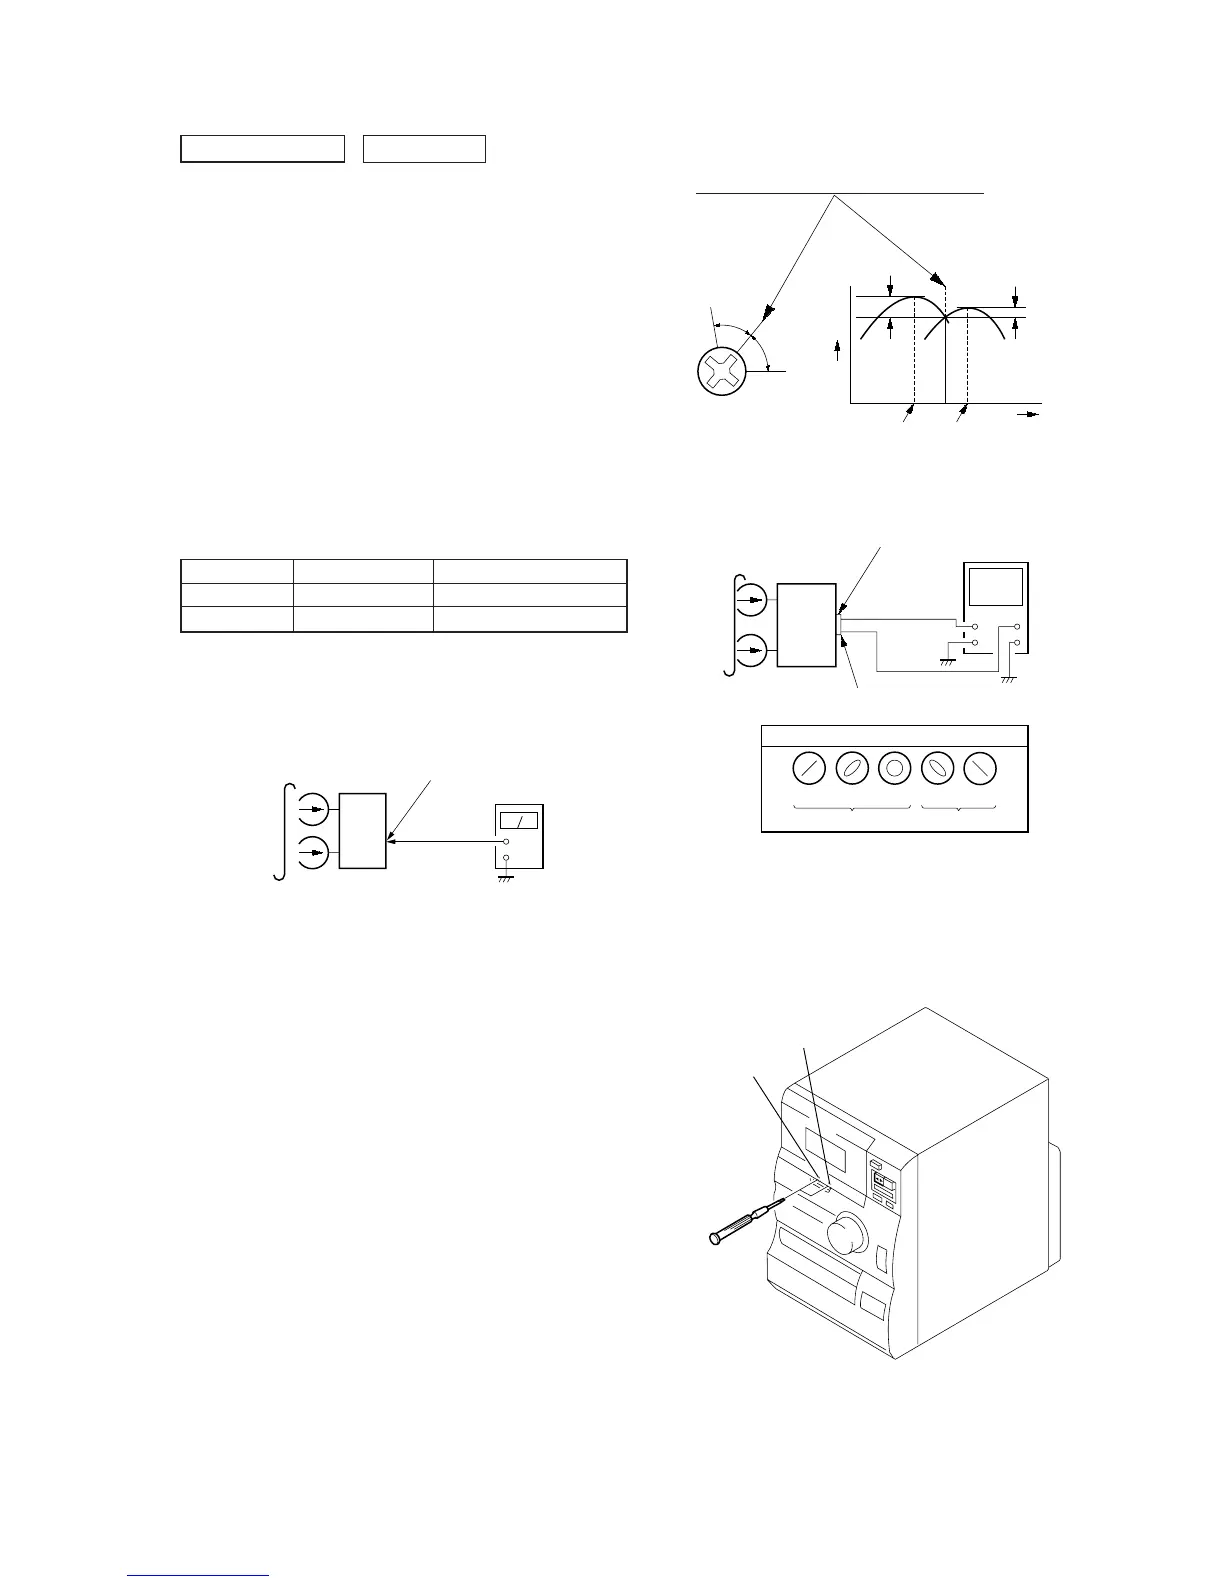
Record/Playback Head Azimuth Adjustment
Procedure:
1. Mode: Playback
SECTION 4
ELECTRICAL CONFIRMATIONS AND ADJUSTMENTS
0 dB=0.775 V
DECK SECTION
Tape Signal Used for
P-4-A100 10 kHz, –10 dB Azimuth Adjustment
P-4-L300 315 Hz, 0 dB Level Adjustment
set
MAIN board
LINE OUT jack (PJ301)
L-CH, R-CH
+
–
level mete
test tape
P-4-A100
(10 kHz, –10 dB)
Screw
position
L-CH
peak
within
1dB
Output
level
L-CH
peak
R-CH
peak
within
1dB
Screw
position
R-CH
peak
2. Turn the adjustment screw and check output peaks. If the peaks
do not match for L-CH and R-CH, turn the adjustment screw
so that outputs match within 1dB of peak.
3. Mode: Playback
4. Repeat step 1 to 3 in playback (REV) mode.
5. After the adjustments, apply suitable locking compound to the
pats adjusted.
Adjustment Location:
test tape
P-4-A100
(10 kHz, –10 dB)
R-CH
oscilloscope
L-CH
R-CH
V
H
waveform of oscilloscope
in phase 45
°
90
°
135
°
180
°
good
wrong
MAIN board
LINE OUT jack (PJ301)
L-CH
set
forward
reverse


 To Next Page