2-5
S MIC Chassis
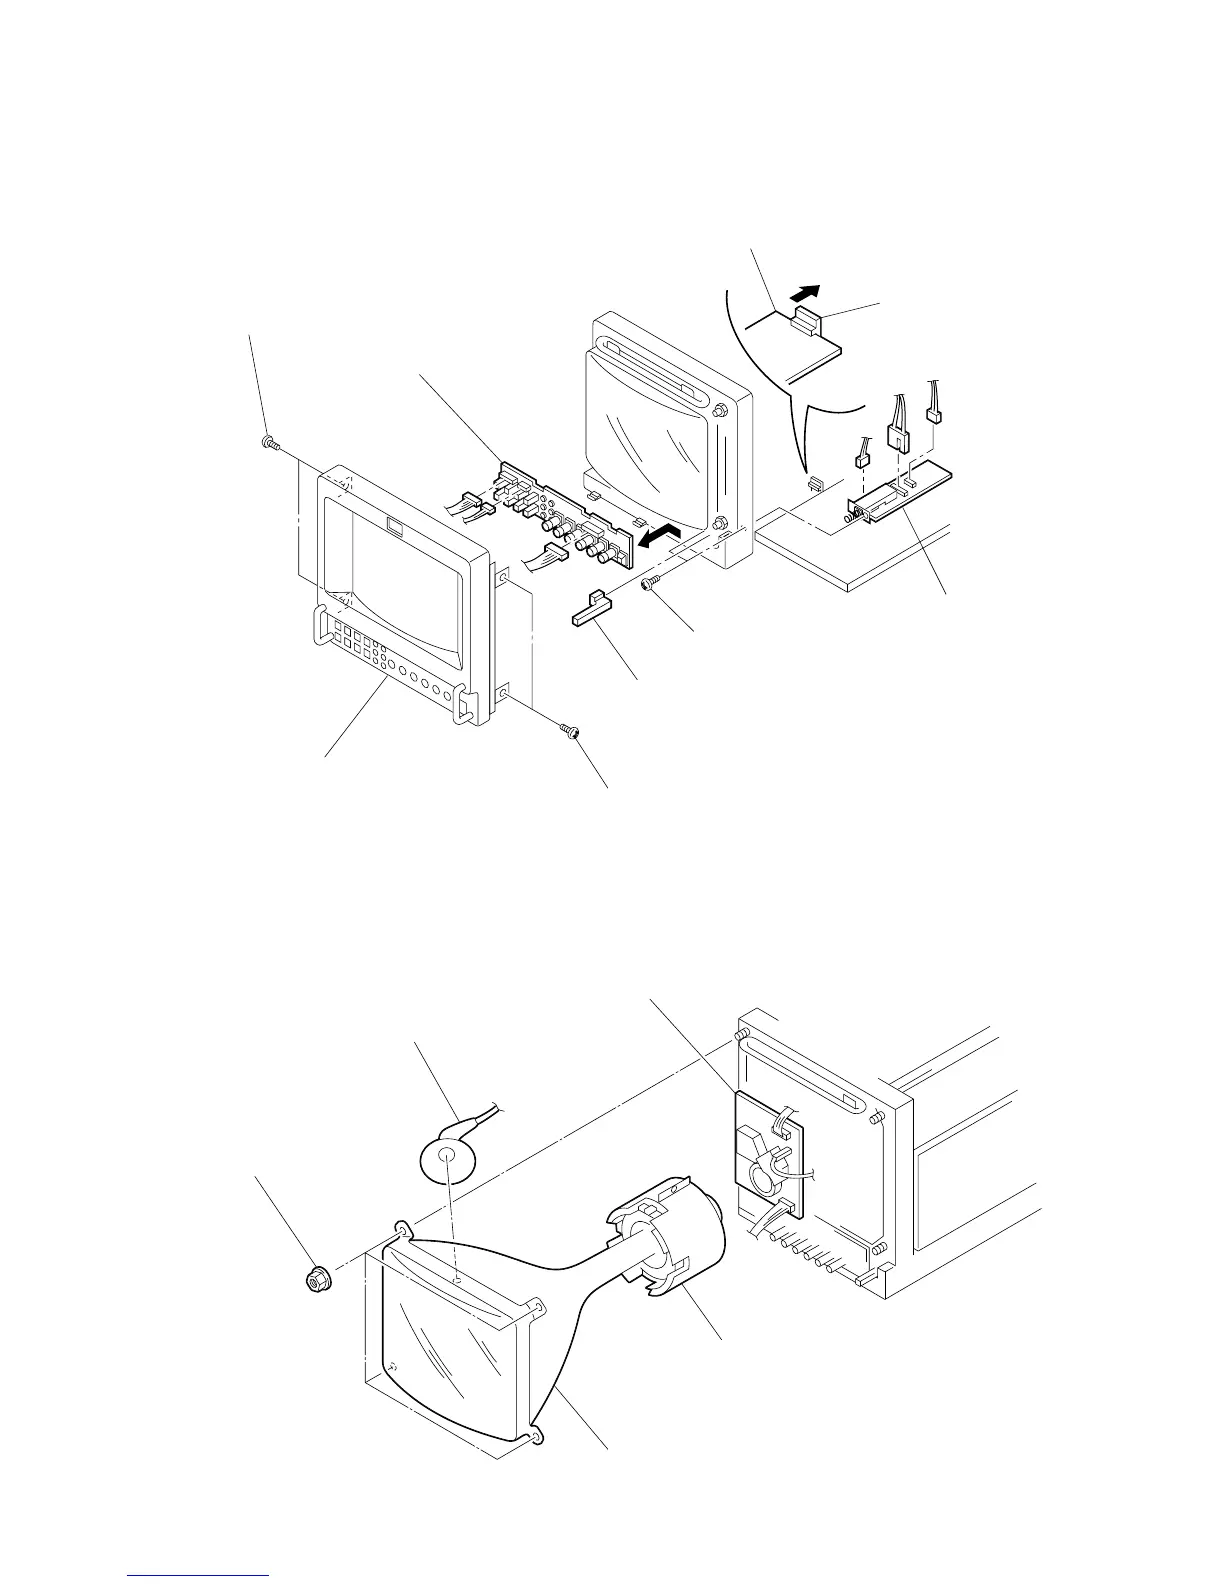
2-2-7. HA Board Removal
2-2-8. CRT Removal
2 Remove the two screws (BVTP3 x 8).
1 Remove the two screws (BVTP3 x 8).
6 Remove the two screws (PSW3 x 10).
7 F
A
board
F
A
board
7 Unhook the claw.
5 Remove the power switch.
3 Remove the front panel assembly.
4 Remove the H
A
board.
CN603
CN002
CN001
CN601
CN602
4 Remove the four nuts.
1 Remove the anode cap.
3 Remove the deflection yoke.
5 Remove the CRT.
2 C
A board
 Loading...