Preparing the Audio Input System
45
Chapter 2 Preparations
channel on which you want to record
the audio from this microphone to
FRONT.
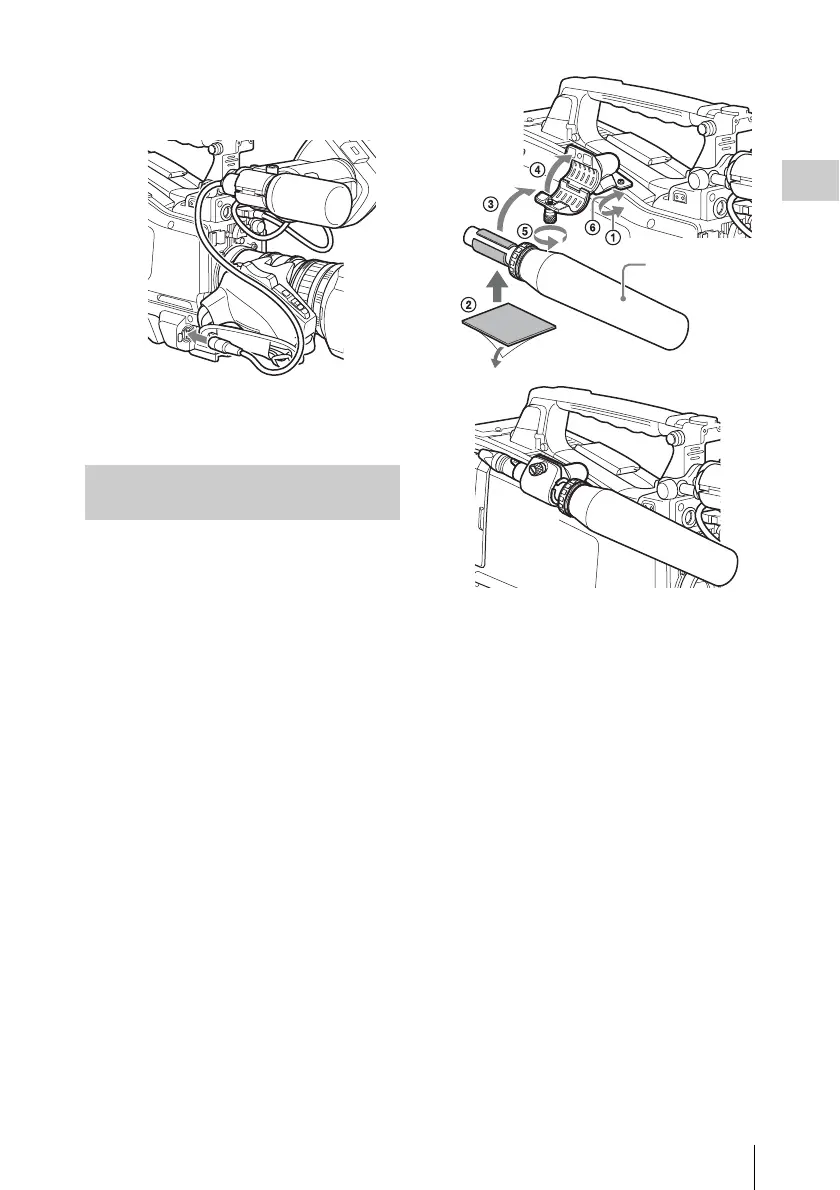
4 Secure the microphone cable with the
cable clamp.
You can connect up to two monaural
microphones to the AUDIO IN CH1/CH2
connectors, using an optional CAC-12
Microphone Holder.
The following is the procedure for attaching an
electret condenser microphone such as the ECM-
674/678.
On how to attach the CAC-12, refer to the operation
manual for the CAC-12.
1 Attach the electret condenser
microphone.
1 Loosen the ball joint lock lever.
2 Wind the microphone spacer (sheet
type, supplied with the microphone)
around the microphone, while peeling
off the protective sheets on both sides
of the microphone spacer.
3 Place the microphone in the holder so
that “UP” is at the top.
4 Close the microphone holder.
5 Tighten the screw.
6 Position so that the microphone does
not interfere with the viewfinder and
tighten the ball joint lock lever.
2 Connect the microphone cable to the
AUDIO IN CH-1 or CH-2 connector.
3 Set the switches as follows.
• Set the AUDIO IN selectors indicated
below, depending on the power supply type
of the microphone.
Internal power supply: MIC
External power supply: +48V
• Set the AUDIO IN CH-1/CH-2 switch for
the channel to which the microphone is
connected to REAR.
Connecting Microphones to the
AUDIO IN Connectors
Microphone