Adjustment Using the Menus
26
[Phase]
Press the button to display the adjustment screen and
adjust the color tones. Press again to hide the adjustment
screen. However, the color tones remain adjustable. Turn
the menu selection control right to increase the green
tone, or left to increase the purple tone.
[Aperture]
Press the button to display the adjustment screen and
sharpen the picture outline. Press again to hide the
adjustment screen. However, the picture sharpness
remains adjustable. Turn the menu selection control
right to make the picture sharper, or left to make the
picture softer.
[Volume]
Press the button to display the adjustment screen and
adjust the volume. Press again to hide the adjustment
screen. However, the volume remains adjustable. Turn
the menu selection control right to increase the volume,
or left to decrease it.
[Closed Caption]
Press the button to display the closed caption. Set the
closed caption setting in the [Closed Caption Setting]
menu (see page 30).
[Flicker Free]
Press the button to change the flicker free setting.
[User Preset1]
[User Preset2]
[User Preset3]
[User Preset4]
[User Preset5]
Press the button to load the settings saved in the User
Preset. You can check the setting status of the User Preset
in [User Preset Status] (page 21) in the [User Preset
Setting] menu. The saving of the User Preset is
performed in [Save] (page 21) in the [User Preset
Setting] menu.
[Line Doubler]
Press the button to check the IP conversion with the Line
Doubler when displaying the interlace signal. Regardless
of the field, the interpolation that draws two lines in the
order that each data arrives is performed. This function
can be used to check the line flicker when creating a
telop as the line flicker can be seen.
When [Line Doubler] is set to on, the scan setting is
disabled and changes to the native mode.
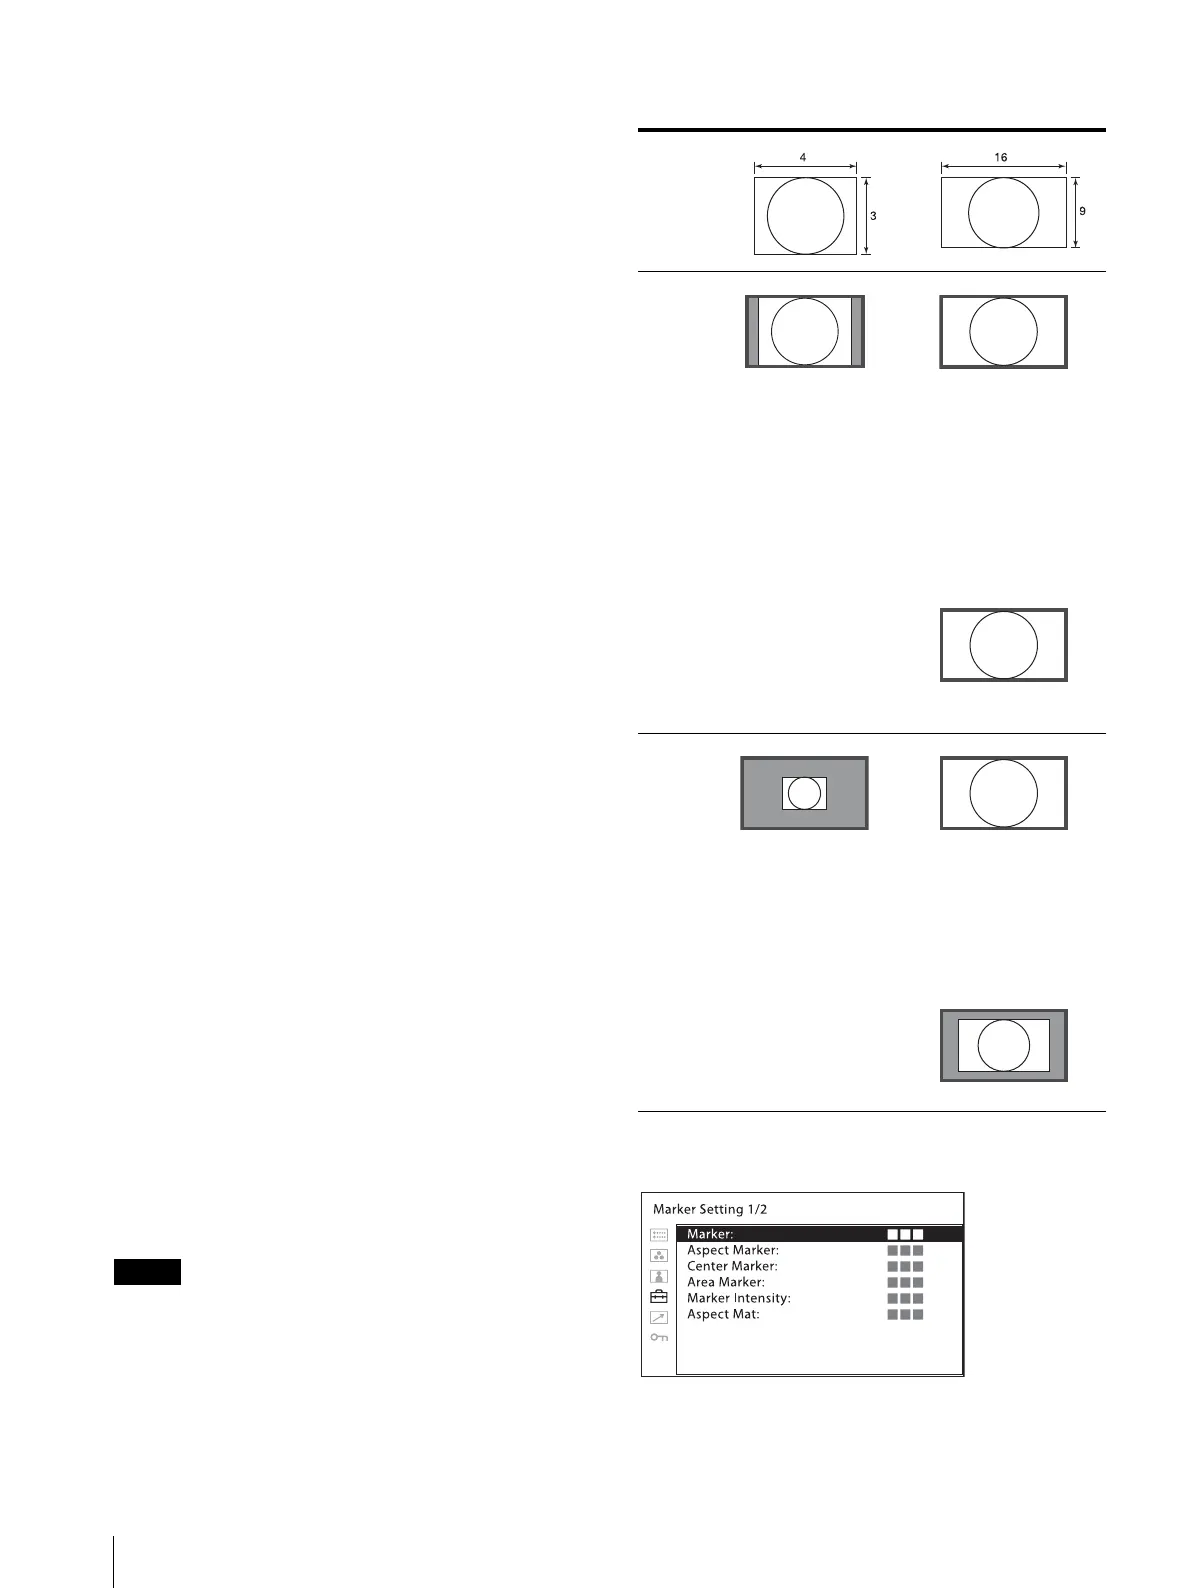
Scan mode image
[Marker Setting]
InputNormal scan
(zeroscan)
480i, 575i, 480p, 576p
Vertical pixels are set to
1080 and horizontal
pixels are displayed with
scaling to the appropriate
aspect ratio.
When an NTSC or PAL
signal is input, the screen
may appear small
depending on the signal.
480i, 575i, 480p, 576p
Horizontal pixels are set
to 1920 and vertical pixels
are displayed with scaling
to the appropriate aspect
ratio.
When an NTSC or PAL
signal is input, the screen
may appear small
depending on the signal.
1080i, 1080PsF, 1080p,
720p
Native scan
480i, 575i, 480p, 576p
Displays the original
video signal pixels. If a
format other than 640 ×
480p is input, the screen
will not be displayed in
the appropriate aspect
ratio.
1080i, 1080PsF, 1080p
720p