EasyManua.ls Logo

Sony STR-AV1000 - Video Tape Editing

Sony STR-AV1000
42 pages
Print Icon
To Next Page IconTo Next Page
To Previous Page IconTo Previous Page
Loading...
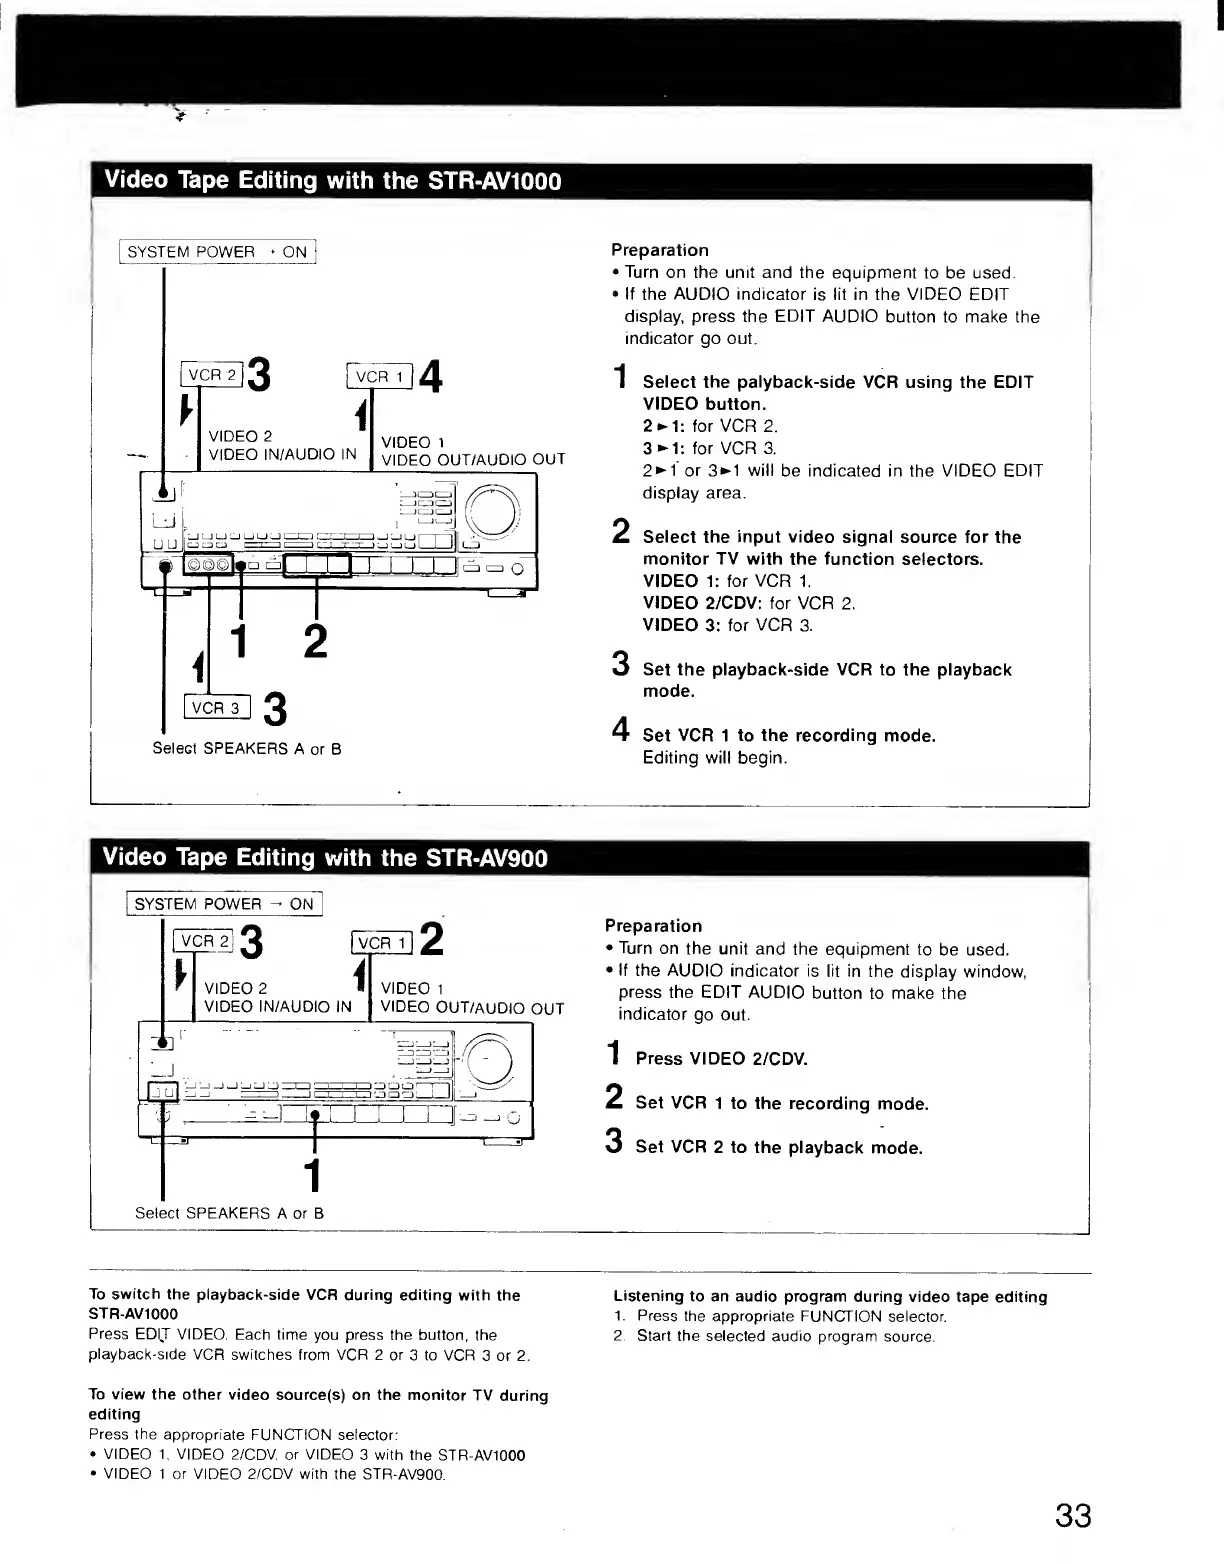
Video
Tape
Editing
with
the
STR-AV1000
Select
SPEAKERS
A
or
B
Preparation
•
Turn
on
the
unit
and
the
equipment
to
be
used.
•
If
the
AUDIO
indicator
is
lit
in
the
VIDEO
EDIT
display,
press
the
EDIT
AUDIO
button
to
make
the
indicator
go
out.
1
Select
the
palyback-side
VCR
using
the
EDIT
VIDEO
button.
2^1:
tor
VCR
2.
3
►
I
:
for
VCR
3.
2^1
or
3^1
will
be
indicated
in
the
VIDEO
EDIT
display
area.
2
Select
the
input
video
signal
source
for
the
monitor
TV
with
the
function
selectors.
VIDEO
1:
for
VCR
1.
VIDEO
2/CDV:
for
VCR
2
VIDEO
3:
for
VCR
3.
3
Set
the
playback-side
VCR
to
the
playback
mode.
4
Set
VCR
1
to
the
recording
mode.
Editing
will
begin.
Video
Tape
Editing
with
the
STR-AV900
SYSTEM
POWER
-
ON
Preparation
•
Turn
on
the
unit
and
the
equipment
to
be
used.
•
If
the
AUDIO
indicator
is
lit
in
the
display
window,
press
the
EDIT
AUDIO
button
to
make
the
indicator
go
out.
1
Press
VIDEO
2/CDV.
2
Set
VCR
1
to
the
recording
mode.
3
Set
VCR
2
to
the
playback
mode.
Listening
to
an
audio
program
during
video
tape
editing
1
Press
the
appropriate
FUNCTION
selector.
2.
Start
the
selected
audio
program
source.
To
view
the
other
video
source(s)
on
the
monitor
TV
during
editing
Press
the
appropriate
FUNCTION
selector:
•
VIDEO
1,
VIDEO
2/CDV
or
VIDEO
3
with
the
STR-AV1000
•
VIDEO
1
or
VIDEO
2/CDV
with
the
STR-AV900.
To
switch
the
playback-side
VCR
during
editing
with
the
STR-AV1000
Press
EDIT
VIDEO.
Each
time
you
press
the
button,
the
playback-side
VCR
switches
from
VCR
2
or
3
to
VCR
3
or
2.