Help Guide
Multi Channel AV Receiver
STR-AZ1000ES
Before you perform Auto Calibration
Set up and connect the speakers.
Disconnect the headphones.
Remove any obstacles between the calibration microphone and the speakers.
Do not connect any microphones other than the supplied calibration microphone to the CALIBRATION MIC jack.
When [Bluetooth Mode] is set to [Transmitter], cancel the setting before performing Auto Calibration.
For accurate measurement, make sure the environment is quiet and free from noise.
Set the speaker output to a setting other than [SPK OFF]. See “Selecting the front speakers.”
If using a bi-amplifier connection or speakers with a front B connection, set the assignment for the SPEAKERS SURROUND
BACK/HEIGHT (FRONT B/BI-AMP/ZONE 3) terminals properly. For details, see “Assigning the surround back speaker terminals
(Surround Back Speaker Assign).”
Note
The speakers emit very loud sound during the calibration and the volume cannot be adjusted. Be considerate of your neighbors and any children who
are present.
If the muting function has been activated before you perform Auto Calibration, the muting function will shut off automatically.
It may not be possible to take the correct measurements or to perform Auto Calibration at all if special speakers such as dipole speakers are used.
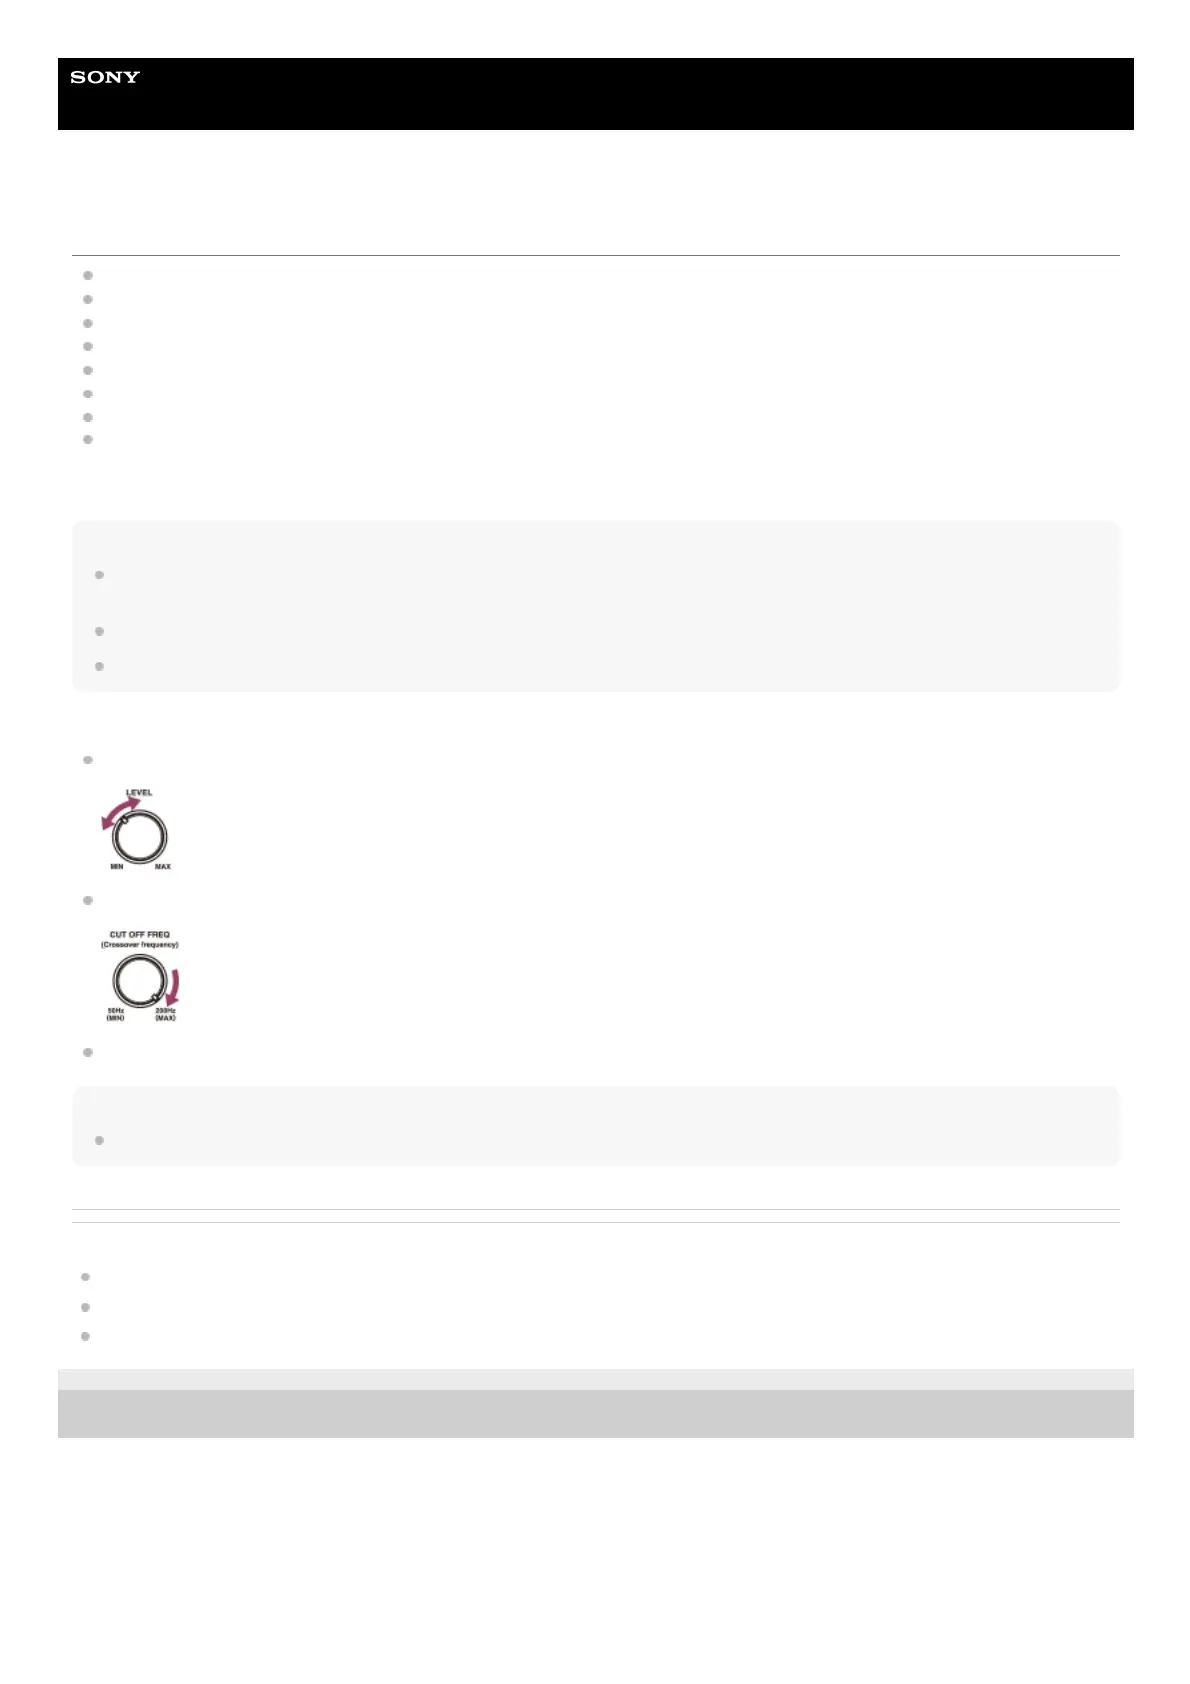
Confirming the subwoofer setup
Before using a subwoofer, turn on the subwoofer and turn up the volume. Turn the LEVEL to just before the mid-point.
When a subwoofer with a crossover frequency function is connected, set the value to maximum.
When a subwoofer with an auto standby function is connected, set it to off (deactivated).
Note
Depending on the characteristics of the subwoofer you are using, the setup distance value may be different from the actual position.
Related Topic
Connecting the calibration microphone
Selecting the speaker pattern (Speaker Pattern)
Assigning the surround back speaker terminals (Surround Back Speaker Assign)
5-037-020-11(1) Copyright 2022 Sony Corporation
 Loading...