13
Chapter 1 Overview
SHIFT ON (LEDs of function buttons in orange)
16:9 button: When this button is pushed in (ON), the aspect ratio changes to
16:9, and when set to OFF, the aspect ratio changes to 4:3.
SYNC button: When this button is pushed in (ON), the monitor synchronizes
to the sync signal input to the SYNC connectors on the rear panel (EXT
SYNC). When set to OFF, it synchronizes to the sync signal included in
the signals being monitored (INT SYNC).
Notes
• When INT SYNC is selected, use a component or YC signals including a
sync signal on the Y signal, and use RGB signal including a sync signal
on the G signal.
• To monitor serial digital signals, select INT SYNC.
BLUE ONLY button: When this button is pushed in (ON), red and green
signals are cut, and only the blue signal is displayed as a monochrome
picture. It makes it easy to adjust CHROMA and to check VTR noise.
R/G/B buttons: When these buttons are pushed in (ON), R(red), G(green),
and B(blue) beams are cut respectively.
F3/F4 buttons: For future expansion.
SAFE AREA button: When this button is pushed in (ON), a safe area is
displayed on the screen.
14
Chapter 1 Overview
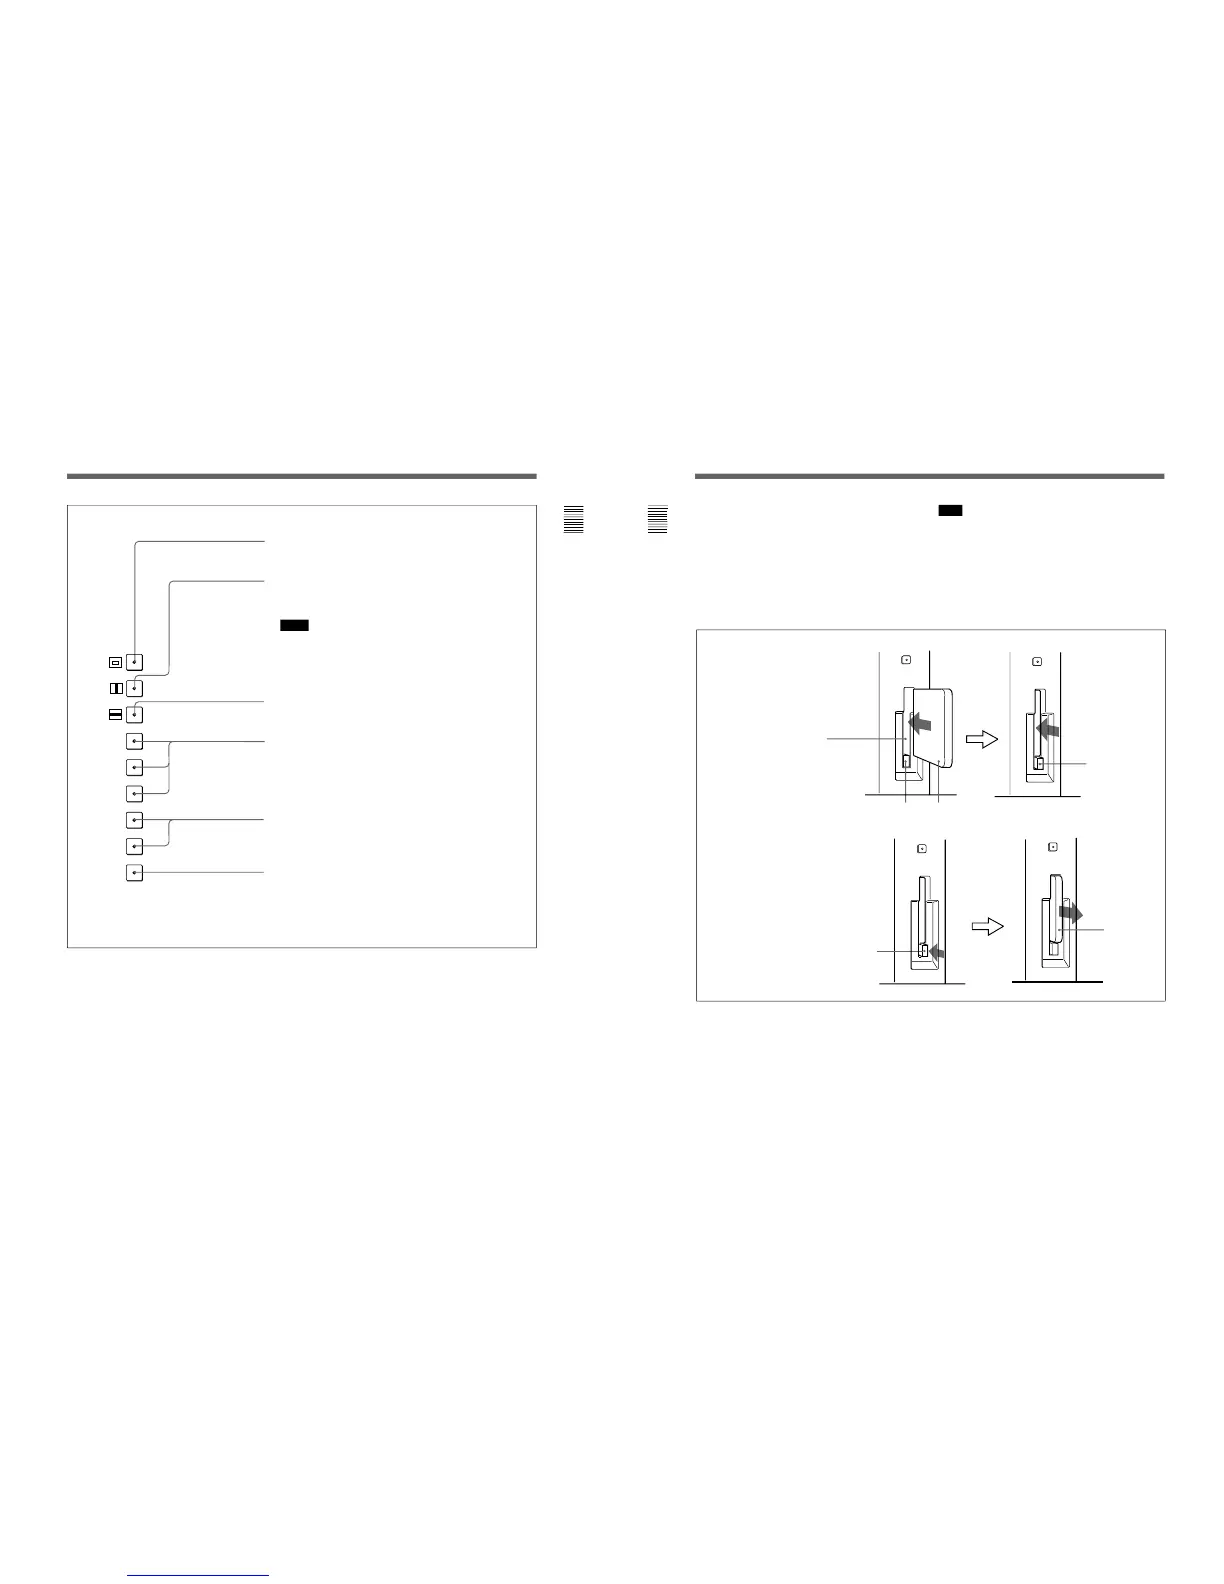
To insert the BKM-12Y Monitor Memory Card
EJECT button
Monitor memory card insertion slot
Monitor memory card
Be careful not to let your hands
touch the connectors on the front
edge of the monitor memory card.
Push the monitor
memory card in
until the EJECT
button comes out.
To eject the BKM-12Y Monitor Memory Card
EJECT button
Press the EJECT button to eject
the monitor memory card.
Take out the
monitor memory
card.
!™ Monitor Memory Card slot
Insert the BKM-12Y Monitor Memory Card
(optional).
For information about operations on monitor memory card
data, see “Monitor Memory Card Data Operations —
MEMORY CARD menu” on page 46.
Proceed as illustrated to insert and eject the BKM-12Y
Monitor Memory Card.
!£ OPTION connector
Connector for expansion.
Location and Function of Parts
Note
Do not eject the monitor memory card while data is
being saved or loaded.