41
Chapter 2 Menu
The ON SCREEN SET menu is used to select the type
of information that will be displayed on the screen and
how that information will be displayed. The types of
information that can be set are as follows.
Setting the Screen Display (SET UP 5) —
ON SCREEN SET Menu
Overview
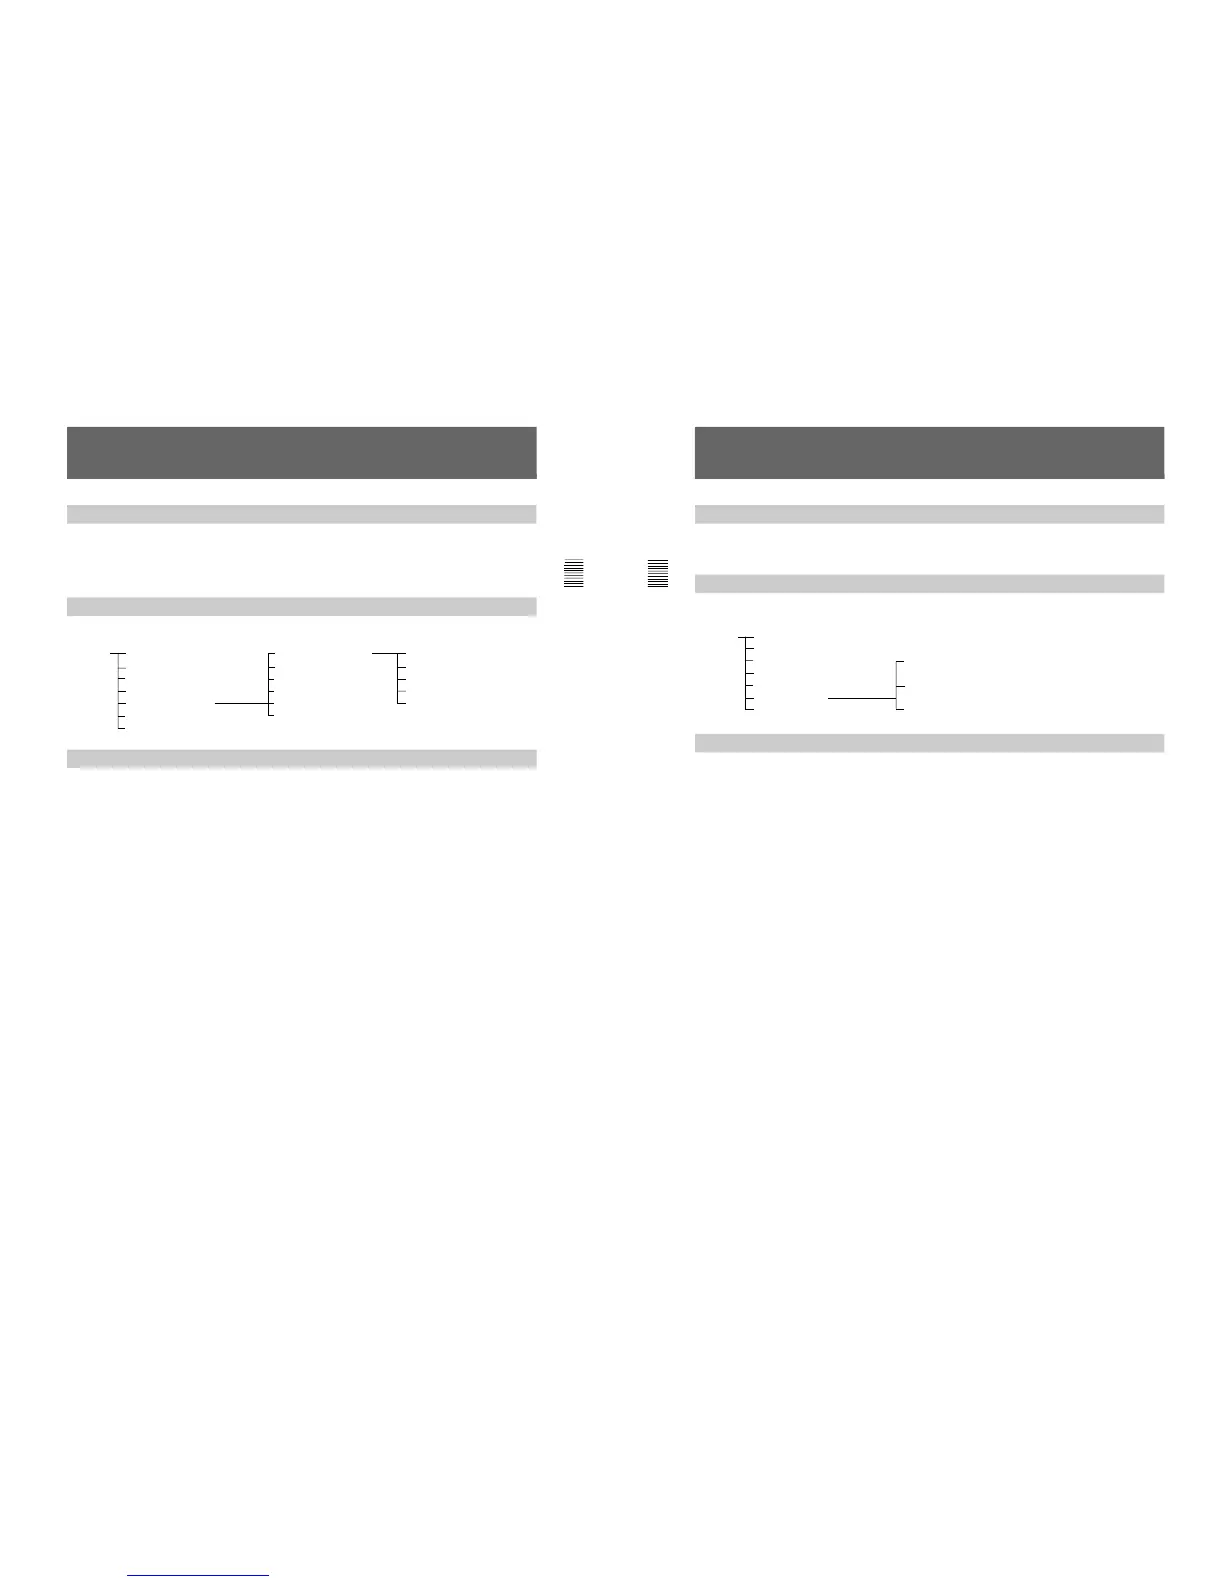
Structure of the ON SCREEN SET Menu
[C5]
Main Menu Level 1 Level 2 Level 3
SET UP C INPUT CONFIGURATION [C1] CAPTION VISION [C51] OFF
REMOTE [C2] ANCILLARY DATA CAPTION 1
PASSWORD [C3] CH NO [C52] CAPTION 2
SYSTEM CONFIGURATION [C4] CH NAME [C52] TEXT 1
ON SCREEN SET [C5] CH NO POSITION [C53] TEXT 2
ALIGNMENT [C6] CH NAME POSITION [C53]
EXTEND MENU [C7]
Setting Lists of the ON SCREEN SET Menu
This section explains the setting lists displayed in the
menu.
How to read the setting lists
•For purposes of explanation, each setting list is
preceded by a menu number. These numbers are not
displayed on the screen.
For more information about the menu number, see “About
menu numbers” on page 19.
•The arrow mark (÷) refers you to another setting list
that appears after you make the setting, or to an
operation that is carried out as a result of the setting.
When there is no arrow mark, the menu does not
have any sub-list.
[C5] ON SCREEN SET menu
Select items to be displayed on the screen.
CAPTION VISION: Select the caption display mode.
÷[C51]
ANCILLARY DATA: Select whether or not to
display the ancillary data in the serial digital signal
(OFF or ON).
CH NO: Select the display mode of the channel
number. ÷[C52]
CH NAME: Select the display mode of the channel
name. ÷[C52]
CH NO POSITION: Select the display position for
the channel number. ÷[C53]
CH NAME POSITION: Select the display position
for the channel name. ÷[C53]
[C51] CAPTION VISION menu
Select the caption display mode.
OFF: Not displayed
CAPTION 1: Displayed in Caption 1 mode.
CAPTION 2: Displayed in Caption 2 mode.
TEXT 1: Displayed in Text 1 mode.
TEXT 2: Displayed in Text 2 mode.
[C51] CH NO or CH NAME menu
Select the channel number and channel name display
mode.
AUTO: Disappear after displayed for a while.
ON: Displayed.
OFF: Not displayed.
[C52] CH NO POSITION or CH NAME NAME
POSITION menu
Select the display position.
TL: Top left
TC: Top center
TR: Top right
BL: Bottom left
BC: Bottom center
BR: Bottom right
•Caption vision
•SDI signal ancillary data blanking (when using the
BKM-20D/21D)
•Channel number and name
42
Chapter 2 Menu
The ALIGNMENT menu is used for adjusting
convergence and geometry.
Structure of the ALIGNMENT Menu
[C6]
Convergence Adjustments (SET UP 6) —
ALIGNMENT Menu
Overview
Main Menu Level 1 Level 2
SET UP C INPUT CONFIGURATION [C1]
REMOTE [C2]
PASSWORD [C3] ROTATION (1/3)
SYSTEM CONFIGURATION [C4]
ON SCREEN SET [C5] H STATIC CONV (2/3)
ALIGNMENT [C6]
EXTEND MENU [C7] H CV R C (3/3)
Setting Lists of the ALIGNMENT Menu
This section explains the setting lists displayed in the
menu.
How to read the setting lists
•For purposes of explanation, each setting list is
preceded by a menu number. These numbers are not
displayed on the screen.
For more information about the menu number, see “About
menu numbers” on page 19.
•The arrow mark (÷) refers you to another setting list
that appears after you make the setting, or to an
operation that is carried out as a result of the setting.
When there is no arrow mark, the menu does not
have any sub-list.
[C6] ALIGNMENT menu (1/3)
Adjust each item with the UP and DOWN buttons or
PHASE knob.
ROTATION: Compensates for the screen rotation
which occurs when the monitor is installed facing
north or south.
V SIZE: Adjust the height of the picture.
V CENTER: Adjust the vertical picture position.
H SIZE: Adjust the width of the picture.
H PHASE: Adjust the horizontal picture position.
H PIN: Correct side pincushion distortion.
H KEY: Correct trapezoid distortion.
SUB CONTRAST: Adjust the center value of the
contrast when the image size is changed.
This item can not be selected when 4:3-NORM is
selected in the SCREEN MODE menu.
...
...
 Loading...


