– 8 –
KV-DA29M81
RM-W105
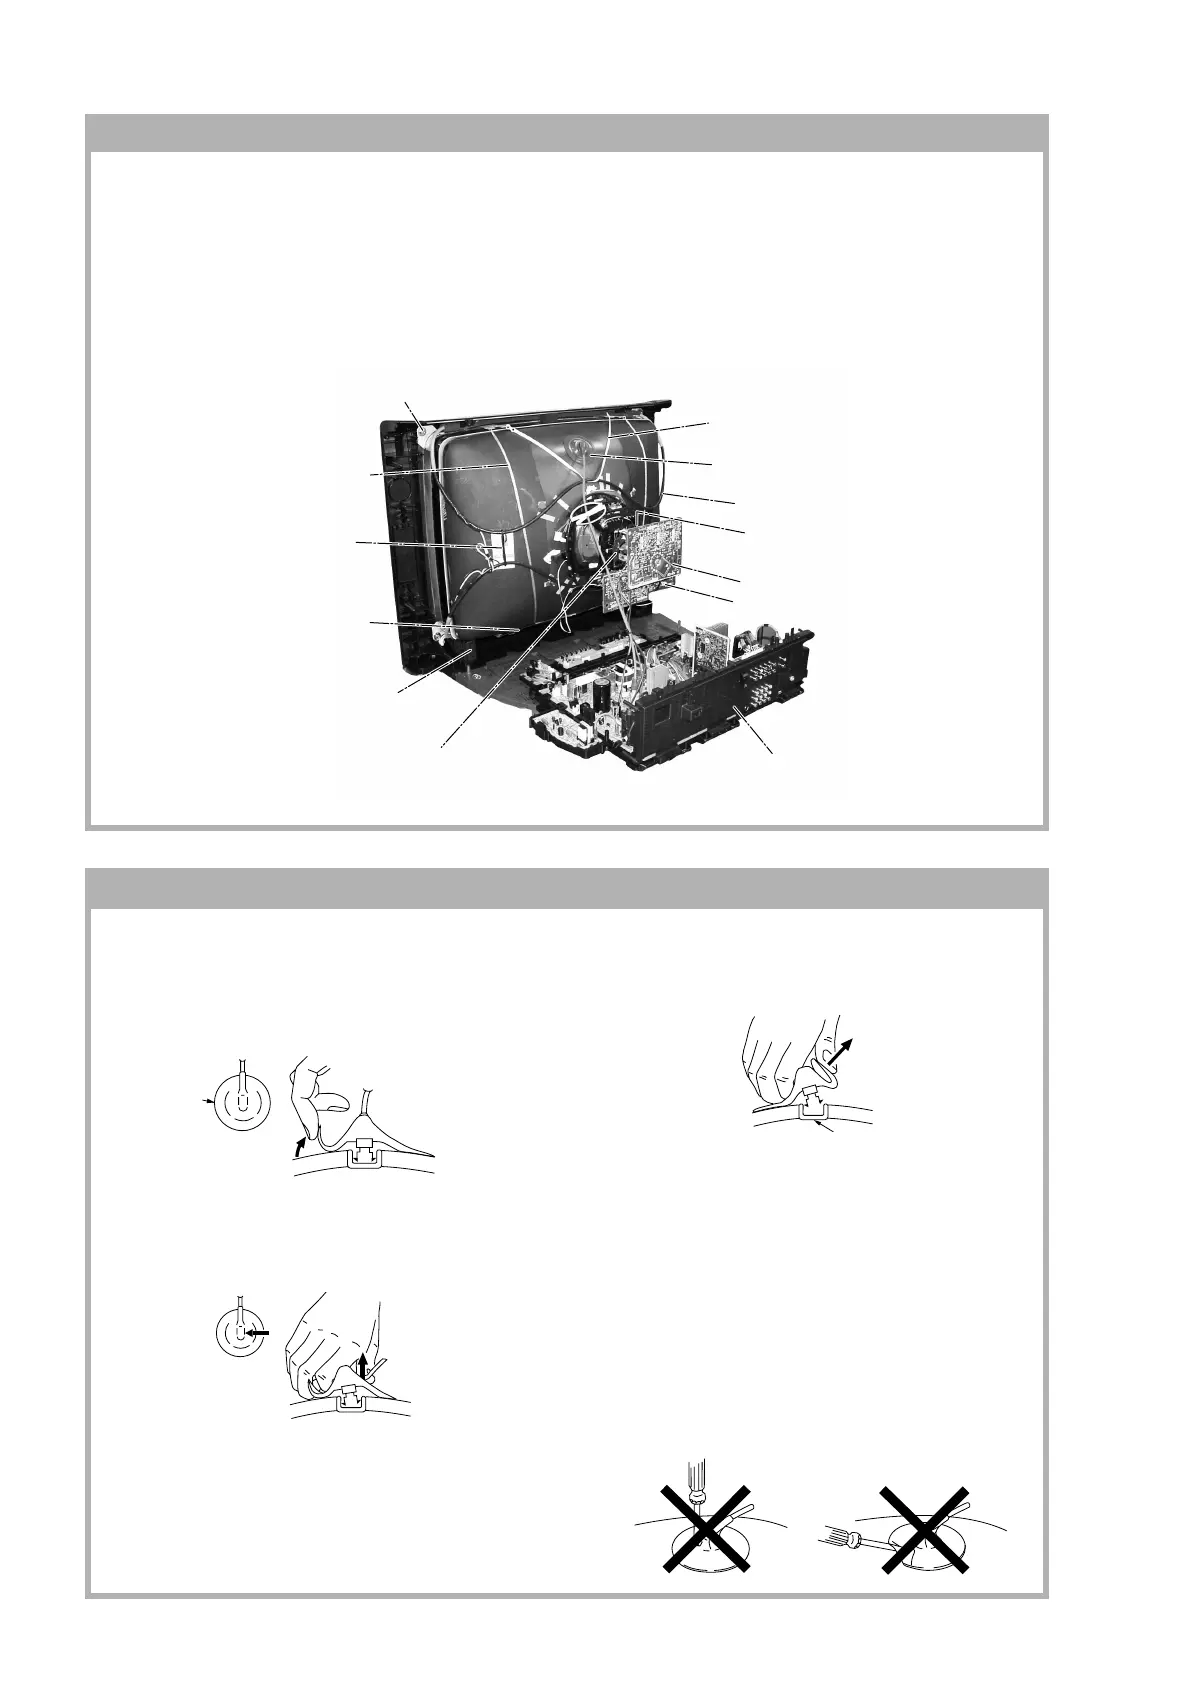
• REMOVAL OF ANODE-CAP
Note:
• After removing the anode, short circuit the anode of the picture tube and the anode cap to the metal chassis, CRT
shield or carbon paint on the CRT.
• REMOVING PROCEDURES
1 Turn up one side of the rubber cap in the direction
indicated by the arrow a.
2 Using a thumb pull up the rubber cap firmly in the direc-
tion indicated by the arrow b.
3 When one side of the rubber cap is separated from the
anode button, the anode-cap can be removed by
turning up the rubber cap and pulling it up in the
direction of the arrow c.
• HOW TO HANDLE AN ANODE-CAP
1 Do not damage the surface of anode-caps with
sharp shaped objects.
2 Do not press the rubber too hard so as not to
damage the inside of anode-cap.
A metal fitting called the shatter-hook terminal is
built into the rubber.
3 Do not turn the foot of rubber over too hard.
The shatter-hook terminal will stick out or damage
the rubber.
1-13. PICTURE TUBE REMOVAL
Note:
• Please make sure the TV set is not in standing position before removing necessary CRT support located on
bottom right and left.
• When removing the Nut Locking: first make sure to hold the Nut special CRT with a spanner while opening the Nut
Locking using a torque driver. Then proceed to remove the Nut special CRT using a torque driver.
1) Place the TV set with the CRT face down on a cushion (jig).
2) Removal the Rear Cover.
3) Unplug all interconnecting leads from the Deflection Yoke, Neck Assy, Degaussing Coils and CRT grounding strap.
!∞ Earth Coating Assy
5 Degaussing Coil
4 Anode Cap Removal
7 C Board Removal
8 VM Board Removal
9 Chassis Assy Removal
!£ Spring Tension(2)
Removal
!™
Support, CRT Removal (x2)
!¢ Holder, DGC
Removal (x2)
!§ Screw, Tapping 7 +
Crown Washer (4)
!º Loosen the Deflection Yoke
fixing screw and remove
!¶ Band, DGC Removal
6 Loosen the Neck Assembly
fixing screw and removal
a
a
b
b
c
Anode Button