83
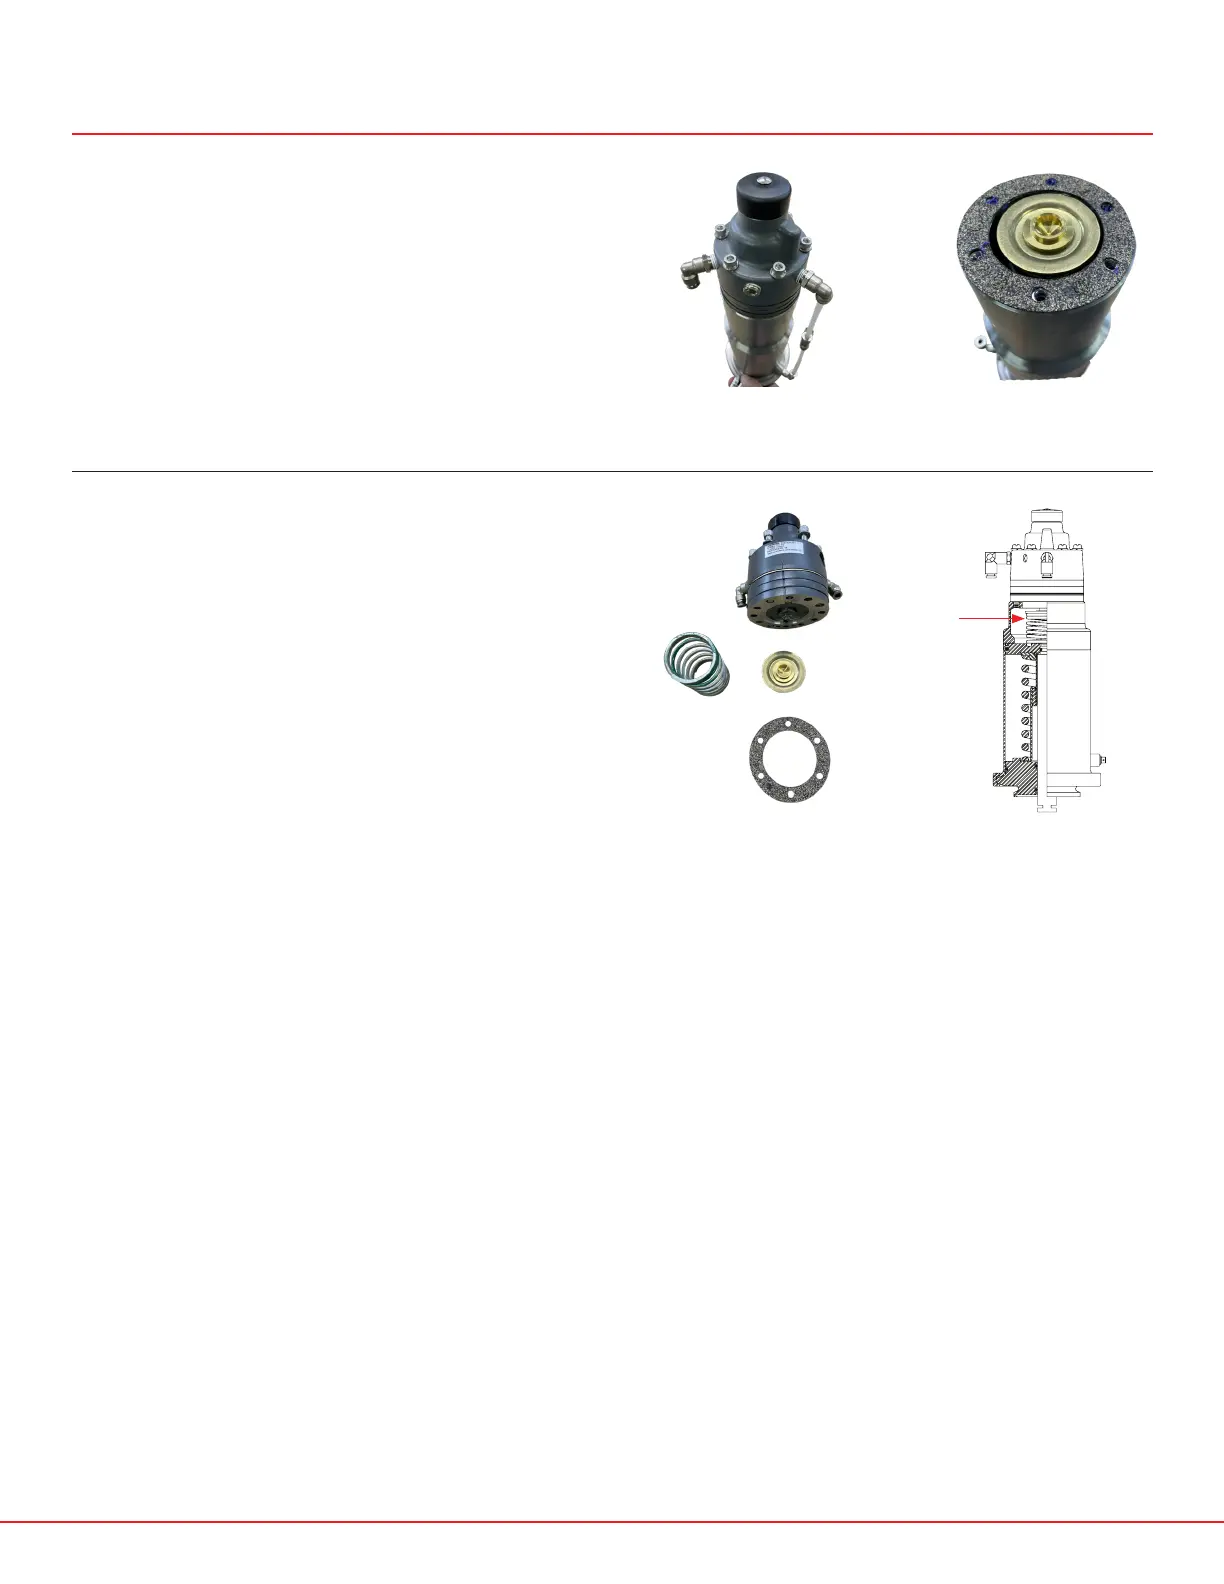
1. Remove the air hose using the push-to-connect
fittings. Remove the six screws holding the
Moore positioner on the actuator with a 3/16”
hex wrench. The Moore positioner will lift o of
the actuator.
FIG. 3 - MOORE POSITIONER
SOCKET HEAD CAP SCREWS
FIG. 4 - MOORE POSITIONER
CORK GASKET AND RANGE
SPRING CAP.
2. The cork gasket, range spring (see figure 6),
and brass range spring cap can be removed.
FIG. 5 - MOORE POSITIONER
ASSEMBLY REMOVED FROM
ACTUATOR ASSEMBLY.
MOORE POSITIONER REMOVAL
RANGE
SPRING
12395-X-1612
FIG. 6 - SP10VPD DIRECT ACTING
VALVE POSITIONER
 Loading...