Waukesha Cherry-Burrell Brand W60/W80 Valves Maintenance
08/2018 95-03022 Page 37
Seat Replacement
Standard Tef-Flow
™
Seat
Standard Tef-Flow
™
seats are white and can be cut for removal.
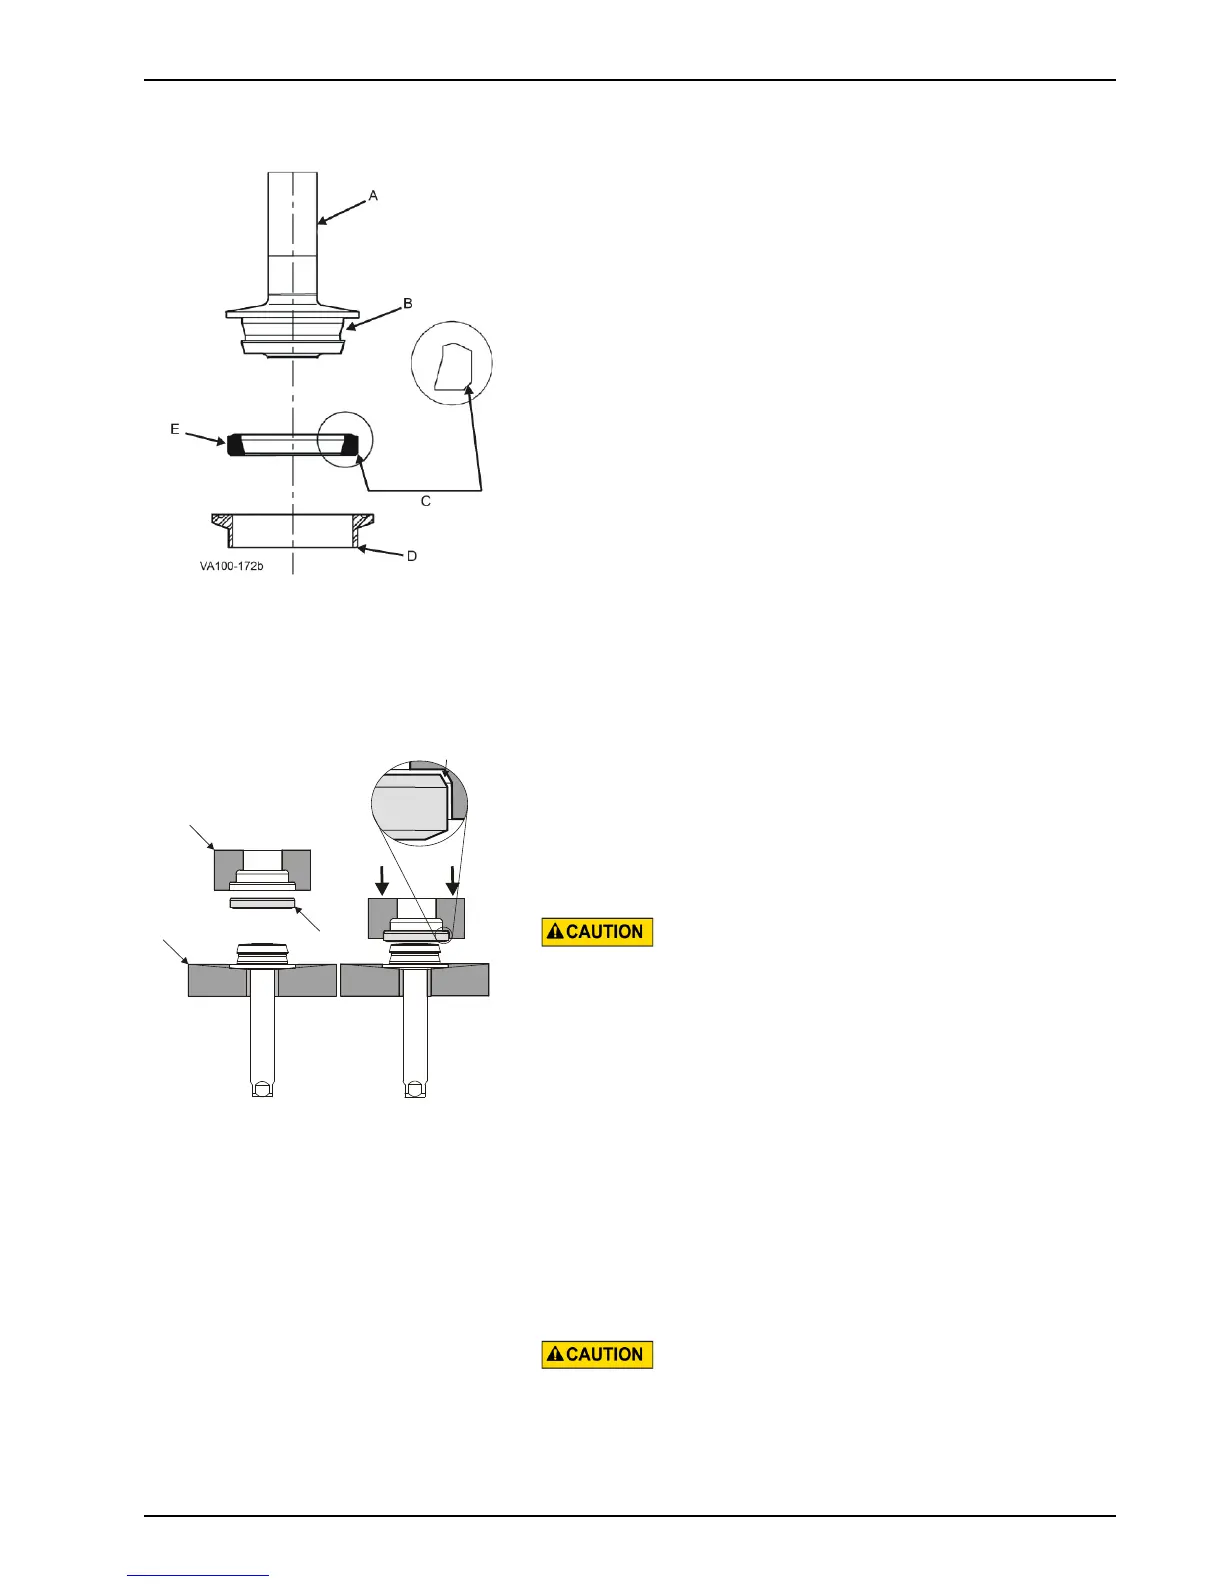
1. Place a piece of shim stock or a feeler gauge behind the seat
ring (Figure 28, item C) to prevent scratching the stem
surface.
2. Carefully cut through the seat ring with a utility knife.
3. Remove the seat ring (item C) from the stem (item A).
4. To install a new seat, place the seat ring on a standard S-
Line ferrule (item D) equal in size to the valve, or on the seat
ring tool as shown in Figure 28, item E.
5. Align the stem on the seat ring and apply pressure to snap
the seat into place.
6. The valve seat will spin freely when properly installed.
Tef-Flow
™
P Seat
Tef-Flow
™
P seats are gray and must be melted through for
proper removal.
1. Melt through the seat ring using a clean plastic cutting tip on
a heavy-duty soldering iron capable of maintaining a 700°F
(371°C) tip temperature.
Do not use a knife to cut the seat ring from the stem to avoid
personal injury and/or damage to the stem.
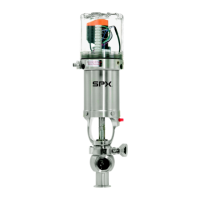
2. To install a new seat, place the installation tool base onto a
table or bench with a 1.0" (25 mm) hole (Figure 29, item B).
For tool part numbers, see “Installation Tools” on page 85.
3. Place the stem through the hole in the base.
4. Place a new seat ring (item C) onto the stem with the seat
angle (item D) and flat side facing away from the base as
shown in Figure 29.
5. Place the seat ring tool (Figure 29, item A) over the seat ring.
For tool part numbers, see “Installation Tools” on page 85.
6. Using an arbor press, apply a constant steady pressure to the
seat ring tool, snapping the seat ring into place.
DO NOT use a hammer to install.
7. The valve seat will spin freely when properly installed.
A. Stem
B. Stem Groove
C. Seat Angle
D. "S" Clamp
Ferrule
E. Seat Ring
Figure 28: Tef-Flow
™
Seat
Figure 29: Tef-Flow
™
P Seat
A
B
C