Shenzhen Sincevision Technology Co.Ltd
www.cnsszn.com
8
/
43
Quick Start Guide of SR Series ©2021 SSZN All Right Reserved
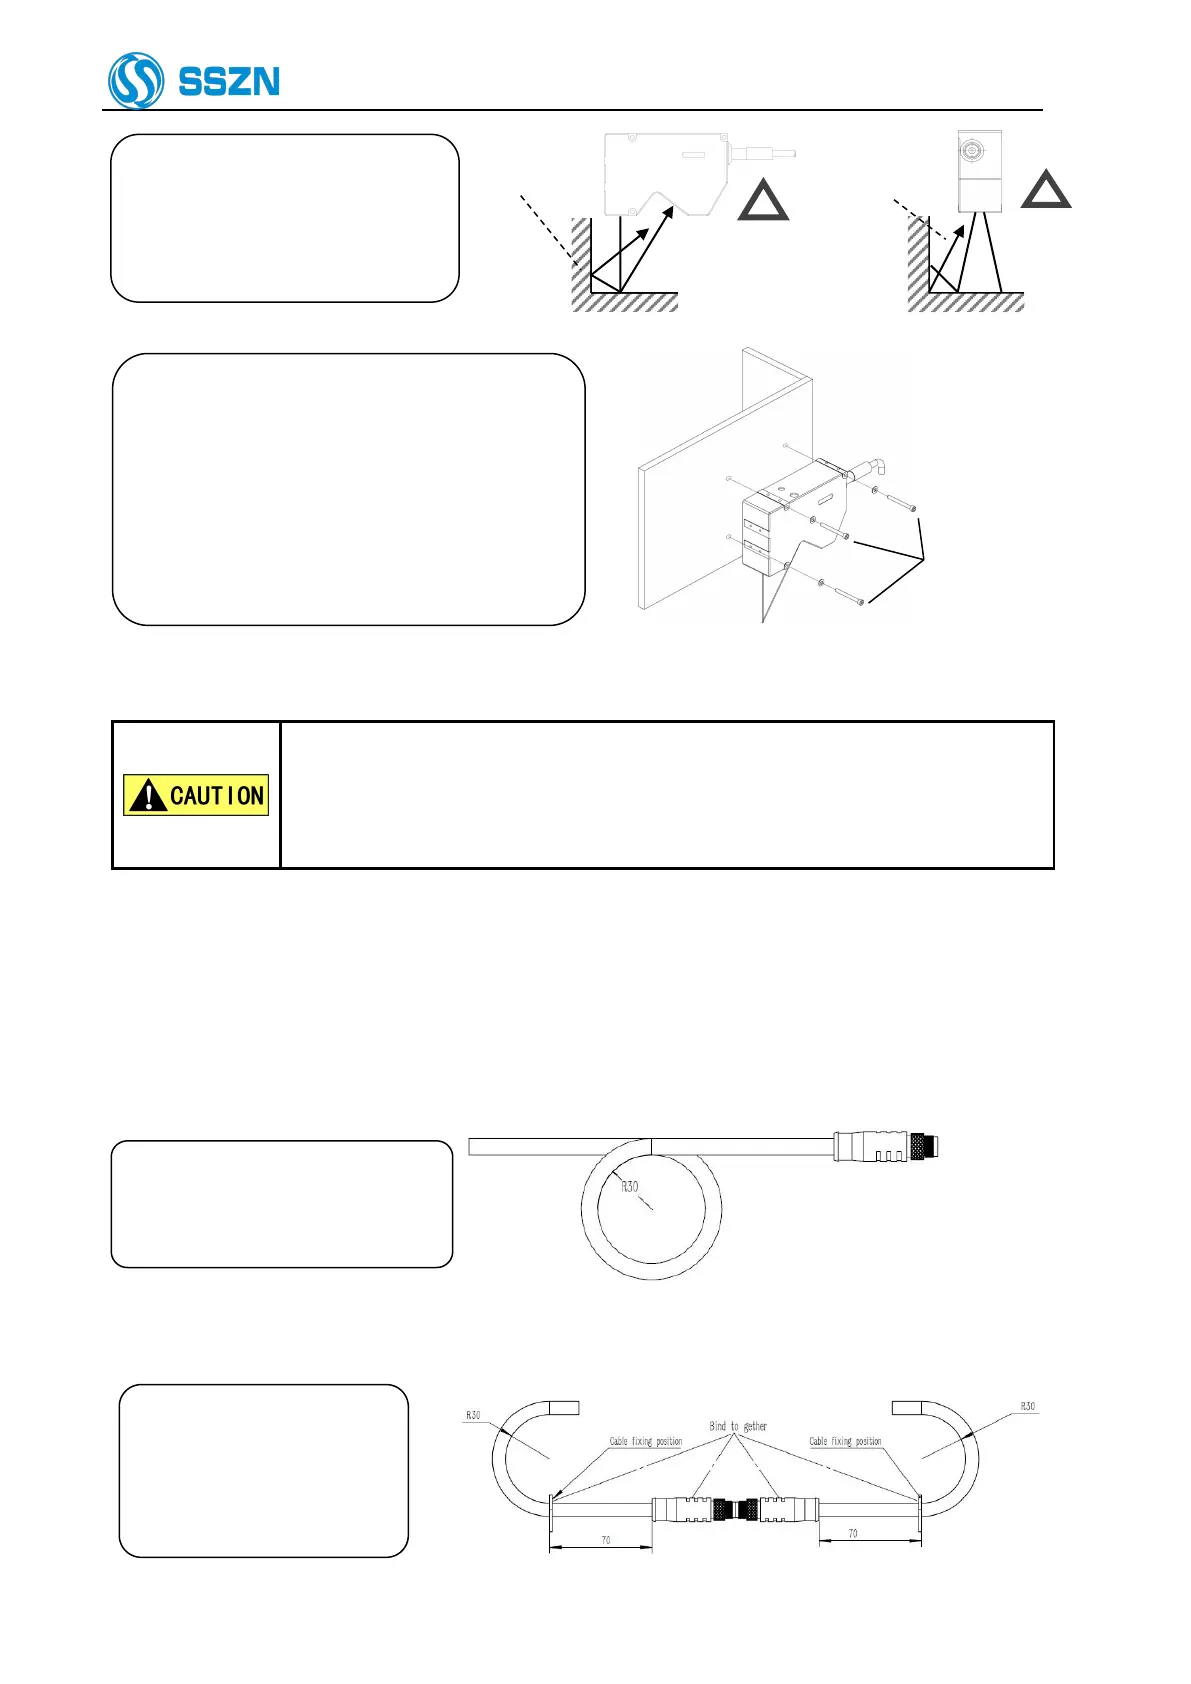
The laser reflected on the wall
will become stray light. Make
sure that the stray light will
not affect the measurement
Figure 4- 3 Generation of Stray light
Adjust the distance between the camera and
the target object, and then mount the camera
using the provided bolts.
For mounting dimensions, please refer to “9
Dimensions”
The tightening torque of the mounting screws
should be in the following ranges:
M4 screw: 1.2 ~ 1.8 N · m
Hexagon socket
head bolt
M4x55: 3 bolts
Figure 4- 4 Mounting the Camera
If you mount the camera on a plate made from material having poor heat
dissipation properties (such as resin), the camera surface may become hot, which
may cause a burn hazard.
Be sure to connect the camera to a metallic plate for better heat dissipation.
When using two cameras, pay attention to mutual interference area to prevent mutual interference from each
other. For more information, please refer to “Software Manual of SR Series 3D Camera” provided together
with the product.
5 Precautions for cable use
Please ensure that the minimum
bending radius of the camera cable
is more than 30mm
Figure 5- 1 Schematic diagram of minimum bending radius of cable
When using cable connection,
the connector and the cable
within 70mm at both ends
must be kept relatively
stationary.
Figure 5- 2 Schematic diagram of cable connection