stewmac.com
17
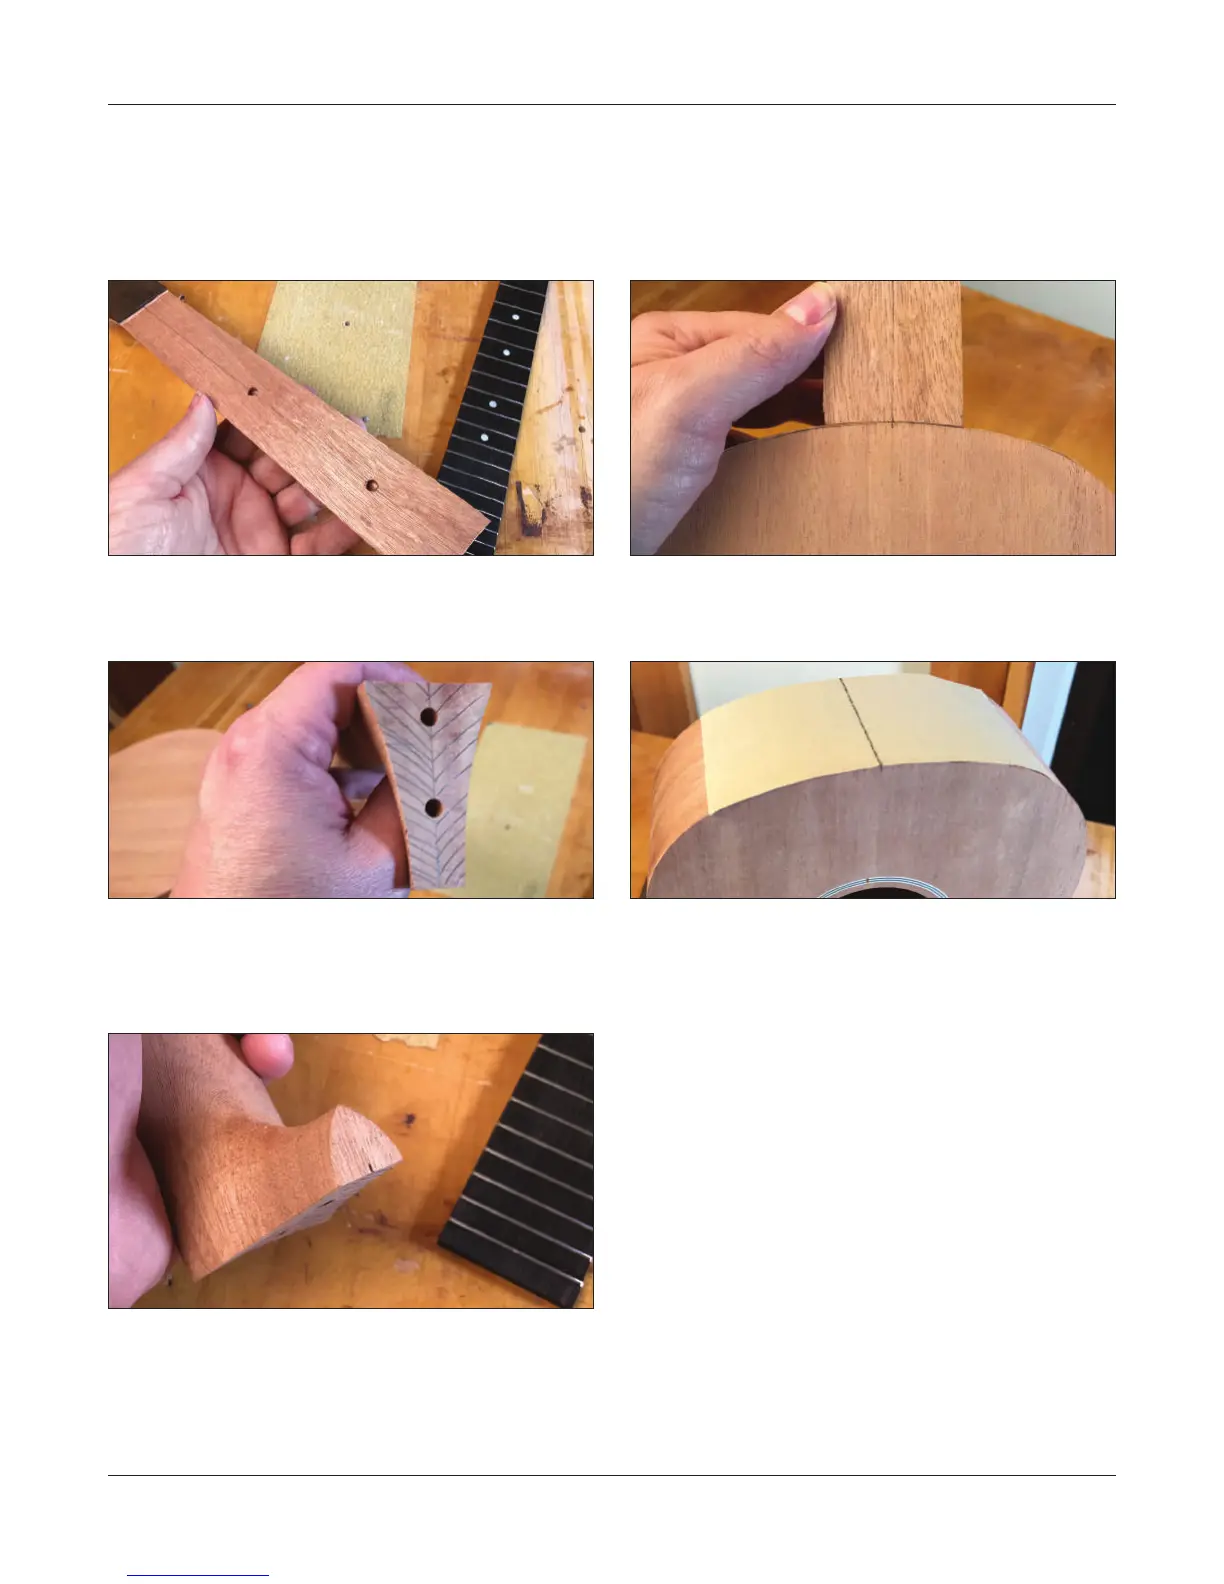
Pre-t the neck
Now is a good time to pre-t the neck. Let’s start by carefully
drawing a centerline down the face of the neck (where the
ngerboard will be placed), and extend this line through
the underside of the heel (the part of the neck that makes
contact with the body).
Carefully extend a pencil mark on the heel so you can re-
draw a centerline to the underside of the heel as necessary.
Gently set the neck in position so the centerline on the neck
closely aligns with the centerlines on the front and back of
the body. Lightly mark the shape of the heel on the body
of the instrument.
Now take a rule or straightedge and check to make sure the
sides are perfectly at along the lines you just drew. If they
aren’t at use a sanding block axed with 120-grit sand
paper and lightly sand the entire surface of the side (with
the grain) until the area where the neck meets the body is
dead at.
Now, ax 80-grit adhesive sandpaper to the body of the
instrument and trim o any overhang with an exacto knife
or razor blade.
Gently sand the underside of the neck prole on the body
taking care to keep the centerlines on the body and neck
aligned. (This isn’t as hard as it sounds.)
When the bottom of the neck is fully sanded and the cheeks
of your neck set ush against the sandpaper your neck has
been roughed in and this will allow it to quickly be ne-tuned
later just before gluing.