stewmac.com
5
Apply the glue
For this application we recommend using Titebond Original
Wood Glue or StewMac Fish Glue.
Apply a thin bead of glue to the brace and use your pinky
nger to spread an even, thin, lm of glue across the entire
brace. Quickly wipe your hands with a dry cloth and seat the
brace in the proper location.
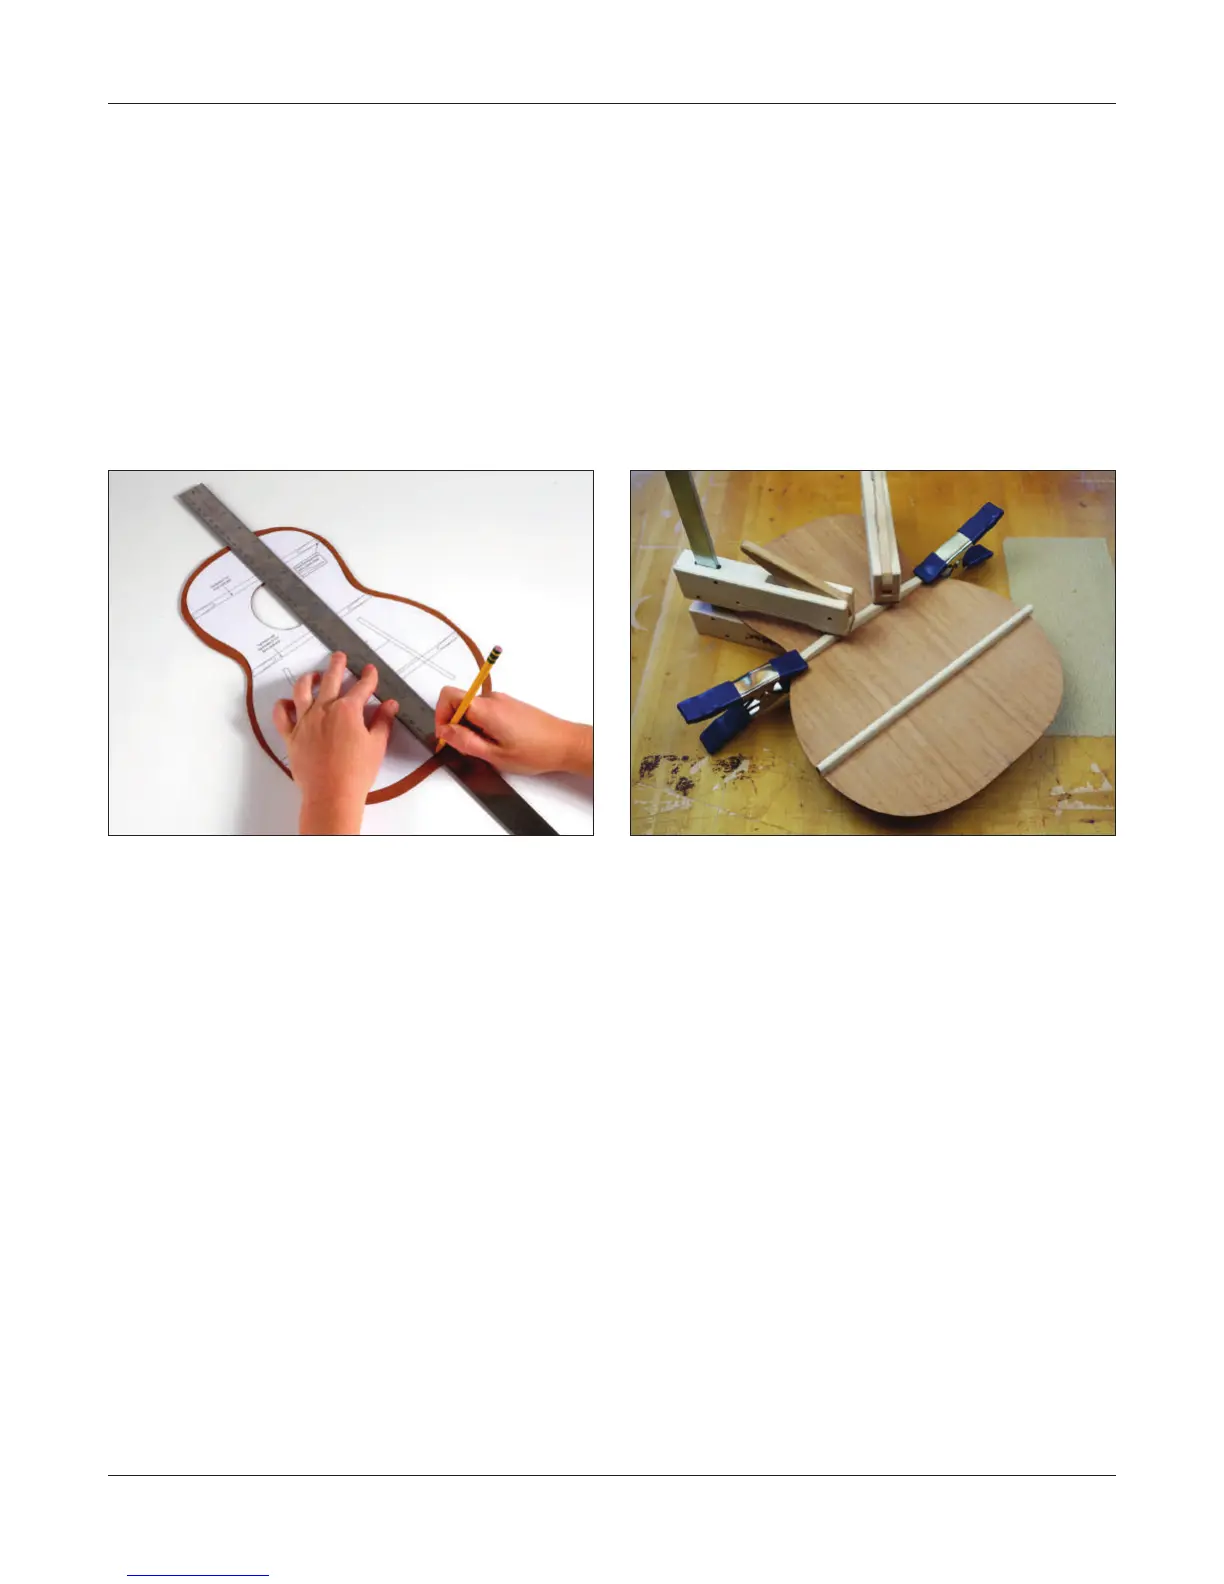
Start by placing a clamp (or Go-bar) in the center of the
brace. Parts tend to skate around during clamp up, so it is
always a good idea to ensure your brace hasn’t moved from
its intended location. If you are using clamps, lightly snug it
up once your brace is in place.
Now place a Go-bar or clamp at each end of the brace. (Again,
frequently check to ensure your brace hasn’t moved during
clamp up.)
If you’re using clamps, 3 will usually suce for a ukulele, but
if you like feel free to add a couple more for added assurance.
Snug them all up. It doesn’t take a lot of clamping pressure
so there is no need to over tighten your clamps.
If you’re using Go-bars feel free to place 2 more bars on the
brace for added clamping pressure.
Wait 5 minutes and clean up the squeeze out. (Waiting a
few minutes gives the glue a bit of time to gel which makes
clean up easier.)
One extremely eective way to clean up squeeze out is
to use a scrap piece of spruce that has been sanded into a
crude “chisel” blade. The soft wood doesn’t dent your brace
or leave marks yet cleans up the glue quite nicely. Any re-
maining glue residue can be wiped away with a damp (NOT
wet) cloth rag.
Ensure your brace is seated tightly to the back across the
entire length.
Let it dry for 2 hours.
Begin by carefully cutting out the plan on or just outside
the solid black line that denotes the sides. This can be done
with scissors or a razor knife.
Transfer the brace plan to the wood
Mark a centerline precisely on your back plate along the
center seam.
Tape your plan carefully to your back plate taking care to
ensure the centerlines match perfectly at both ends.
Locate the back braces by using a pushpin, awl or scribe
to poke small holes into the wood at the brace ends. The
back braces are the two horizontal braces at the waist and
lower bout.
Connect these holes with a pencil and straightedge, which
will be your marks for where to glue the braces.
Save the plan drawing for use later throughout the build
process.
Gluing the back braces
Notice that the bottom of your back braces have a radius.
This adds structural integrity to your instrument as well as
improves the sound quality.
You can glue each brace separately, or use a Go-bar Deck
and a radius dish to clamp more than one brace at a time.
Do a dry run before gluing
It is always a good idea to test your clamping setup before
you apply glue. Decide where to place clamps and cauls on
your bench, and frequently check to see that the braces are
located in the proper location and held down tightly from
end to end.
You don’t want to gure this out while the glue is drying!
The important thing is that you’re comfortable with your
clamping plan, and have seen that it works before you’re
under the time pressure created by wet glue.
Brace the top and back