stewmac.com
29
Place a straightedge on the frets, and see where it meets the
bridge. It should be roughly at the height of the bridge top.
Press the saddle into its slot and rest the straightedge on it.
Pretend the straightedge is a string and imagine that string
passing over the rst fret. Lift the straightedge so it’s a little
less than 1/16" above the rst fret (about .050"). This is a good
height for your strings. When the nut is installed, we’ll want
it to hold the strings at about this height.
Clean up the nut ledge
Use sandpaper to be sure the at area for the nut is level and
free of nish. An easy way to do this is to double-stick tape
a piece of 220-grit sandpaper to the bottom of the nut and
slide it back and forth. Remove the sandpaper and place the
nut in position, holding it with a bit of double-stick tape.
Install the two outside strings
There are four strings on a uke—two thin ones and two
thicker ones. The thin ones are the outermost strings. Install
these two outer strings so you can check the height of the
nut and saddle.
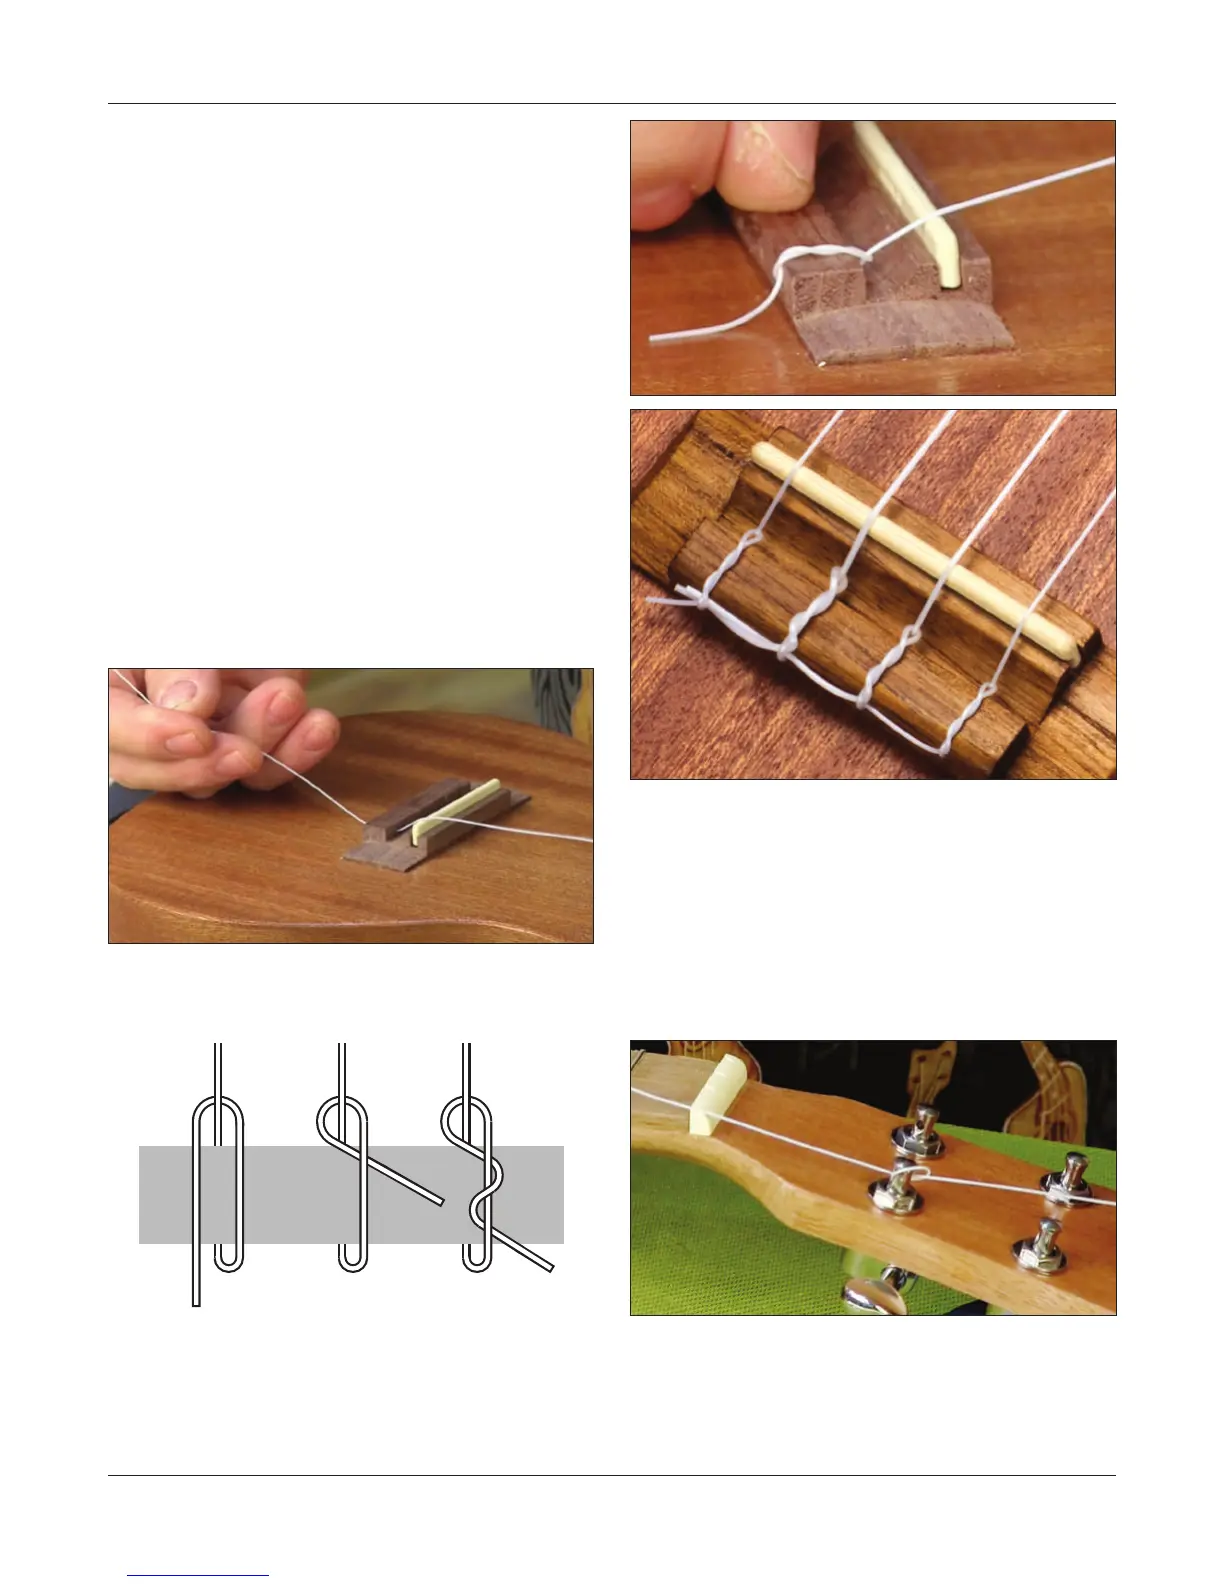
Thread the string through the back of the bridge. Tie it as
shown in the three-step drawing below. Draw it tight.
Pull it tight, and the knot holds securely.
When installing all four strings, tuck the tail end of the rst
string into the wrap of the second string. Continue this pat-
tern for a clean job of stringing the uke.
Uke strings are stretchy. To get them to hold tight to the
string post, pass them through the hole, around and through
again to create a knot. This is quicker than slowly wrapping
many times to get a good grip on the post.
Fit the nut and saddle