stewmac.com
7
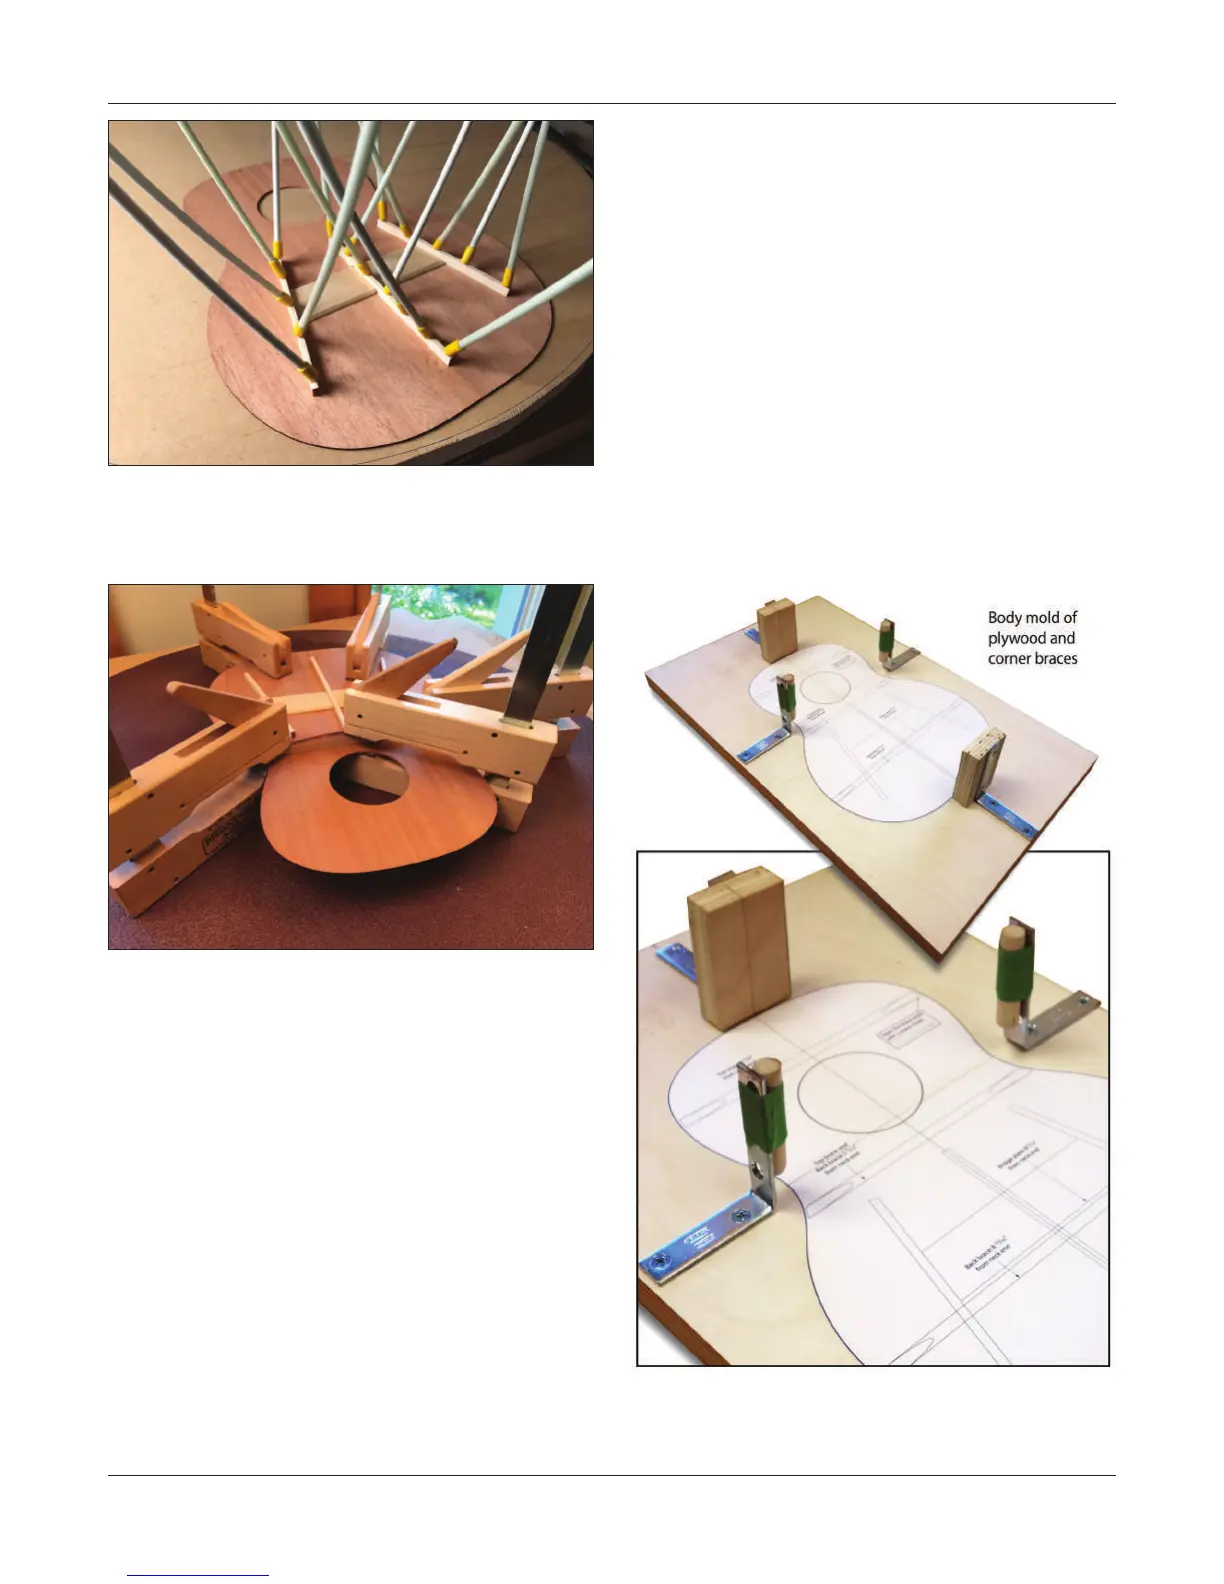
in the photo (below). Screw these two braces to the plywood,
on the centerline. Position them so they are against the bold
line of the uke shape. These are clamp supports for gluing
the neck block and tail block to the sides.
These clamping blocks should be no taller than the sides
of the ukulele.
The other two corner braces support the sides at the uke’s
waist. To avoid metal scarring the mahogany sides, give
these brackets some padding. A piece of dowel wrapped
in masking tape works well.
Screw these braces to the plywood, positioning them against
the uke outline at the waist.
Now we’re ready to begin working on the body.Next glue in the lower transverse brace followed by the
upper transverse brace.
Let the braces dry for 2 hours before removing the clamps.
Make the body mold
Now we are going to turn our attention to the ukulele body,
and this begins with creating an outside mold.
This is a very simple xture: a piece of plywood (or MDF) and
four 2-1/2" corner braces (angle brackets). It holds the body
pieces in shape while you build.
Start with a high quality piece of 3/4" plywood (or MDF),
19"x12". Draw a centerline down the middle of the board.
Tape or spray mount the plan drawing to the plywood,
aligning it on the centerline. The bold black line on the plan
drawing is the nal shape of your uke.
Attach blocks of wood to two of the corner braces, as shown
Optional: showing the gluing setup with clamps.