stewmac.com
15
Prepare the neck
Install the side dots
The position markers on the side of the ngerboard are
made from a small plastic dowel, 1/16" in diameter. The dots
are centered between the same frets that have inlaid dots
on the board.
Use your scribe, awl or pushpin to mark holes for drilling.
Make sure all the holes are centered equally down the side
of the board. You might want to put two dots at the 12th fret
to indicate the octave; this is optional on a ukulele.
Using a drill with a 1/16" bit, start each hole by briey run-
ning the drill in reverse. This will create an indentation in the
wood to center the bit so it doesn’t wander when drilling.
Hold the drill square to the surface, and drill each hole about
1/8" deep.
Turn the end of the side dot dowel against a piece of sand-
paper to clean up the end so it will slide into the hole. Then
dip it in Titebond glue and insert it in the hole.
Wipe away any excess glue, then cut the dowel o at the
surface of the wood using fret cutters or side cutters. After
installing all the dots, use a le to level them ush with
the surface of the wood. The result is a line of small round
position markers.
Preparing for fretting
Use a smooth flat work surface. You want a solid table
that won’t bounce or shake when you tap the frets with a
hammer.
Lay the end of the wire over the rst fret slot, so it protrudes
only very slightly over the edge of the board. Holding the
wire down with one hand, cut the fret at the other side of
the board. This creates a fret that’s cut to length for this slot,
with very little extra metal to le away from the ends later.
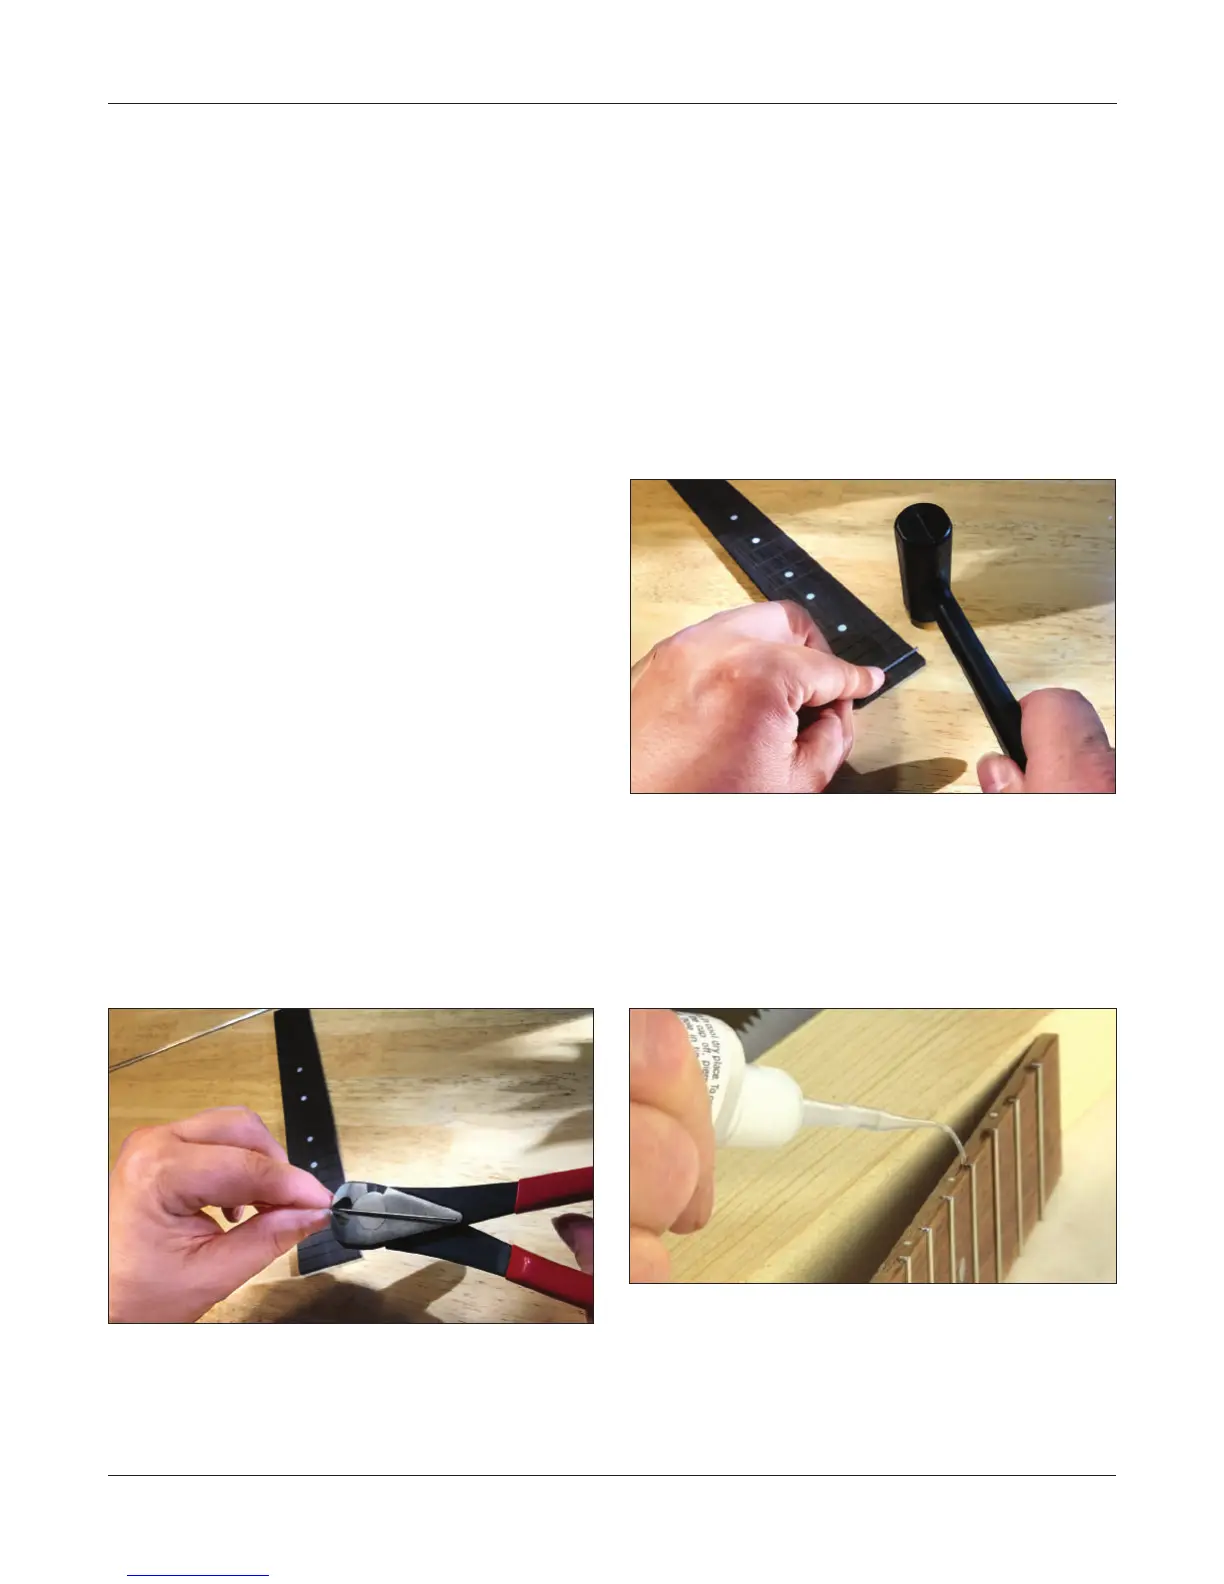
Use a fret cutter or side cutter to cut the fretwire.
Set the cut fret aside and move on to the next. Fasten a piece
of masking tape to your table, sticky side up, to keep your
cut frets in order while you work.
Install the frets
The top of the fret is called the crown. The strip that ts into
the fret slot is called the tang. Position the rst fret so the
tang sits on the fret slot. Hold the fret in position by pressing
it down at the center with one nger. With a hammer in your
other hand, tap the two ends of the fret into the slot.
When the ends are seated in the slot, you can remove your
nger and tap down the center of the fret. Do this for each
fret down the board.
Any hammer can be used, but a small one, like a fretting
hammer, works best. Don’t hit the fret or the board hard
enough to cause dents.
Glue the frets
Adding medium viscosity superglue under the frets, such as
StewMac #20, keeps the frets seated.
Turn the board on its side and run the glue under the fret
slots. A small whip tip on the glue bottle will help direct the
glue into the fret slot.
After adding glue to each slot, turn the board over and do
the same to the other side.