stewmac.com
24
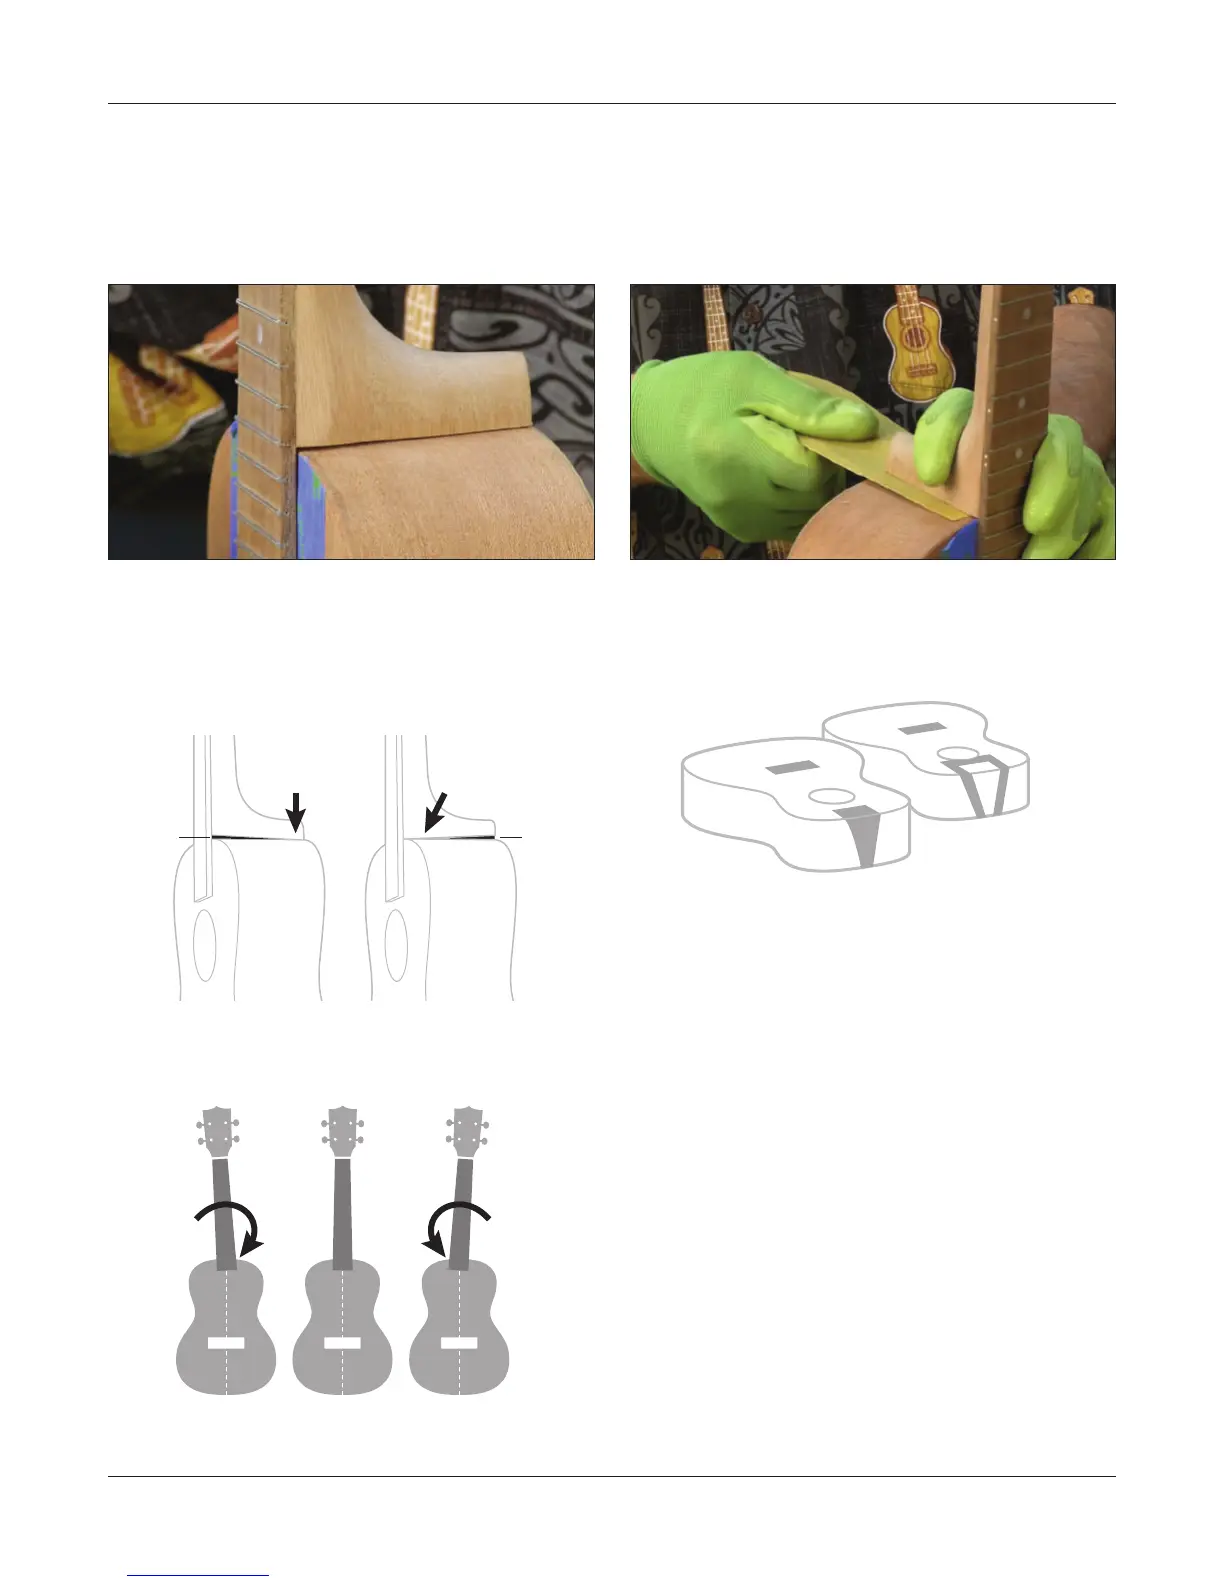
Fitting the neck joint
When you dry-tted the neck, if it needed to be shifted left
or right for centering, the neck joint needs to be adjusted.
Or, you may nd a gap between the neck and the body.
This can be caused by any number of things, and it’s not
hard to correct.
The gap in the photo above can be xed by removing wood
from the heel of the neck. Because the gap is toward the
ngerboard, wood needs to be removed from the bottom of
the heel. If the gap were ran the opposite way, wood would
be removed from the top of the heel.
If the neck leans to the left or right, wood needs to be re-
moved from the opposite side of the neck heel.
Remove wood by strip-sanding with 80-Grit sandpaper. Cut
a strip of paper to t under the area you’re sanding, and slide
it between the neck and body. Hold the neck rmly down
onto the body, and pull the sandpaper out. Repeat this until
enough wood has been sanded away. Wear gloves to avoid
paper cuts from the edge of the sandpaper.
Tape o the neck heel area
Frame the neck heel with masking tape, as you did for the
bridge and ngerboard.
The next step depends on whether you’re going to stain your
ukulele or give it a clear natural nish. If you’re staining, tape
inside the neck heel and ngerboard extension, then remove
the frame of tape. Like the bridge, the neck joint area is now
masked to keep it free of stain and nish, for gluing later.
If you’re not staining, the frame of tape around the neck joint
is ready for gluing the neck.
Taped-off for staining
Taped-off for gluing
Remove
wood here
Remove
wood here
Gap
Gap
If the
neck leans
this way,
remove
wood here
If the
neck leans
this way,
remove
wood here