www.stiebel-eltron.com WPL basic | WPL S basic | 17
INSTALLATION
Electrical connection
26�03�01�1738
1
2
3
1 Bevelled edge
2 Control panel
3 Screw
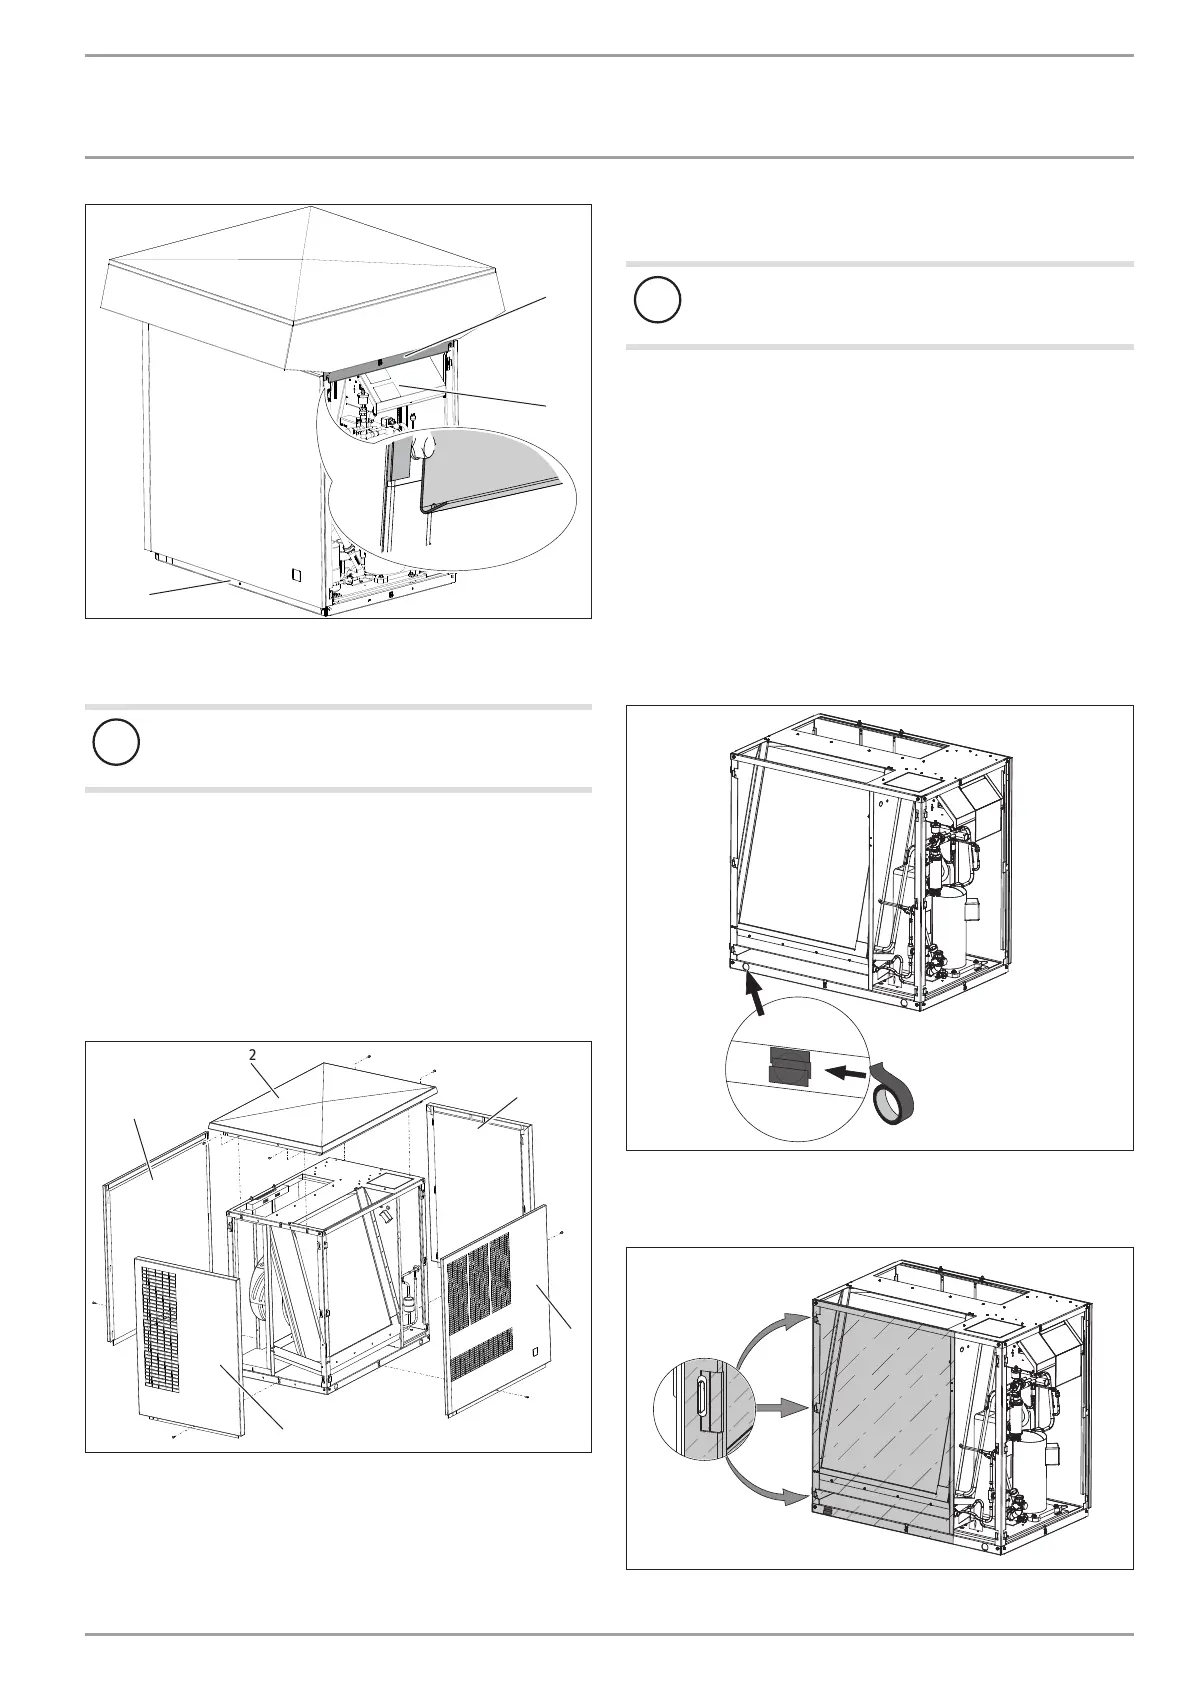
!
Material losses
The cover protects the PCB from water ingress.
Install the cover with the drip edge above the PCB.
Position the cover on the appliance, and secure it with two
screws.
Hook the side panels and front and back doors onto the
standard appliance. Secure these with a screw each.
Affix the type plate supplied to the front at the top in a clearly
visible location on the r.h. or l.h. side panel of the appliance.
11.1.2 Fitting the casing components for the basic external
installation
2
1
3
4
5
26�03�01�1637�
1 Side panel, r.h.
2 Cover
3 Front panel
4 Side panel, l.h.
5 Back panel
Hook the side panels into the hooks provided on the standard
appliance and secure them with one screw each.
!
Material losses
The cover protects the PCB from water ingress.
Install the cover with the drip edge above the PCB.
Position the cover on the appliance, and secure it with four
screws.
Hook the front and back panels into the hooks provided on
the standard appliance and secure them with one screw
each.
Affix the type plate supplied to the front at the top in a clearly
visible location on the r.h. or l.h. side panel of the appliance.
11.1.3 Fitting the casing components for internal installation
Before fitting the casing sections, seal the appliance by affixing
a plastic film; this will prevent condensation forming under all
operating conditions.
The plastic film is supplied with the casing sections.
26�03�01�1456
Apply fabric tape to seal the hole at the bottom of the frame
on the l.h. side. The fabric tape is supplied with the accessory
“thermally insulated air hose”.
26�03�01�1454