27BT 45
– Remove the metering diaphragm
- b
8.4.2
: Take out the screw (1).
936RA029
VA
1
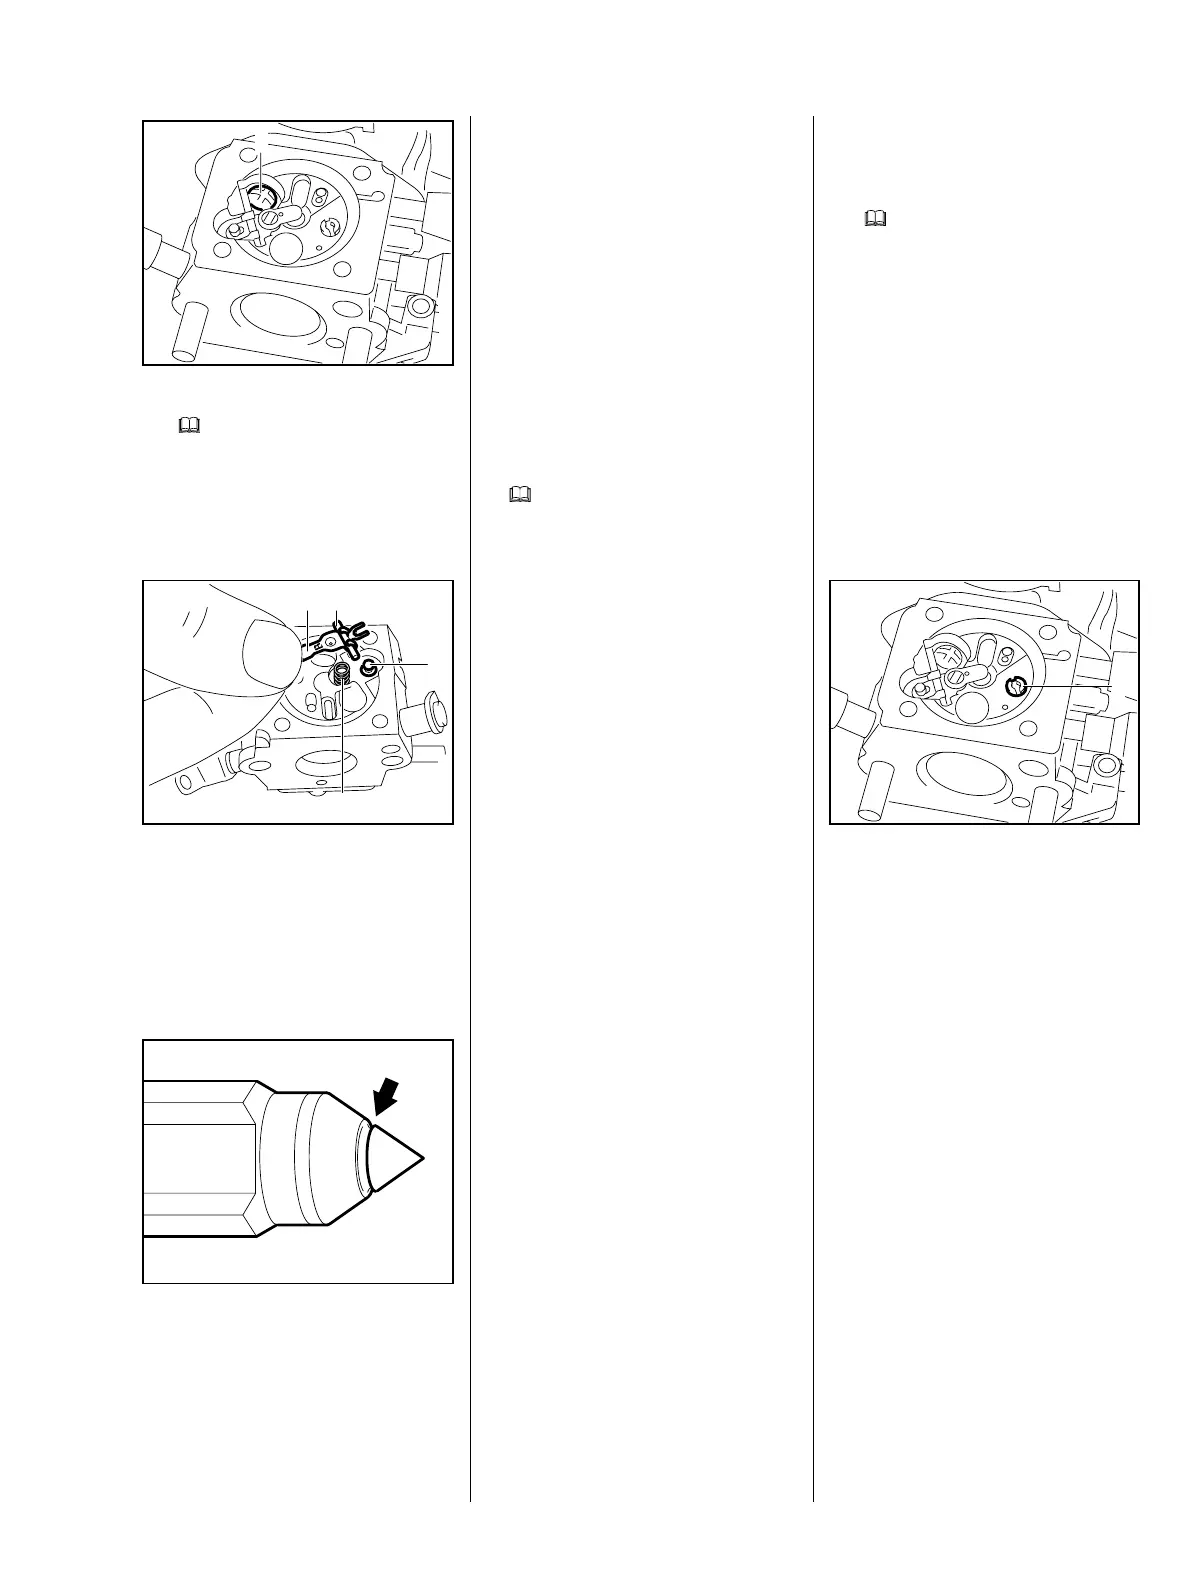
: Remove the inlet control
lever (4), spindle (3), spring (2)
and inlet needle (1).
The spring (2) may pop out during
disassembly.
2
3
4
1
VA
932RA260
: If there is an annular indentation
(arrow) on the sealing cone of the
inlet needle, it will be necessary
to replace the inlet needle
because it will no longer seal
properly.
VA
372RA120
Assemble in the reverse sequence.
– Engage clevis in annular groove
on head of the inlet needle.
Make sure the helical spring locates
on the control lever’s nipple.
– Check that inlet control lever
moves freely.
The upper edge of the inlet control
lever must be flush with the top of
the carburetor body.
– Install the metering diaphragm -
b
8.4.2
Take care not to damage the fixed
jet when removing.
– Remove the metering diaphragm
- b
8.4.2
: Unscrew the fixed jet (1).
Assemble in the reverse sequence.
936RA031
VA
1
8.4.3 Inlet Needle 8.4.4 Fixed Jet

 Loading...