1413
6.1 Getting Started6.1 Getting Started
3) Satellite Scan
Through this function, the receiver searches for all the available channels and saves
them in memory.
ᶀ
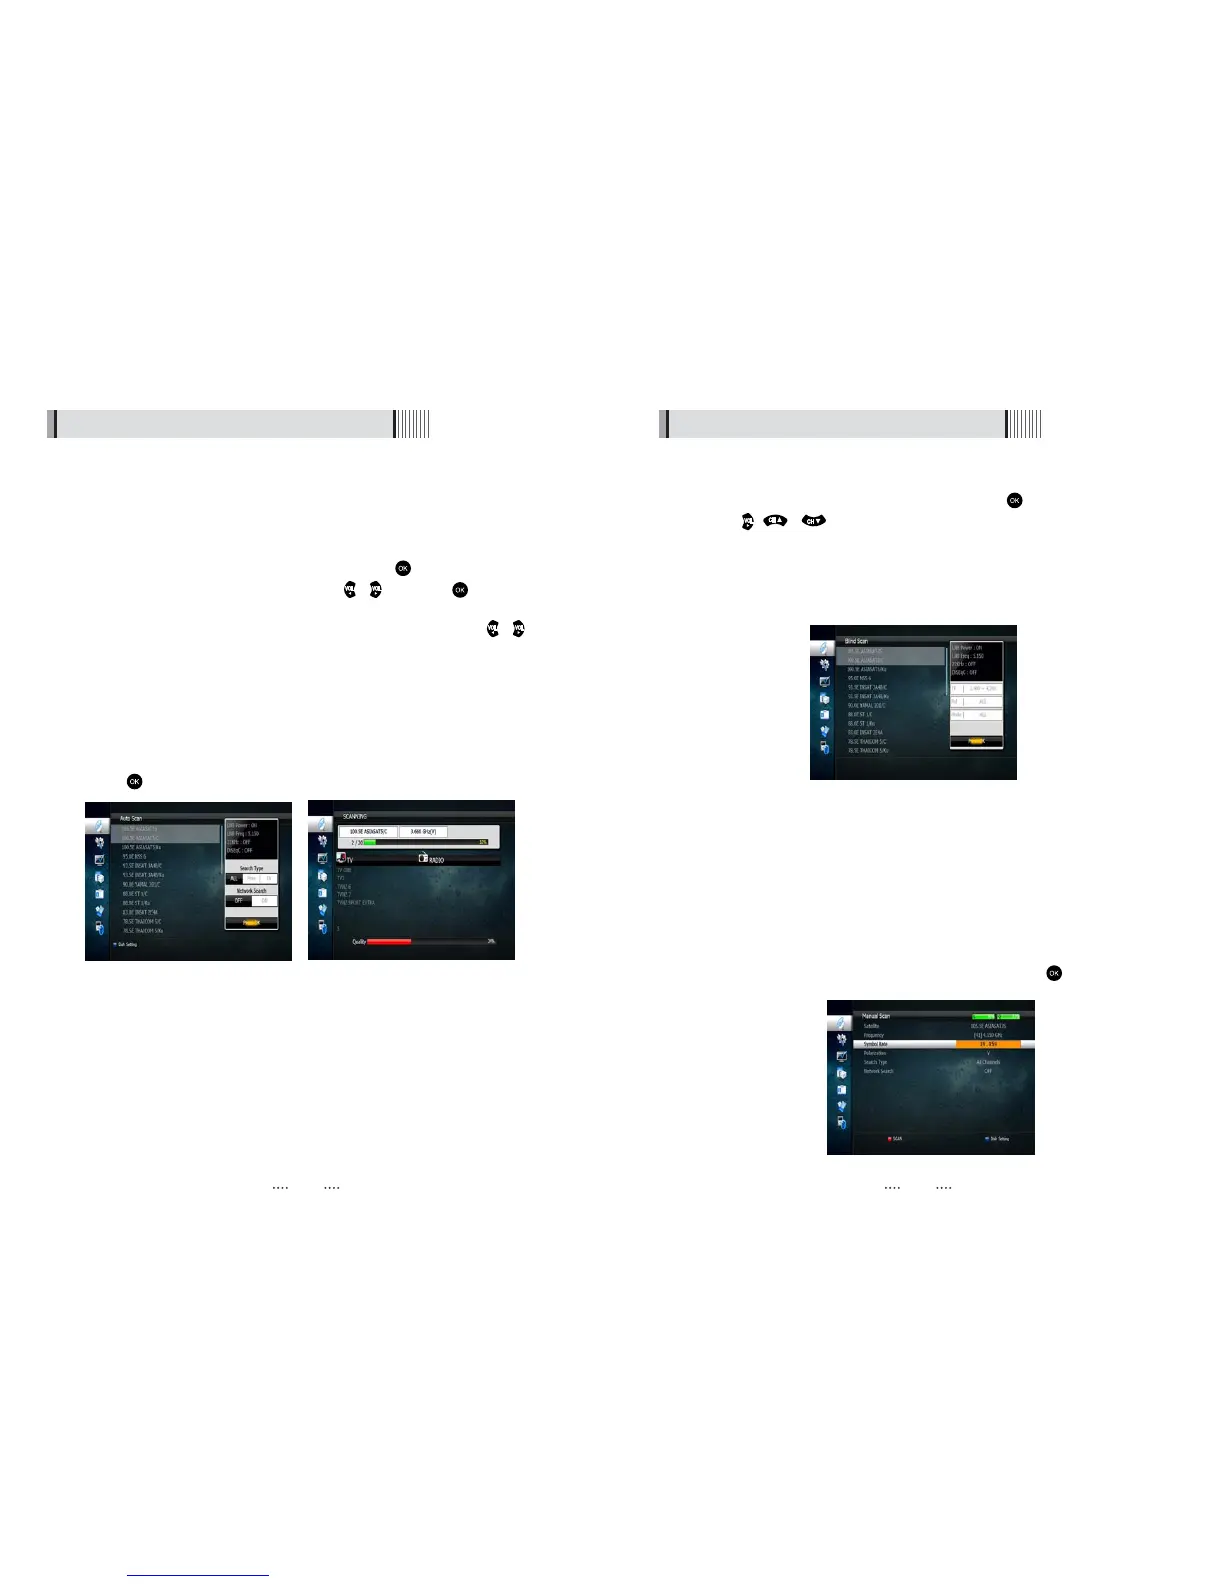
Auto Scan <Figure 6.1.8>
⊹
Select the satellites you want to search by pressing the button on the remote.
You can select more satellites by pressing the / button and button on
the remote.
- Search Type : Select the type of channel search you want by presssing /
buttons on the remote.
⍜ All : To search all the Free To Air and scrambled channels, TV & Radio channels.
⍜ Free : To search Free To Air channels only.
⍜ TV : To search TV channels only.
- Network Search : Select Network Search ON/OFF to find more transponders
through NIT Search.
- Scan : Begin channel search of the selected satellite.
⊺
Press under ‘SCAN’ to scan the selected satellites. <Figure 6.1.9>
<Figure 6.1.8> <Figure 6.1.9>
ᶀ
Blind Scan <Figure 6.1.10>
⊹
Select the satellites you want to search by pressing the button on the remote.
⊺
Press , / to set the “Polarization” and “Scan Mode” options.
- TP : Select TP Frequency
- Polarization : Select among All / Vertical / Horizontal
- Mode : Select among All / Free / TV
- SCAN : Begin channel search of the selected satellites.
ᶀ
Manual Scan <Figure 6.1.11>
⊹
Select a transponder.
⊺
To change a transponder’s information (Frequency, Symbol Rate), use the
NUMERIC buttons.
⊻
To add a new transponder, press the GREEN button.
⊼ To delete a transponder, press the YELLOW button with the cursor next to the
Frequency parameter.
⊽ To search a transponder, set its different parameters and press .
<Figure 6.1.10>
<Figure 6.1.11>
 Loading...