Service Information
30
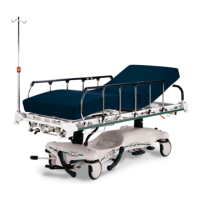
PATIENT CONTROL LOCKOUT SWITCH REPLACEMENT
Lockout Rocker Switch Part Number 59−68
Required Tools:
Standard Screwdriver 5/32” Allen Wrench
Procedure:
1. Unplug the power cord from the wall socket. Properly ground yourself (see page 11).
2. Lift the foot section and pivot it back, securing it with a string or cord. Using a 5/32” Allen wrench, remove
the four screws and two Knee Gatch guides from the sides of the motor/board enclosure cover. Using a
standard screwdriver, remove the two sheet metal screws holding the cover to the foot end frame tube
and remove the cover.
3. Disconnect the three cables leading from the rocker switch to the lockout cable on the logic circuit board.
4. From inside the enclosure, squeeze the sides of the rocker switch and push the switch out of the frame
tube.
5. Push the new switch into the frame tube, threading the three cables through the tube. Connect the cables
to the lockout cable, being sure the white cable is connected in the center.
6. Reinstall the enclosure cover and Knee Gatch guides with the four socket cap screws. When reinstalling
the Knee Gatch guides, be sure the large hole in the guide is toward the foot (crank) end with the ridged
side of the guide facing out. Install the two sheet metal screws.
7. Plug the stretcher power cord into a properly grounded wall receptacle and test the lockout function before
returning the stretcher to service.
PATIENT CONTROL LOCKOUT LED REPLACEMENT
Required Tools:
Standard Screwdriver 5/32” Allen Wrench Wire Cutters
Procedure:
1. Unplug the power cord from the wall socket. Properly ground yourself (see page 11).
2. Lift the foot section and pivot it back, securing it with a string or cord. Using a 5/32” Allen wrench, remove
the four screws and two Knee Gatch guides from the sides of the motor/board enclosure cover. Using a
standard screwdriver, remove the two sheet metal screws holding the cover to the foot end frame tube
and remove the cover.
3. Disconnect the red and black LED wires from the lockout cable. Clip the red and black wires and push
the LED out of the litter frame tube.
4. Thread the new LED wires through the frame tube. Push the new LED into the frame tube. Crimp new
connectors on the red and black wires on the new LED. Connect the new LED to the lockout cable on
the logic circuit board.
5. Reinstall the enclosure cover and Knee Gatch guides with the four socket cap screws. When reinstalling
the Knee Gatch guides, be sure the large hole in the guide is toward the foot (crank) end with the ridged
side of the guide facing out. Install the two sheet metal screws.
6. Plug the stretcher power cord into a properly grounded wall receptacle and be sure the LED will light when
the lockout function is activated before returning the stretcher to service.
Return to Table of Contents