EEnngglliisshh
EENN
www.stryker.com KK-7100 REV 02 1-23
Operation
Removing or replacing the headboard (Continued)
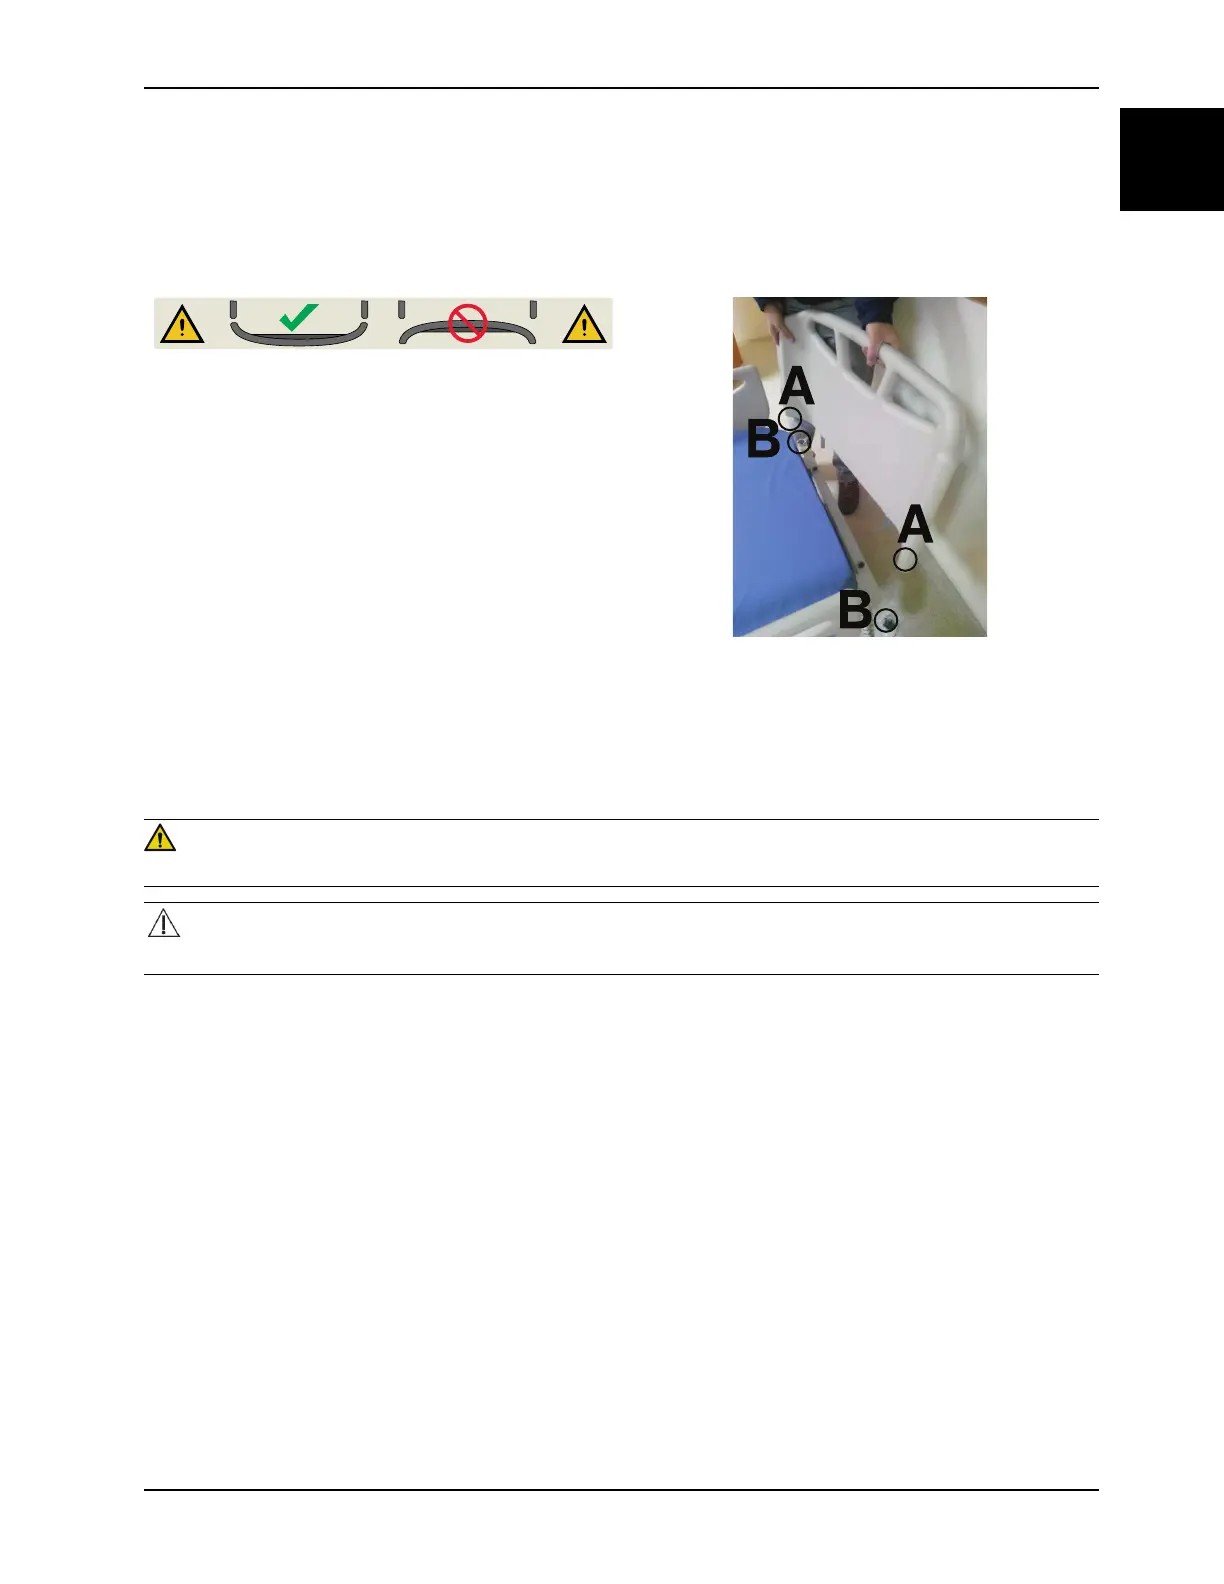
2. Align the headboard pegs (A) with the plastic sleeves (B) at the head end of the product (Figure 1-13 on page 1-23).
3. Lower the headboard until it seats into the plastic sleeves (B) (Figure 1-13 on page 1-23).
Figure 1-12: Headboard orientation
Figure 1-13: Removing or replacing the headboard
Removing or replacing the footboard
WARNING
Always properly orient the footboard when replacing the footboard to avoid entrapment.
CAUTION
Always hang the nurse control pendant onto a foot end siderail or the linen tray (option) before removing the footboard.
You can remove the footboard for patient accessibility and cleaning.
To remove the footboard:
1. Hang the nurse control pendant onto a foot end siderail or the linen tray (optional).
2. Grasp the handles and lift the footboard straight up and off the product (Figure 1-15 on page 1-24).
To replace the footboard:
1. Align the curved footboard corners with the head end of the bed (Figure 1-14 on page 1-24).
2. Align the footboard pegs with the plastic sleeves at the foot end of the product (Figure 1-15 on page 1-24).
3. Lower the footboard until it seats into the plastic sleeves (Figure 1-15 on page 1-24).
 Loading...