mur en béton: 0,5 pt
chaud:
froid:
chaleur:
fond combustion:
sol: fond gris 50%
produits/pierre réfactaires/feu/
vitre/ventilo (contour+fond blanc): 0,5 pt
flèche noire pointillée: 0,5 pt
flèche combustion 0,5 pt:
flèche convection 0,5 pt:
flèche grise 0,5 pt:
entrées/sorties noires:
entrées/sorties grises:
entrées/sorties blanches:
contour combustion 2,8 pt
conduits: 1,5 pt
trait: 0,5 pt
trait: 0,25 pt
trait: 0,25 pt + fond blanc
cote - 2 côtés: 0,25 pt
cote - 1 côté: 0,25 pt
contours pointillés: 0,5 pt
contours pointillés_2: 0,25 pt
typo: Syntax 7 pt - bold
Légendes: Dessins - Notices
!!!!! toujours se baser sur la largeur de la colonne Notices pour obtenir un dessin importé
à 100 % dans Indesign !!!!
Format du document:
1 Colonne: 52 mm - Largeur max. du dessin: 48 mm
2 Colonnes: 109 mm - Largeur max. du dessin: 105 mm
3 Colonnes: 166 mm - Largeur max. du dessin: 162 mm
!!!!! Décocher la case “mise à l’échelle des contours et des effets ” afin que l’épaisseur des traits reste identique !!!!!!!
!!!!! Lors des mises à l’échelle ; vérifier que le corps des textes soit tjrs en 7 pt (cotes) !!!!!!!
≥
800
b
a
8
9 10
11
14
7
12
13
Stûv 30-compact - installation [en] - 01/13
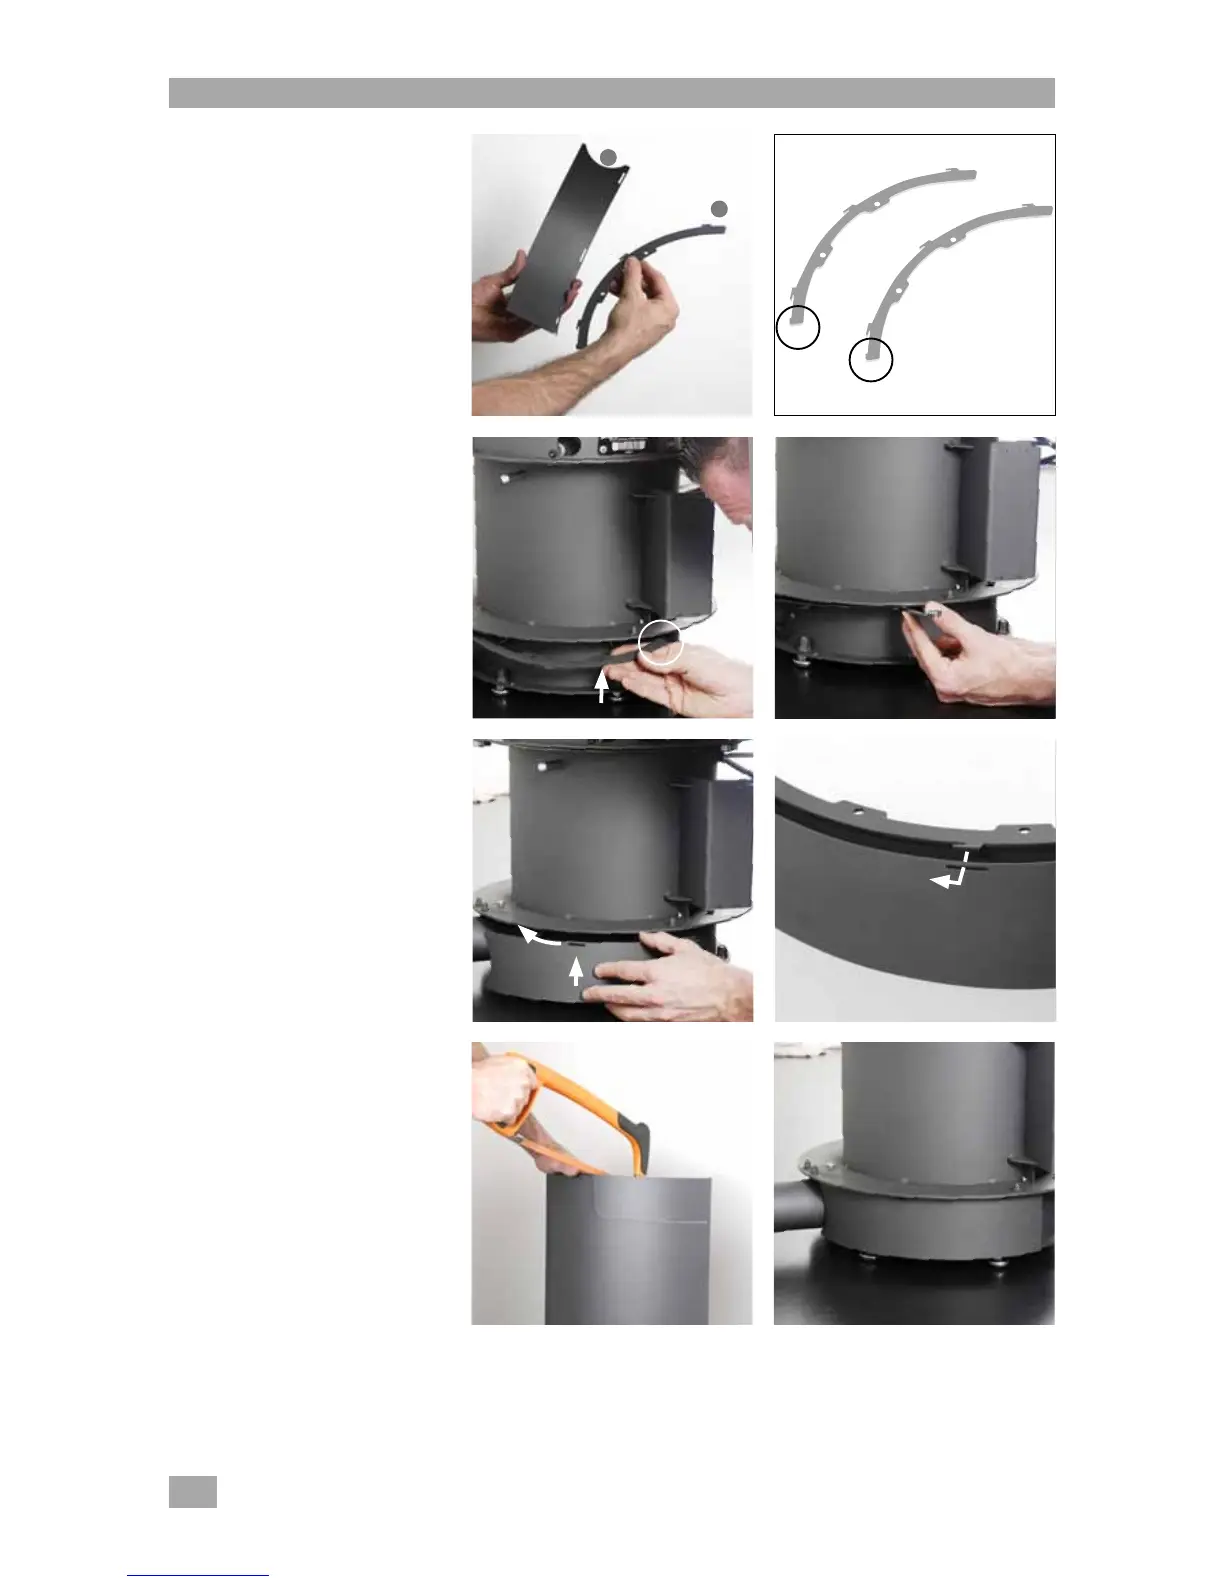
Connection with outside air (continued)
> Fix the 2 masking supports
[photo 7a]
– Position the supports so that the
additional piece is at the front of the
stove [photo 9].
– Fix the 2 supports (using the 4
M5x6 hexagonal head screws and a
size 8 spanner) [photo 10].
> Clip on the 2 masking pieces
[photo 7b] to their supports and check
that they are firmly in place
[photos 11 to 12].
> Prepare the 2 panels by removing
the lower pre-cut part (using a metal
saw) [photo 13]. Smooth the panel
edges with a half-moon file.
> Put the stove in position
[photo 14].
 Loading...