Model 315I (UC Ice Maker)
Component Access/Removal
5-13
#3757320 - Revision B - August, 2005
Condenser Fan Assembly Removal
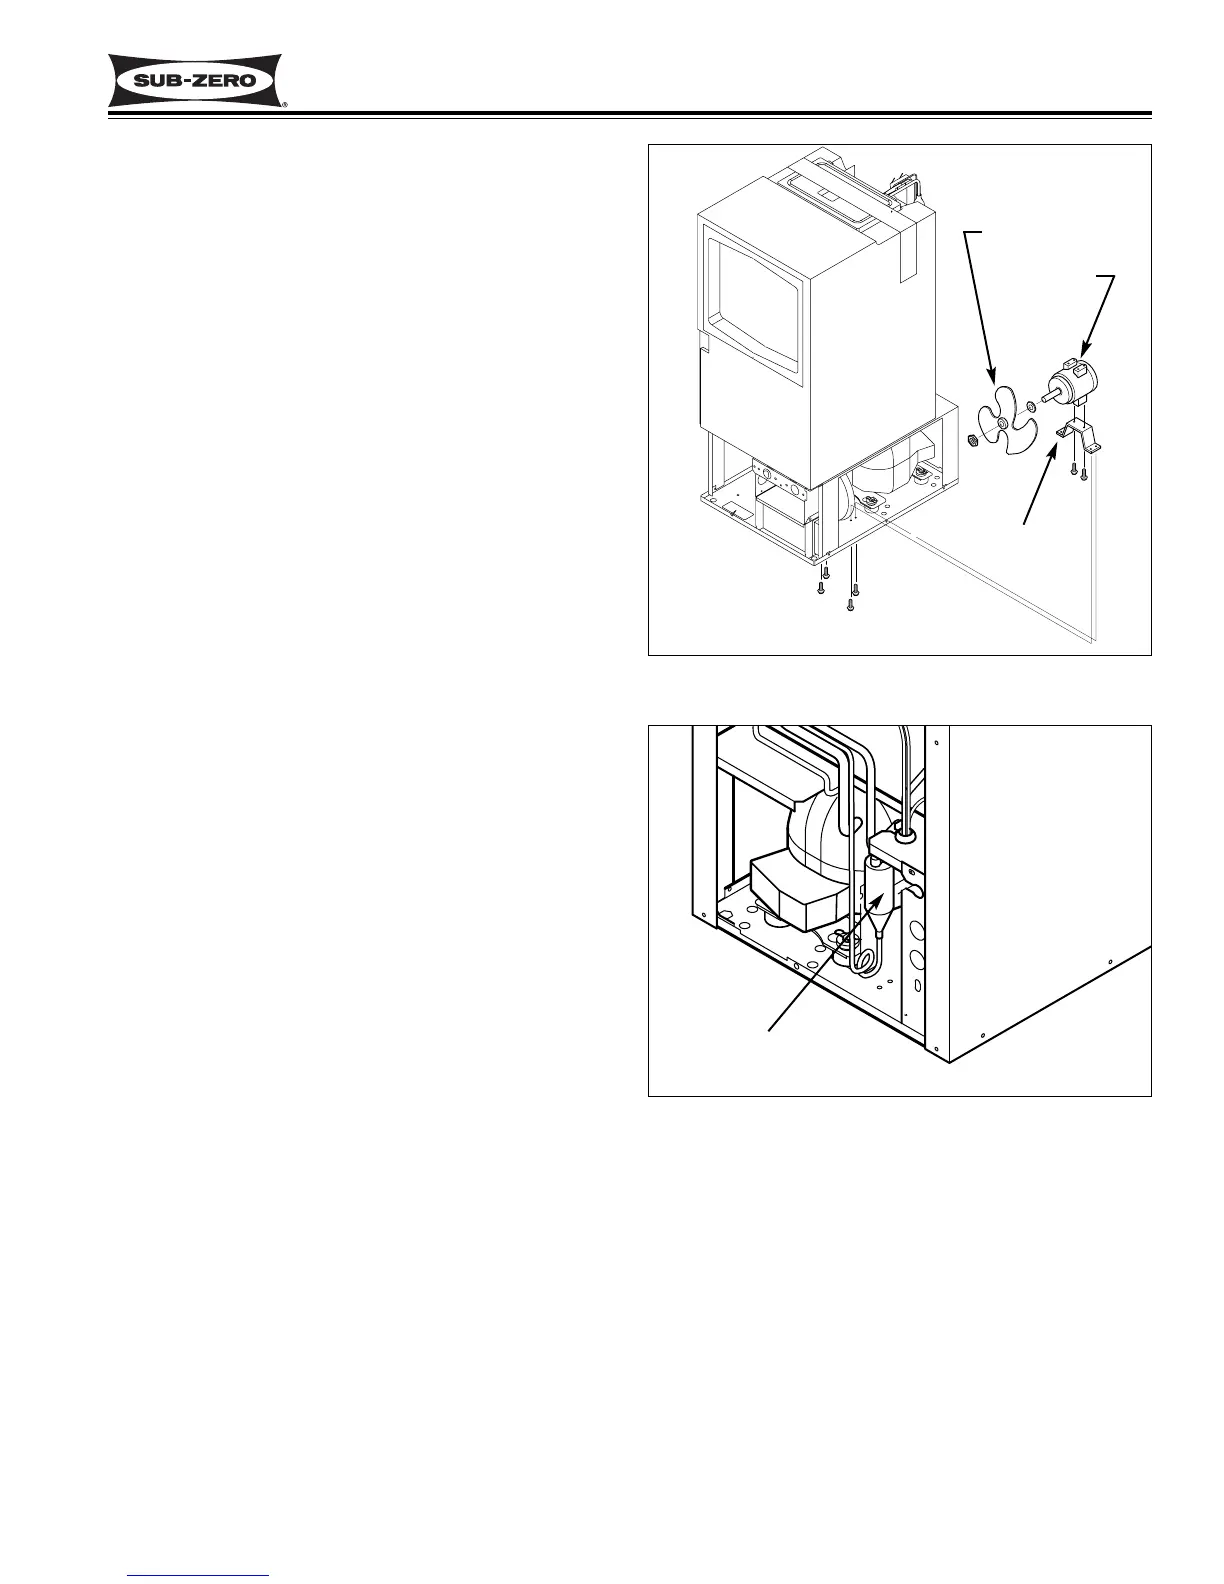
The condenser fan motor is attached to the fan bracket
with screws that pass up through the bracket into the
motor body. The fan bracket is attached to the base
assembly with screws that pass up through the base
into the fan bracket. The condenser fan blade fits over
the shaft of the motor. A flat nut screws onto the motor
shaft to hold the blade in place. The fan motor electri-
cal leads pass through a grommet in the side of the
control box and plug into the terminal board.
To access the condenser fan assembly, remove the
control panel, inner access panel, upper and lower face
plates, back panel and unit shell.
Before removing the condenser fan assembly, discon-
nect the power to the unit. Then, disconnect the fan
motor electrical leads from the terminal board. Extract
the fan bracket mounting screws from the bottom of the
base assembly and lift the fan assembly off of the base
plate. The fan motor can then be removed from the
bracket by extracting the motor mounting screws, and
the fan blade can be removed from the motor shaft by
first removing the flat nut. (See Figure 5-27)
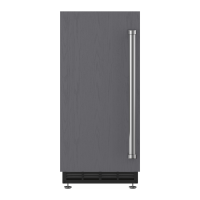
High-Side Filter-Drier Removal
The high-side filter-drier is attached between the con-
denser outlet and the capillary tube and is located at
the rear of the base assembly.
To access the high-side filter-drier, remove the back
panel.
Before removing the high-side filter-drier, capture the
refrigerant from the sealed system. Then, use a file to
score a line around the capillary tube approximately
one inch from the filter-drier. Fatigue the capillary tube
at this point until it separates. Now, use a tube cutter to
cut the drier inlet tube approximately one inch from the
drier. (See Figure 5-28)
Figure 5-27. Condenser Fan Removal
Fan Blade
Fan Motor
Fan Bracket
Figure 5-28. High-Side Filter-Drier Removal
High-Side
Filter-Drier