6
|
English subzero.com
|
7
Custom Panels
For integrated models, custom door panels and handle
hardware must be installed. Stainless steel panels are avail-
able through an authorized Sub-Zero dealer.
The thickness of the custom panel can vary. A minimum
16 mm thick panel is required, but the thickness can be
increased provided it does not exceed the maximum panel
weight indicated in the chart below. The depth of each
integrated model is 610 mm. Allow for panel thickness when
planning the nished opening depth.
PANEL REQUIREMENTS
COLUMN MAX WEIGHT
457 mm Models 20 kg
610 mm Models 27 kg
762 / 914 mm Models 34 kg
TALL (DOOR) MAX WEIGHT
762 mm Models 22 kg
914 mm Models 27 kg
DRAWER MAX WEIGHT
All Drawer Panels 7 kg
PANEL THICKNESS MINIMUM
All Panels 16
Reveals between panels can vary, 3 mm reveals are typical.
CAUTION
When installing a panel thicker than 25 mm, the 90°
stop may be required to prevent damage to the unit
and adjacent cabinetry.
CAUTION
As reveals between cabinetry and the unit decrease,
severe nger pinching can occur while door is closing.
Finish all sides of custom panels. They will be visible when
the door is open.
D-style handles are recommended. Stainless steel tubular
and pro handles are avail able through an authorized
Sub-Zero dealer. Door handles must be located near the
edge of the panel opposite the hinge and should be cen-
tered top to bottom. Drawer handles must be located near
the top edge of each panel.
DUAL INSTALLATION
When installing two units side by side in a dual installa-
tion, the opening width is the width of the two units added
together. A dual installation kit will be required for this
installation.
Dual installation kits are available through an authorized
Sub-Zero dealer. For questions regarding the installation,
contact your authorized Sub-Zero dealer.
PANEL INSTALLATIONINSTALLATION
Water Line
Purge the water line prior to nal connection to the unit. This
will remove any debris that may be present in the tubing
from installing the new water line. Connect the plastic tubing
from the unit to the house water supply line with the tting
connection kit provided. Check all water line ttings for
leaks.
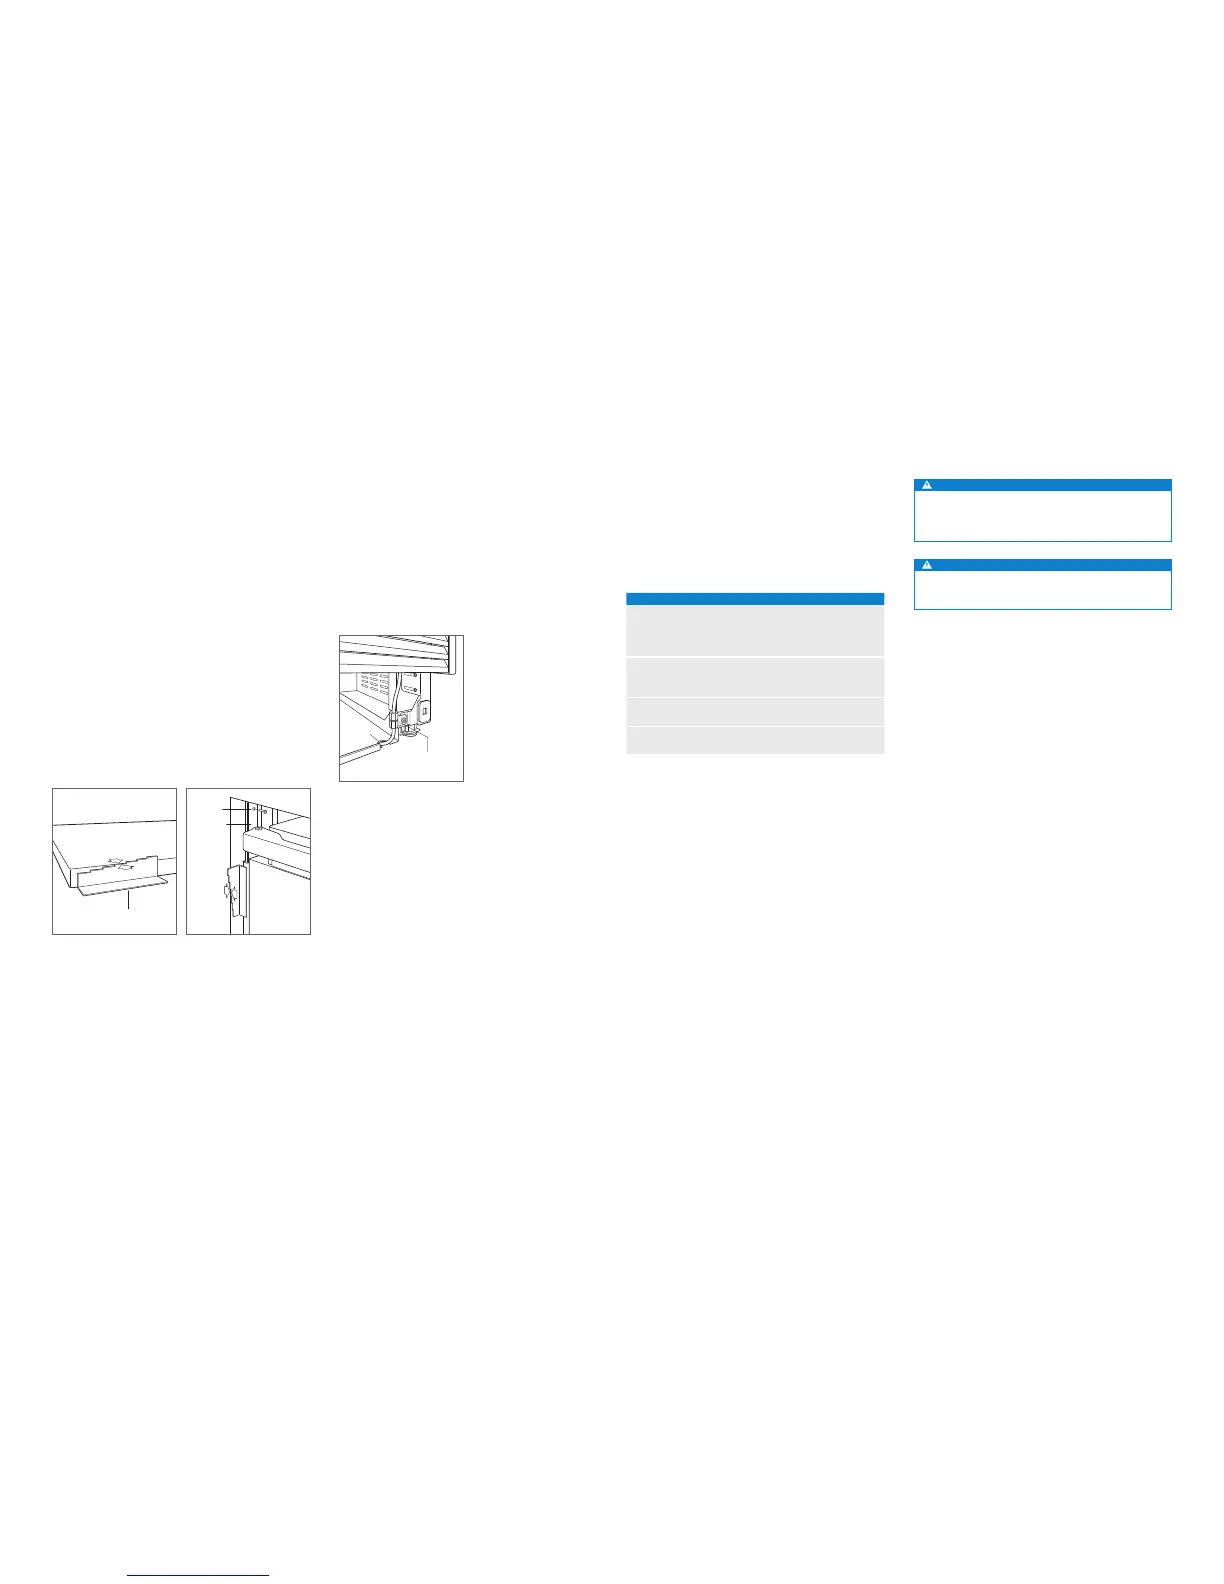
Locate the water line in the notch as shown in the illustration
below.
IMPORTANT NOTE: Water lines can not be exposed to
freezing temperatures.
WATER LINE
CONNECTION
NOTCH
Water line.
Alignment
DEPTH ADJUSTMENT
Adjust the depth of the unit to t ush with surrounding
cabinetry. Follow these steps for a precision t:
1 Place decorative panel on a protected work surface.
Place the panel thickness gauge next to the panel to
determine which notch corresponds with the panel thick-
ness. Once the proper notch has been determined, mark
that notch with a marker.
2 With the door closed, position the top of the unit using
the panel thickness gauge. Insert a #8 x 13 mm stainless
steel screw above the hinge, then insert a #8 x 13 mm
pan head screw on the handle side of the unit. For nar-
rower units, the door may need to be opened to access
the handle side screw location. Repeat the process to
align the bottom.
ANCHORING
Once the top and bottom are aligned, verify doors and
drawers open properly, then install remaining screws in each
side trim.
PANEL THICKNESS
GAUGE
FRONT OF
UNIT
CABINETRY
FACE
FRAME
SCREW
SIDE TRIM
Panel thickness.
Unit depth.
 Loading...