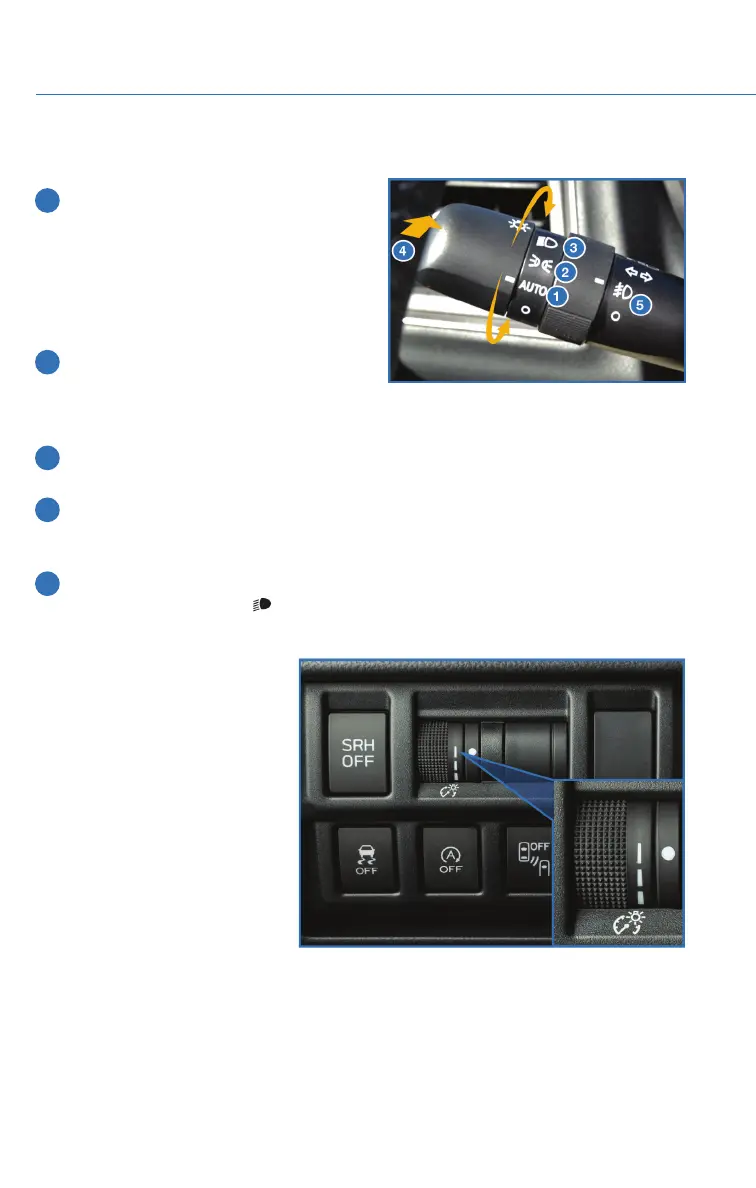
LIGHT CONTROLS
1 AUTO: If equipped, rotate the end of the
lever to set your headlights to
automatically turn on or off, depending
on the level of light outside.
NOTE: The sensitivity of the automatic
headlights can be adjusted through the
STARLINK
®
multimedia display.
2 Parking Lights: Rotate the end of the
lever to turn on the instrument panel
lights, parking lights, side marker lights,
tail lights, and license plate lights.
3 Headlights: Rotate the end of the lever to turn on the headlights, instrument panel
lights, parking lights, side marker lights, tail lights, and license plate lights.
4 High Beams: Push the lever forward to change from low beam to high beam. When
set to the “AUTO” position, pushing the lever forward also activates the High Beam
Assist (HBA) system, if equipped. Pull the lever back to center to return to low beam.
5 Fog Lights: If equipped, rotate the dial to turn on the fog lights when the headlights
are on low beams in the
” or “AUTO” position.
Illumination Brightness
While the light controls are on,
and ambient light is low, rotating
the illumination brightness dial on
the instrument panel upward will
make the instrument panel
illumination brighter. When the
dial is fully rotated upward (dots
aligned), the instrument panel
illumination stays at full
brightness. Rotating the dial
downward dims the instrument
panel illumination.
For map equipped vehicles, this
setting also adjusts the day/night
view and illumination level,
depending on the light levels outside.
Illumination Brightness Dial
CONTROLS
24