36
• Cleaning & Unblocking Bottom Burr and
Grind Chamber
- Use the Cleaning Brush or a Vacuum
Cleaner to thoroughly clear the parts and
surfaces in the Grind Chamber of fine
coffee grinds. A damp cloth can be used
to wipe the inside of the Grind Collar.
- Allow thorough air drying.
WARNING: Do not pour water or any
other liquid into the Grind Chamber.
• Cleaning & Unblocking Grind Outlet
- Feed the Cleaning Brush up into the
Grind Outlet from below, wiping &
brushing the inside surfaces.
- If the Grind Outlet is clear the bristles
will be visible inside the Grind Chamber.
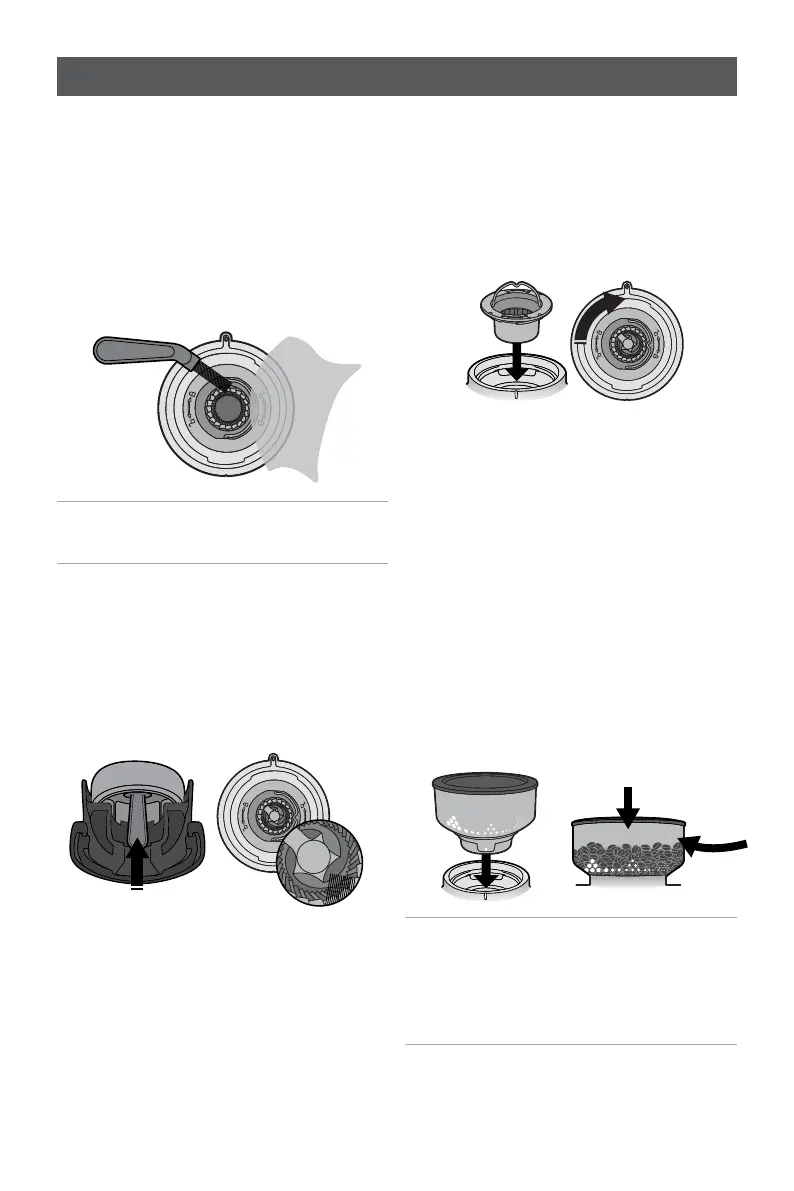
• Replace Top Burr
- Identify the locking fixtures on the
underside of the Top Burr, underneath
the moulded padlock symbols.
- Using the handle insert the Top Burr
into the Grinder Collar, ensuring locking
features align.
- Rotate the Top Bur approximately 30
degrees clockwise to lock, the burr
should click into position.
- When correctly seated, the Top Burr will
be flush with the surface of the Grinder
Collar.
Replace Bean Hopper
- Ensure the Hopper Guide is aligned, and
the tab on the Hopper base locates into
the cut-out on the rear of the housing.
- Align & insert the Bean Hopper into the
Grinder Collar and firmly pushing down
turn clockwise to lock into place and
open the Hopper Guide.
- Reset to the Grinder Setting noted prior
to cleaning.
- Refill the Bean Hopper with coffee beans.
Note: We strongly advise not to use
Torrefacto style coffee beans in your
Origins Espresso Machine. Due to the
high sugar content, the burr grinder
assembly will quickly clog.
Care and cleaning – Grinder
1. ALIGN HOPPER GUIDE
3. TURN
2. INSERT