SunFounder 3in1 Kit
#include <SoftwareSerial.h>
SoftwareSerial espSerial(2, 3); //Rx,Tx
void setup() {
// put your setup code here, to run once:
Serial.begin(115200);
espSerial.begin(115200);
}
void loop() {
if (espSerial.available()) {
Serial.write(espSerial.read());
}
if (Serial.available()) {
espSerial.write(Serial.read());
}
}
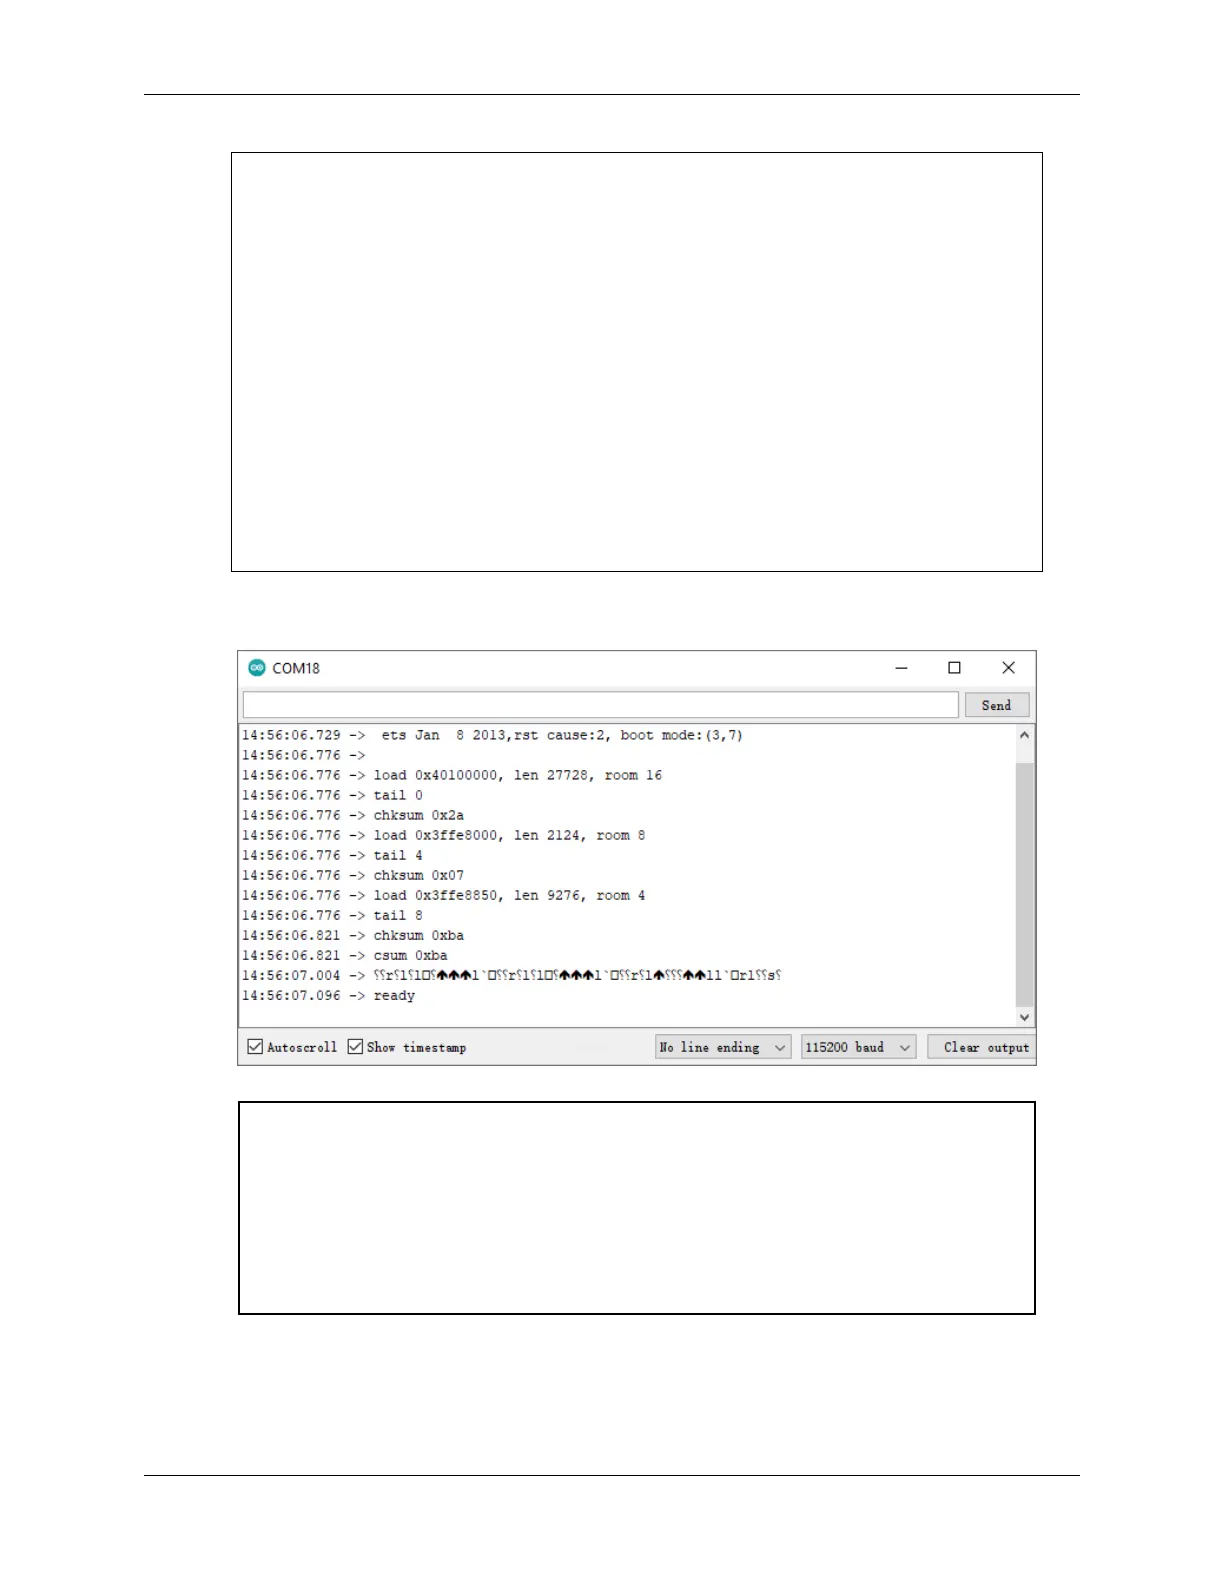
3. Click the magnifying glass icon (Serial Monitor) in the upper right corner and set the baud rate to 115200. (You
may have some printed information like me, or you may not, it doesn’t matter, just go to the next step.)
Warning:
• If ready doesn’t appear, you can try to reset the ESP8266 module(connect RST to GND)
and re-open the Serial Monitor.
• In addition, if the result is OK, you may need to re-burn the firmware, please refer to How
to re-burn the firmware for ESP8266 module? for details. If you still can’t solve it, please
take a screenshot of the serial monitor and send it to sevice@sunfounder.com, we will help
you solve the problem as soon as possible.
4. Click on NEWLINE DROPDOWN BOX, select both NL & CR in the drop down option, enter AT, if it returns
OK, it means ESP8266 has successfully established connection with your board.
6.1. 1. Get Started with Blynk 269