SunFounder 3in1 Kit
1. Open the 3.push_data_to_blynk.ino file under the path of 3in1-kit\iot_project\3.
push_data_to_blynk, or copy this code into Arduino IDE.
2. Replace the Template ID, Device Name, and Auth Token with your own. You also need to enter the ssid
and password of the WiFi you are using. For detailed tutorials, please refer to 1.4 Connecting the R4 board to
Blynk.
3. After selecting the correct board and port, click the Upoad button.
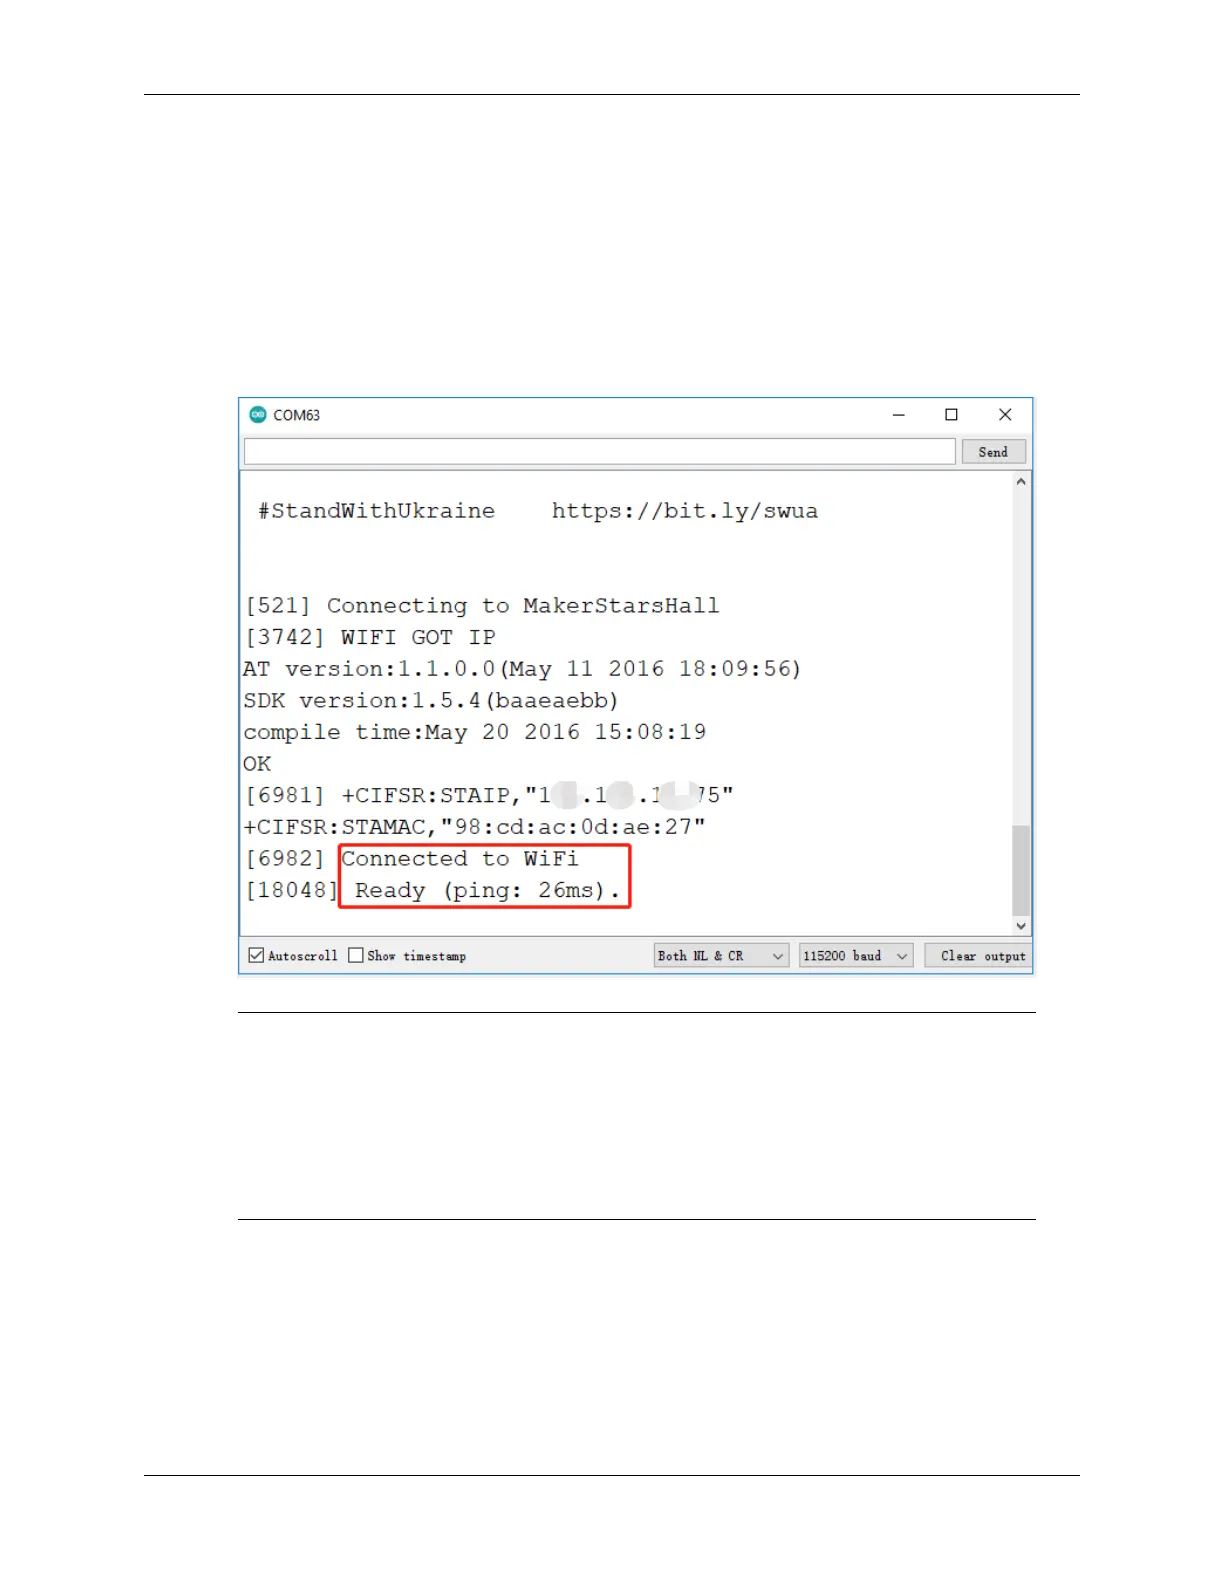
4. Open the Serial monitor(set baudrate to 115200) and wait for a prompt such as a successful connection to appear.
Note: If the message ESP is not responding appears when you connect, please follow these
steps.
• Make sure the 9V battery is plugged in.
• Reset the ESP8266 module by connecting the pin RST to GND for 1 second, then unplug it.
• Press the reset button on the R4 board.
Sometimes, you may need to repeat the above operation 3-5 times, please be patient.
5. Now, Blynk will show the status of your doors and windows. If your doors and windows are closed, the LED
widget will be green, otherwise, it will be gray.
6. If you want to use Blynk on mobile devices, please refer to How to use Blynk on mobile device?.
How it works?
For this example, you should focus on the following lines. “Write data every second to Blynk Cloud’s V1 Datastream”
is defined by these lines.
294 Chapter 6. IoT Projects