SunFounder 3in1 Kit
and only once. loop() is used to write the main feature, and the code inside it will run in a loop after setup() is
executed.
To better understand setup() and loop(), let’s use four sketches. Their purpose is to make the on-board LED of the
Arduino blink. Please run each experiment in turn and record them specific effects.
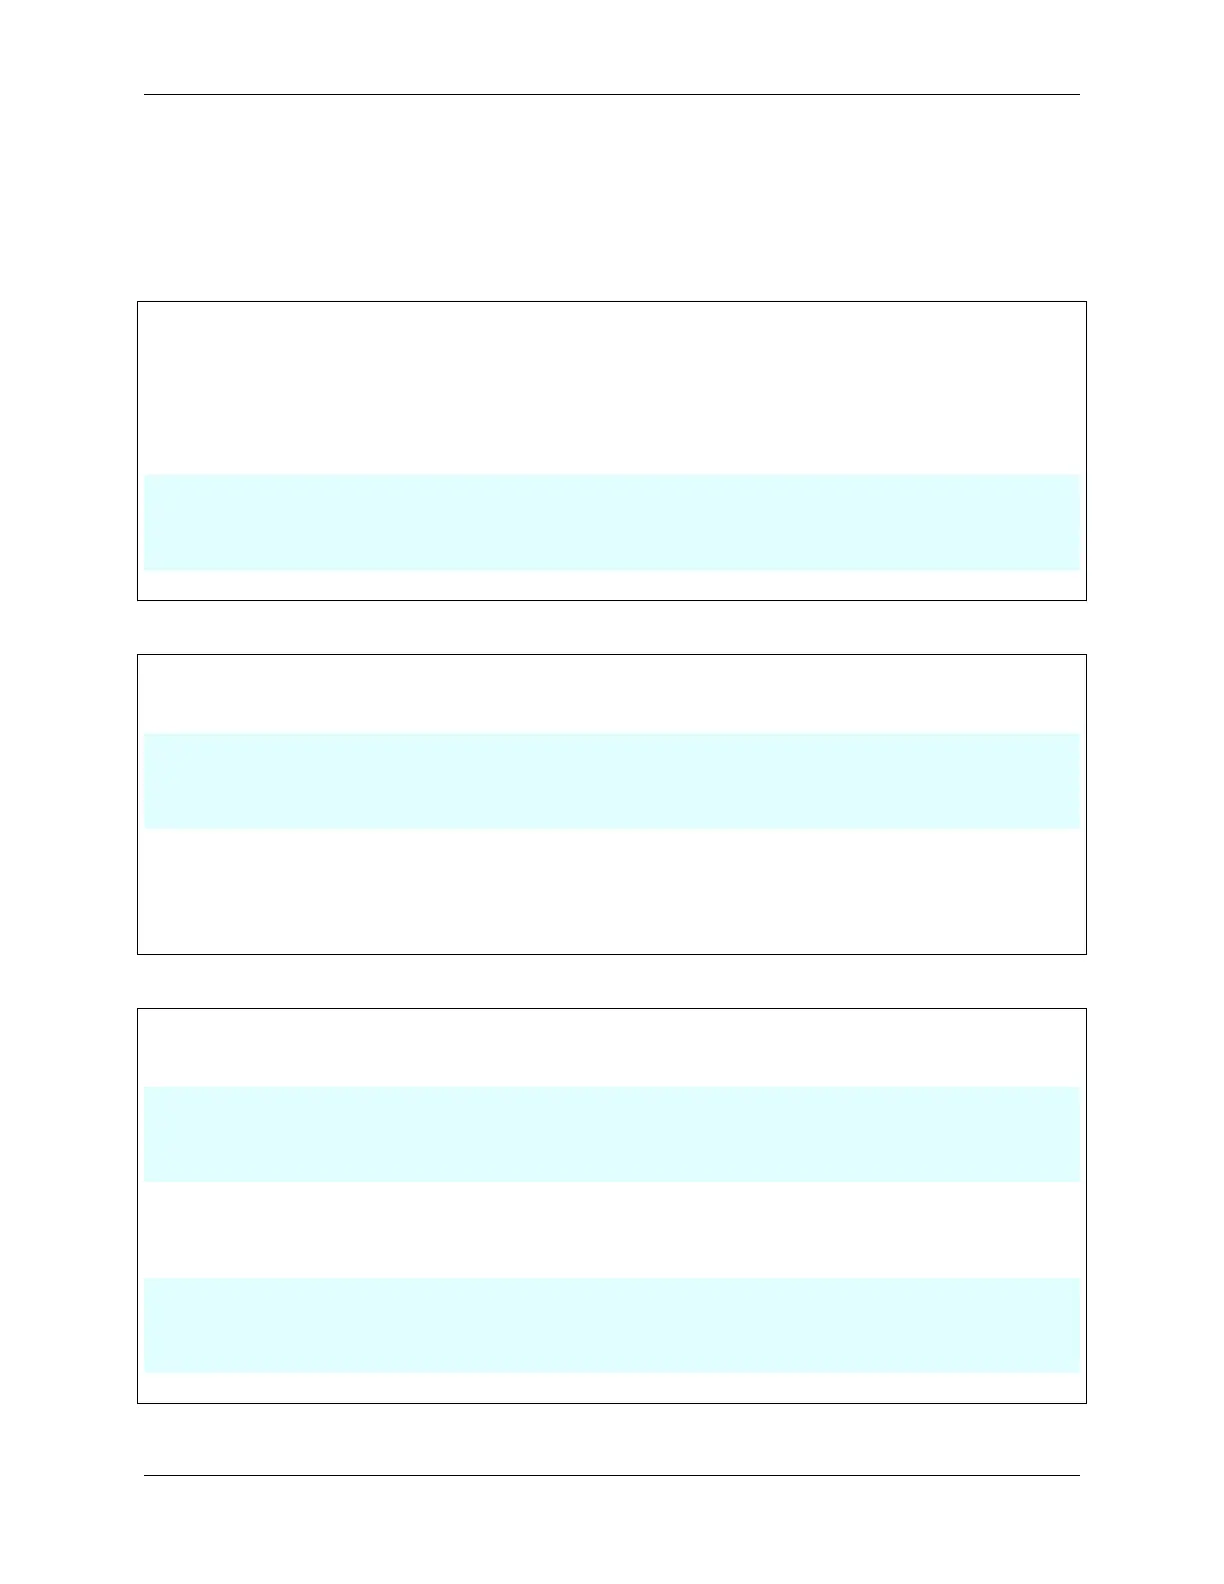
• Sketch 1: Make the on-board LED blink continuously.
void setup() {
// put your setup code here, to run once:
pinMode(13,OUTPUT);
}
void loop() {
// put your main code here, to run repeatedly:
digitalWrite(13,HIGH);
delay(500);
digitalWrite(13,LOW);
delay(500);
}
• Sketch 2: Make the on-board LED blink only once.
void setup() {
// put your setup code here, to run once:
pinMode(13,OUTPUT);
digitalWrite(13,HIGH);
delay(500);
digitalWrite(13,LOW);
delay(500);
}
void loop() {
// put your main code here, to run repeatedly:
}
• Sketch 3: Make the on-board LED blink slowly once and then blink quickly.
void setup() {
// put your setup code here, to run once:
pinMode(13,OUTPUT);
digitalWrite(13,HIGH);
delay(1000);
digitalWrite(13,LOW);
delay(1000);
}
void loop() {
// put your main code here, to run repeatedly:
digitalWrite(13,HIGH);
delay(200);
digitalWrite(13,LOW);
delay(200);
}
• Sketch 4: Report an error.
68 Chapter 2. Get Started with Arduino