바늘 설치 그림7. ( 9)
ATTACHING THE NEEDLE (Fig.9)
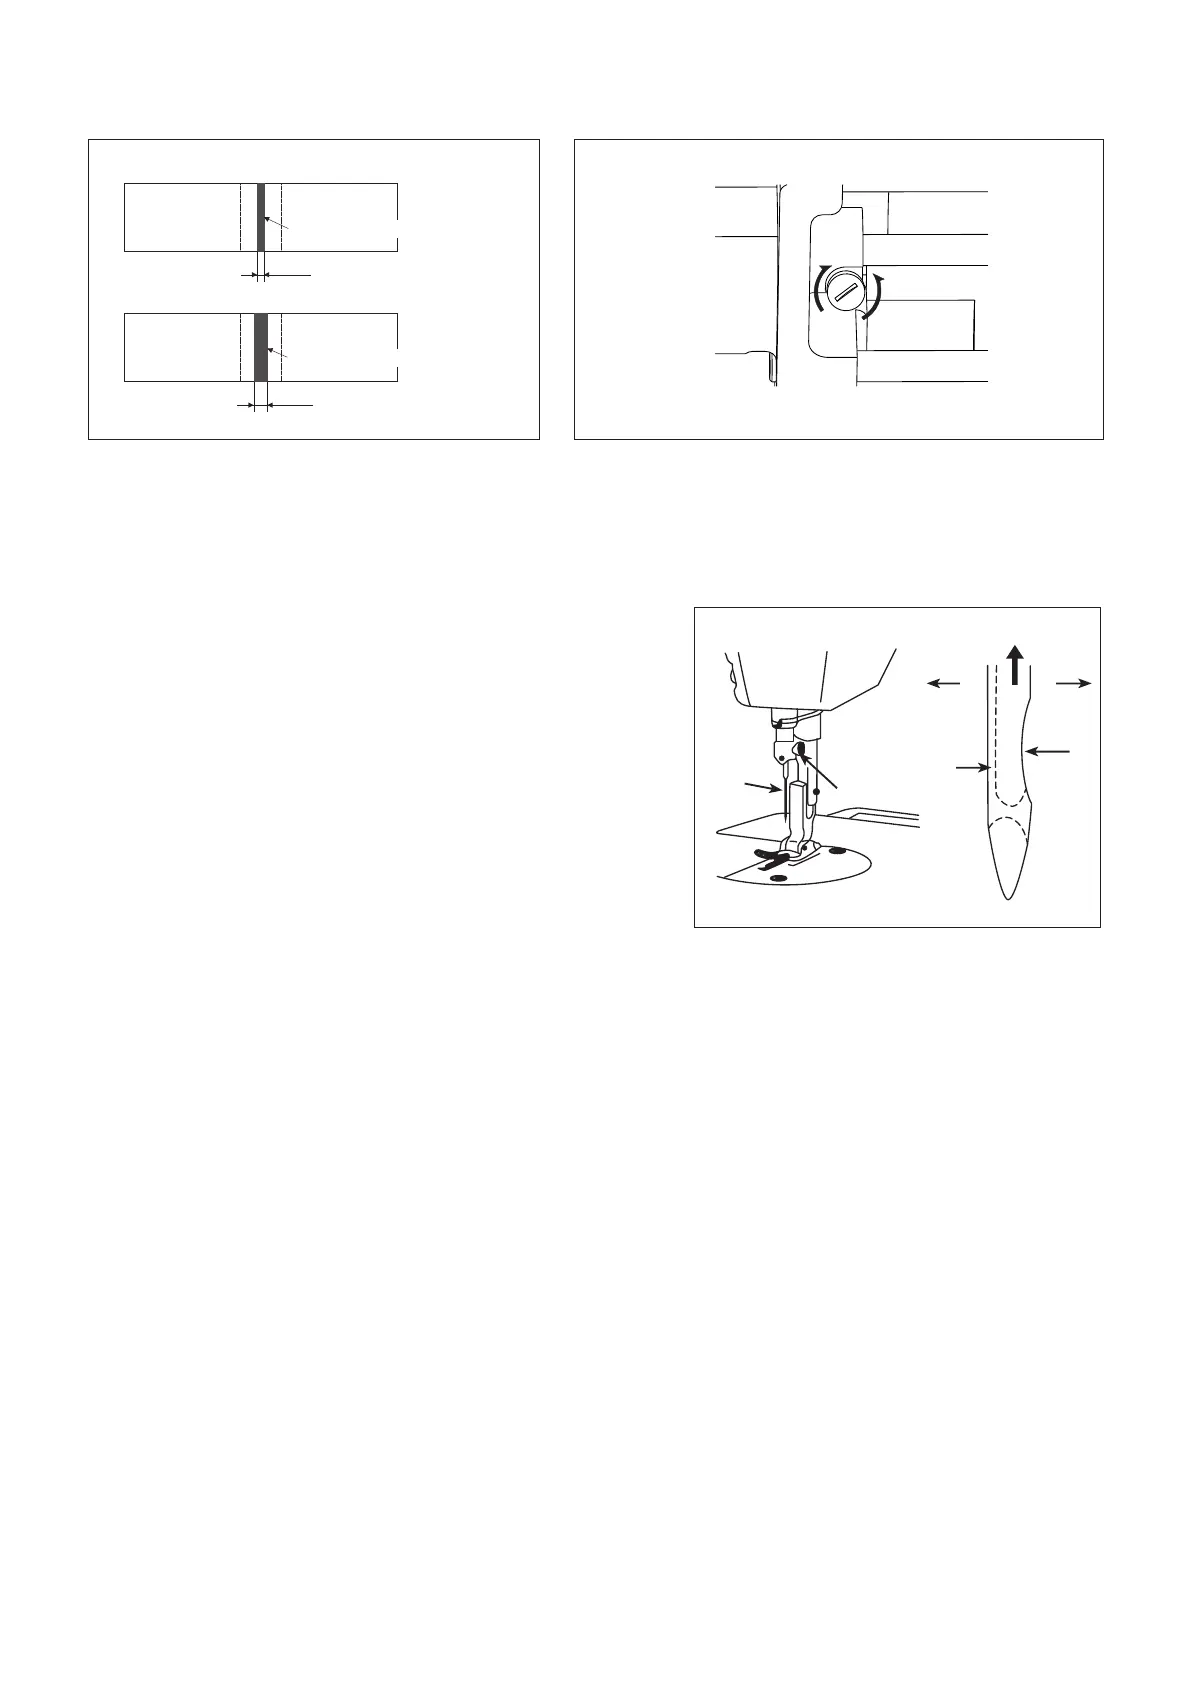
바늘을 설치하기 전에 전원을 끄십시오*.
실의 종류와 재봉물의 종류에 따라 적절한 바늘 크기를
선택하십시오.
바늘대가 상정지에 오도록 핸드 휠을 돌려주십시오1) .
나사 를풀고바늘 을오목한부분 가정확히2) A②①
오른쪽 방향을 향하도록 해주십시오B.
바늘을 화살표 방향으로 더 이상 안 들어 갈 때 까지3)
밀어 넣어 주십시오.
나사 를 단단히 조입니다4) .②
바늘의 긴 홈 가 왼쪽 방향을 향했는지5) C D
확인하십시오.
*Turn the motor power OFF before starting to attach
the needle.
Select a proper needle size according to the count of
thread and the type of material used.
1) Turn the hand wheel until the needle bar reaches
the highest point of its stroke.
2) Loosen screw , and hold needle with its②①
indented part A facing exactly to the right in
direction B.
3) Insert the needle in the direction of the arrow until
will go no further.
4) Securely tighten screw .②
5) Check that long groove C of the needle is facing
exactly to the left in direction D.
-16-
Fig.7
Fig.8
1mm
Min
Max
The amount of oil
The amount of oil
2mm
A
B
Fig.9
A
B
C
D
①
②
 Loading...


